HP LaserJet Pro MFP M148-M149 User Guide - Page 140
Method two: Update the firmware using the Firmware Update Utility, Setup, Service, LaserJet Update
 |
View all HP LaserJet Pro MFP M148-M149 manuals
Add to My Manuals
Save this manual to your list of manuals |
Page 140 highlights
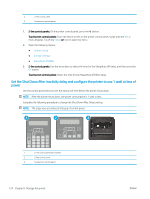
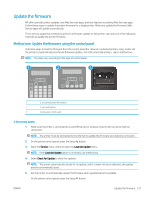
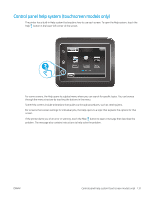
Open the Service menu, open the LaserJet Update menu, and then select the Manage Updates menu. Set the Allow Updates option to YES, and then set the Automatic Check option to ON. Touchscreen control panels: 1. Make sure the printer is connected to a wired (Ethernet) or wireless network with an active Internet connection. NOTE: The printer must be connected to the internet to update the firmware via a network connection. 2. From the Home screen on the printer control panel, touch the Setup button. 3. Scroll to and open the Service menu, and then open the LaserJet Update menu. NOTE: If the LaserJet Update option is not listed, use method two. 4. Touch Check for Updates Now to check for updates. NOTE: The printer automatically checks for an update, and if a newer version is detected, the update process automatically starts. 5. Set the printer to automatically update the firmware when updates become available. From the Home screen on the printer control panel, touch the Setup button. Open the Service menu, open the LaserJet Update menu, and then select the Manage Updates menu. Set the Allow Updates option to YES, and then set the Check automatically option to ON. Method two: Update the firmware using the Firmware Update Utility Use these steps to manually download and install the Firmware Update Utility from HP.com. NOTE: This method is the only firmware update option available for printers connected to the computer via a USB cable. It also works for printers connected to a network. NOTE: You must have a print driver installed in order to use this method. 1. Go to www.hp.com/support, select your country/region language, click Get software and drivers link, type the printer name in the search field, press the Enter button, and then select the printer from the list of search results. 2. Select the operating system. 3. Under the Firmware section, locate the Firmware Update Utility. 4. Click Download, click Run, and then click Run again. 5. When the utility launches, select the printer from the drop-down list, and then click Send Firmware. NOTE: To print a configuration page to verify the installed firmware version before or after the update process, click Print Config. 6. Follow the on-screen instructions to complete the installation, and then click the Exit button to close the utility. 128 Chapter 8 Manage the printer ENWW
-
 1
1 -
2
-
3
-
4
-
5
-
6
-
7
-
8
-
9
-
10
-
11
-
12
-
13
-
14
-
15
-
16
-
17
-
18
-
19
-
20
-
21
-
22
-
23
-
24
-
25
-
26
-
27
-
28
-
29
-
30
-
31
-
32
-
33
-
34
-
35
-
36
-
37
-
38
-
39
-
40
-
41
-
42
-
43
-
44
-
45
-
46
-
47
-
48
-
49
-
50
-
51
-
52
-
53
-
54
-
55
-
56
-
57
-
58
-
59
-
60
-
61
-
62
-
63
-
64
-
65
-
66
-
67
-
68
-
69
-
70
-
71
-
72
-
73
-
74
-
75
-
76
-
77
-
78
-
79
-
80
-
81
-
82
-
83
-
84
-
85
-
86
-
87
-
88
-
89
-
90
-
91
-
92
-
93
-
94
-
95
-
96
-
97
-
98
-
99
-
100
-
101
-
102
-
103
-
104
-
105
-
106
-
107
-
108
-
109
-
110
-
111
-
112
-
113
-
114
-
115
-
116
-
117
-
118
-
119
-
120
-
121
-
122
-
123
-
124
-
125
-
126
-
127
-
128
-
129
-
130
-
131
-
132
-
133
-
134
-
 135
135 -
 136
136 -
 137
137 -
 138
138 -
 139
139 -
 140
140 -
 141
141 -
 142
142 -
 143
143 -
 144
144 -
 145
145 -
146
-
147
-
148
-
149
-
150
-
151
-
152
-
153
-
154
-
155
-
156
-
157
-
158
-
159
-
160
-
161
-
162
-
163
-
164
-
165
-
166
-
167
-
168
-
169
-
170
-
171
-
172
-
173
-
174
-
175
-
176
-
177
-
178
-
179
-
180
-
181
-
182
-
183
-
184
-
185
-
186
-
187
-
188
-
189
-
190
-
191
-
192
-
193
-
194
-
195
-
196
-
197
-
198
-
199
-
200
-
201
-
202
-
203
-
204
-
205
-
206
-
207
-
208
 |
 |
