HP M27fwa User Guide - Page 13
Routing the cables
 |
View all HP M27fwa manuals
Add to My Manuals
Save this manual to your list of manuals |
Page 13 highlights
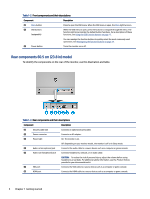
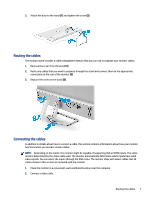
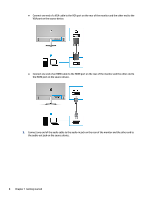
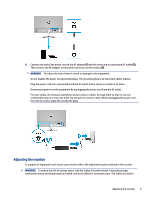
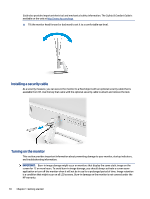
3. Attach the base to the stand (1) and tighten the screw (2). Routing the cables The monitor stand includes a cable management feature that you can use to organize your monitor cables. 1. Remove the cover from the stand (1). 2. Route any cables that you want to organize through the stand and connect them to the appropriate connectors on the rear of the monitor (2). 3. Replace the cover on the stand (3). Connecting the cables In addition to details about how to connect a cable, this section contains information about how your monitor functions when you connect certain cables. NOTE: Depending on the model, the monitor might be capable of supporting VGA or HDMI inputs. The video mode is determined by the video cable used. The monitor automatically determines which inputs have valid video signals. You can select the inputs through the OSD menu. The monitor ships with select cables. Not all cables shown in this section are included with the monitor. 1. Place the monitor in a convenient, well-ventilated location near the computer. 2. Connect a video cable. Routing the cables 7
-
 1
1 -
2
-
3
-
4
-
5
-
6
-
7
-
 8
8 -
 9
9 -
 10
10 -
 11
11 -
 12
12 -
 13
13 -
 14
14 -
 15
15 -
 16
16 -
 17
17 -
 18
18 -
19
-
20
-
21
-
22
-
23
-
24
-
25
-
26
-
27
-
28
-
29
-
30
-
31
-
32
-
33
-
34
-
35
-
36
 |
 |
