HP M517 HP Photosmart M417/M517 Digital Camera with HP Instant Share - User's - Page 89
Date & Time
 |
UPC - 829160821870
View all HP M517 manuals
Add to My Manuals
Save this manual to your list of manuals |
Page 89 highlights
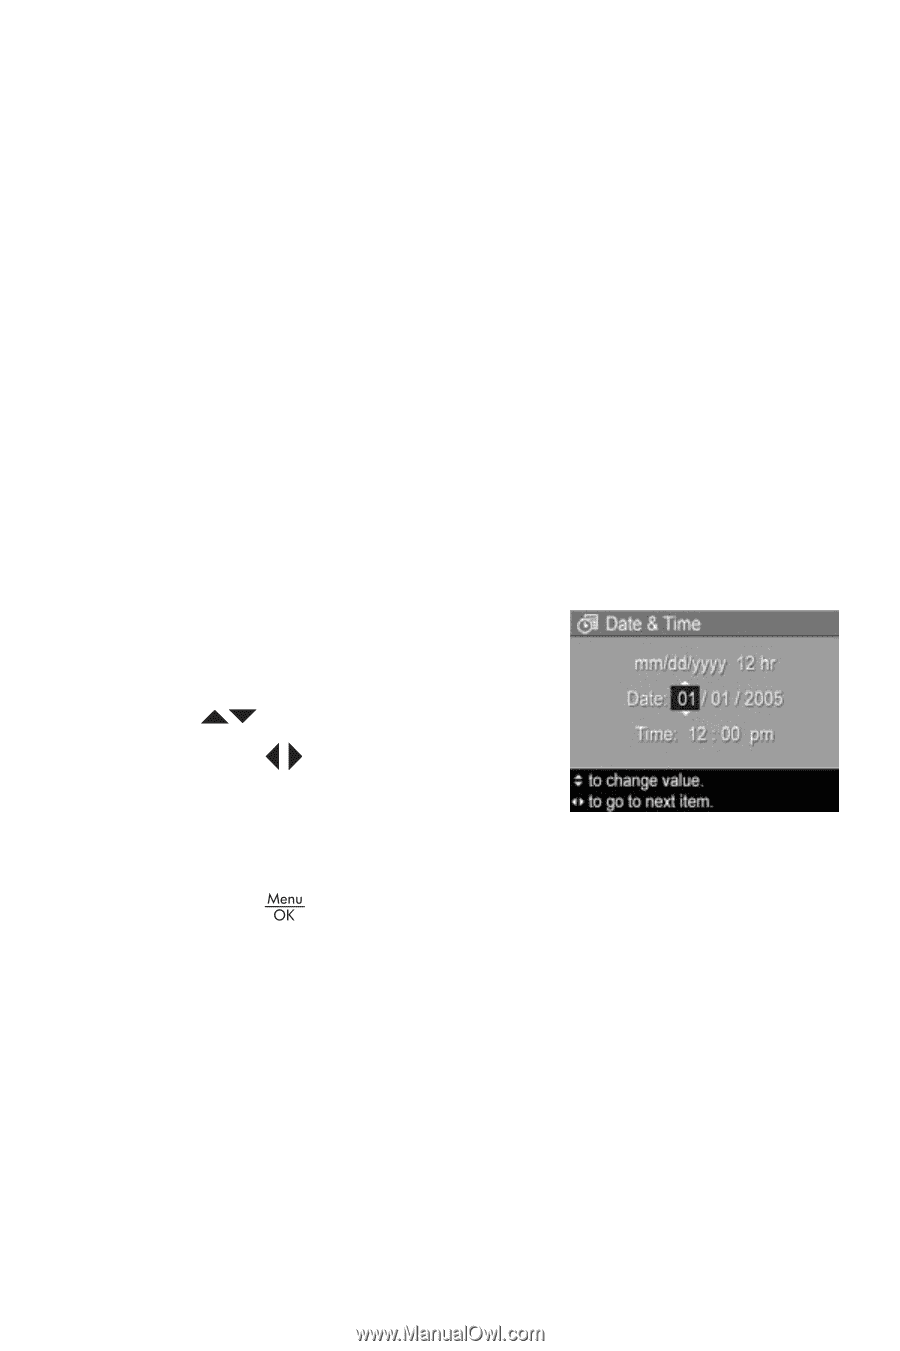
Date & Time This setting allows you to set the date/time format, as well as the current date and time for the camera. This is usually done when you first set up the camera; however, you may need to reset the date and time when you are traveling to different time zones, after the camera has been without power for an extended time, or if the date or time is incorrect. The date/time format chosen will be used to display the date information in Playback. Also, the format chosen in this setting is what is used in the Date & Time Imprint feature (see Date & Time Imprint on page 53). 1. In the Setup Menu (page 85), select Date & Time. 2. In the Date & Time sub-menu, adjust the value of the highlighted selection by using the buttons. 3. Press the buttons to move to the other selections. 4. Repeat steps 2 and 3 until the correct date/time format, date, and time are set. 5. Press the button to save the setting and return to the Setup Menu. The date/time format setting remains in effect until it is changed again, even when you turn the camera off. The date and time settings also remain current as long as the camera batteries that are installed have a charge, or batteries are removed for less than 10 minutes, or the camera is connected to an optional HP AC power adapter. Using the Setup Menu 89
-
 1
1 -
2
-
3
-
4
-
5
-
6
-
7
-
8
-
9
-
10
-
11
-
12
-
13
-
14
-
15
-
16
-
17
-
18
-
19
-
20
-
21
-
22
-
23
-
24
-
25
-
26
-
27
-
28
-
29
-
30
-
31
-
32
-
33
-
34
-
35
-
36
-
37
-
38
-
39
-
40
-
41
-
42
-
43
-
44
-
45
-
46
-
47
-
48
-
49
-
50
-
51
-
52
-
53
-
54
-
55
-
56
-
57
-
58
-
59
-
60
-
61
-
62
-
63
-
64
-
65
-
66
-
67
-
68
-
69
-
70
-
71
-
72
-
73
-
74
-
75
-
76
-
77
-
78
-
79
-
80
-
81
-
82
-
83
-
 84
84 -
 85
85 -
 86
86 -
 87
87 -
 88
88 -
 89
89 -
 90
90 -
 91
91 -
 92
92 -
 93
93 -
 94
94 -
95
-
96
-
97
-
98
-
99
-
100
-
101
-
102
-
103
-
104
-
105
-
106
-
107
-
108
-
109
-
110
-
111
-
112
-
113
-
114
-
115
-
116
-
117
-
118
-
119
-
120
-
121
-
122
-
123
-
124
-
125
-
126
-
127
-
128
-
129
-
130
-
131
-
132
-
133
-
134
-
135
-
136
-
137
-
138
-
139
-
140
-
141
-
142
-
143
-
144
-
145
-
146
-
147
-
148
-
149
-
150
-
151
-
152
-
153
-
154
-
155
-
156
-
157
-
158
-
159
-
160
-
161
-
162
-
163
-
164
-
165
-
166
-
167
-
168
-
169
-
170
-
171
-
172
-
173
-
174
-
175
-
176
-
177
 |
 |