HP Officejet Pro X476 HP Officejet X Series - Software Technical Reference - Page 34
Color tab, s per sheet, Orientation - ink
 |
View all HP Officejet Pro X476 manuals
Add to My Manuals
Save this manual to your list of manuals |
Page 34 highlights
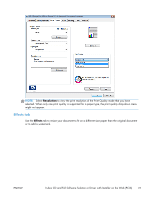
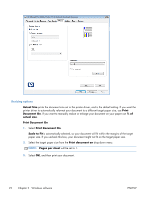
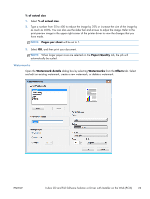
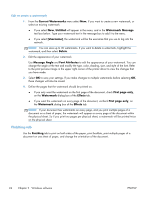
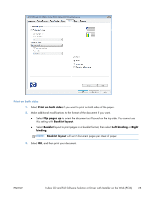
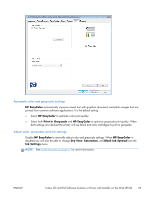
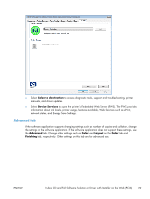
Pages per sheet 1. Select Pages per sheet if you want to print multiple pages of your document on a sheet of paper. You will see the document changes reflected by the print preview image on the upper right corner of the printer driver. 2. Select one of the Pages per sheet options from the drop-down menu. NOTE: You can print a maximum of 16 document pages on a sheet of paper. You can only select Booklet layout if you select 2 pages per sheet. 3. Make additional modifications to the format of the document if you want. Select Print page borders if you want a line printed around the edge of each document page on a sheet of paper. Select a Page order from the drop-down menu to define where each document page will appear on a sheet of paper. Orientation Most software applications will automatically set the page orientation of a document. If your application does not set the orientation, or you want to change the orientation, use this setting. 1. Select Portrait or Landscape. Portrait orients the document vertically on the page; Landscape orients the document horizontally on the page. Changing orientation in the driver does not affect how the paper feeds into the printer. You will see the document changes reflected by the print preview image in the upper right corner of the printer driver. 2. If you want to rotate the page orientation of a document by 180 degrees, check Rotate by 180 degrees. You might want to rotate an image if you are printing on pre-punched paper. You will not see changes to this setting reflected by the print preview image in the upper right corner of the printer driver. Color tab Use the Color tab if you want to print in grayscale, or adjust color and grayscale settings, or adjust ink drying time, saturation, and spread. 26 Chapter 2 Windows software ENWW
-
 1
1 -
2
-
3
-
4
-
5
-
6
-
7
-
8
-
9
-
10
-
11
-
12
-
13
-
14
-
15
-
16
-
17
-
18
-
19
-
20
-
21
-
22
-
23
-
24
-
25
-
26
-
27
-
28
-
 29
29 -
 30
30 -
 31
31 -
 32
32 -
 33
33 -
 34
34 -
 35
35 -
 36
36 -
 37
37 -
 38
38 -
 39
39 -
40
-
41
-
42
-
43
-
44
-
45
-
46
-
47
-
48
-
49
-
50
-
51
-
52
-
53
-
54
-
55
-
56
-
57
-
58
-
59
-
60
-
61
-
62
-
63
-
64
-
65
-
66
-
67
-
68
-
69
-
70
 |
 |