HP OmniBook 2000 HP OmniBook Hardware Diagnostics - Page 9
Creating the OmniBook Hardware Diagnostics Floppy, Diskette Locally
 |
View all HP OmniBook 2000 manuals
Add to My Manuals
Save this manual to your list of manuals |
Page 9 highlights
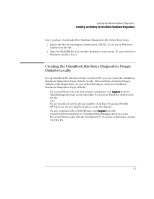
Starting OmniBook Hardware Diagnostics Installing and Setting Up OmniBook Hardware Diagnostics Once you have downloaded the Hardware Diagnostics file, follow these steps: 1. Extract the files by running the downloaded .EXE file. To do this in Windows, double-click the file. 2. Open the README file and read the installation instructions. To open this file in Windows, double-click it. Creating the OmniBook Hardware Diagnostics Floppy Diskette Locally For an OmniBook PC introduced after October 1997, you can create the OmniBook Hardware Diagnostics floppy diskette locally. After inserting a formatted floppy diskette in the floppy drive, do one of the following to create an OmniBook Hardware Diagnostics floppy diskette: • On an OmniBook with a factory software installation, run diaginst from the \Dmi\Hpdiags directory on the hard disk. To do this in Windows, double-click the file. -or- For an OmniBook with TopTools installed, click Start, Programs, HP DMI, HP TopTools. Use the DiagTools tab to create the diskette. • On any computer with a CD-ROM drive, run diaginst from the \Omnibook\Drivers\Hputils or \OmniBook\Dmi\Hpdiags directory on the Recovery CD that came with the OmniBook PC. To do this in Windows, doubleclick the file. 1-3
-
 1
1 -
2
-
3
-
 4
4 -
 5
5 -
 6
6 -
 7
7 -
 8
8 -
 9
9 -
 10
10 -
 11
11 -
 12
12 -
 13
13 -
 14
14 -
15
-
16
-
17
-
18
-
19
-
20
-
21
-
22
-
23
-
24
-
25
-
26
-
27
-
28
-
29
-
30
-
31
-
32
-
33
-
34
-
35
-
36
-
37
-
38
-
39
-
40
-
41
-
42
 |
 |