HP Pavilion 17-f200 Pavilion 17 Notebook PC Pavilion 15 Notebook PC Maintenanc - Page 68
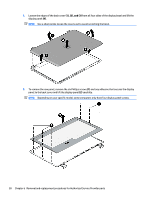
To remove the raw panel, remove the six Phillips screws, and any adhesive that secures the display
 |
View all HP Pavilion 17-f200 manuals
Add to My Manuals
Save this manual to your list of manuals |
Page 68 highlights
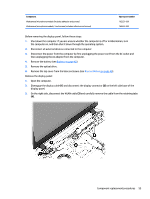
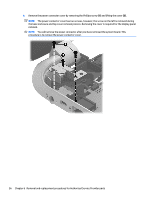
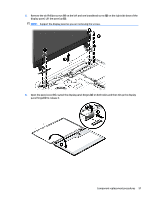
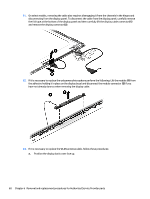
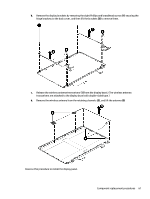
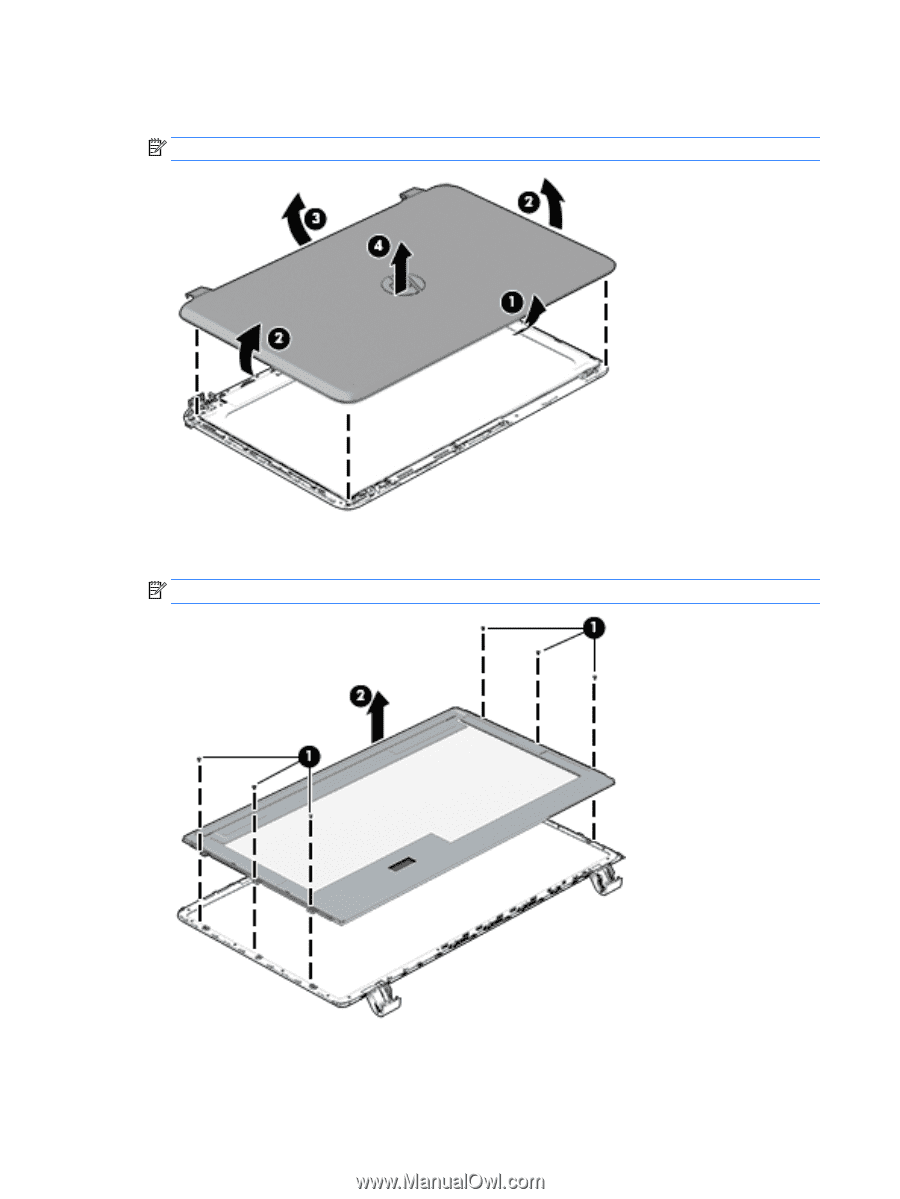
7. Loosen the edges of the back cover (1), (2), and (3) from all four sides of the display bezel and lift the display panel (4). NOTE: Use a sharp probe to pop the covers out to avoid scratching the bezel. 8. To remove the raw panel, remove the six Phillips screws (1) and any adhesive that secures the display panel to the back cover and lift the display panel (2) carefully. NOTE: Depending on your specific model, some computers only have four display panel screws. 58 Chapter 6 Removal and replacement procedures for Authorized Service Provider parts
-
 1
1 -
2
-
3
-
4
-
5
-
6
-
7
-
8
-
9
-
10
-
11
-
12
-
13
-
14
-
15
-
16
-
17
-
18
-
19
-
20
-
21
-
22
-
23
-
24
-
25
-
26
-
27
-
28
-
29
-
30
-
31
-
32
-
33
-
34
-
35
-
36
-
37
-
38
-
39
-
40
-
41
-
42
-
43
-
44
-
45
-
46
-
47
-
48
-
49
-
50
-
51
-
52
-
53
-
54
-
55
-
56
-
57
-
58
-
59
-
60
-
61
-
62
-
 63
63 -
 64
64 -
 65
65 -
 66
66 -
 67
67 -
 68
68 -
 69
69 -
 70
70 -
 71
71 -
 72
72 -
 73
73 -
74
-
75
-
76
-
77
-
78
-
79
-
80
-
81
-
82
-
83
-
84
-
85
-
86
-
87
-
88
-
89
-
90
-
91
-
92
-
93
-
94
-
95
-
96
-
97
-
98
-
99
-
100
-
101
-
102
-
103
-
104
-
105
-
106
-
107
-
108
-
109
-
110
-
111
-
112
-
113
-
114
-
115
-
116
-
117
-
118
-
119
-
120
-
121
-
122
-
123
-
124
-
125
-
126
-
127
-
128
 |
 |
7.
Loosen the edges of the back cover
(1), (2), and (3)
from all four sides of the display bezel and lift the
display panel
(4)
.
NOTE:
Use a sharp probe to pop the covers out to avoid scratching the bezel.
8.
To remove the raw panel, remove the six Phillips screws
(1)
and any adhesive that secures the display
panel to the back cover and lift the display panel
(2)
carefully.
NOTE:
Depending on your specific model, some computers only have four display panel screws.
58
Chapter 6
Removal and replacement procedures for Authorized Service Provider parts