HP Pavilion ze5200 Start-Up Guide - Enhanced for Accessibility - Page 19
Step 2: Connect AC power, Worldwide Limited, Warranty and Technical Support
 |
View all HP Pavilion ze5200 manuals
Add to My Manuals
Save this manual to your list of manuals |
Page 19 highlights
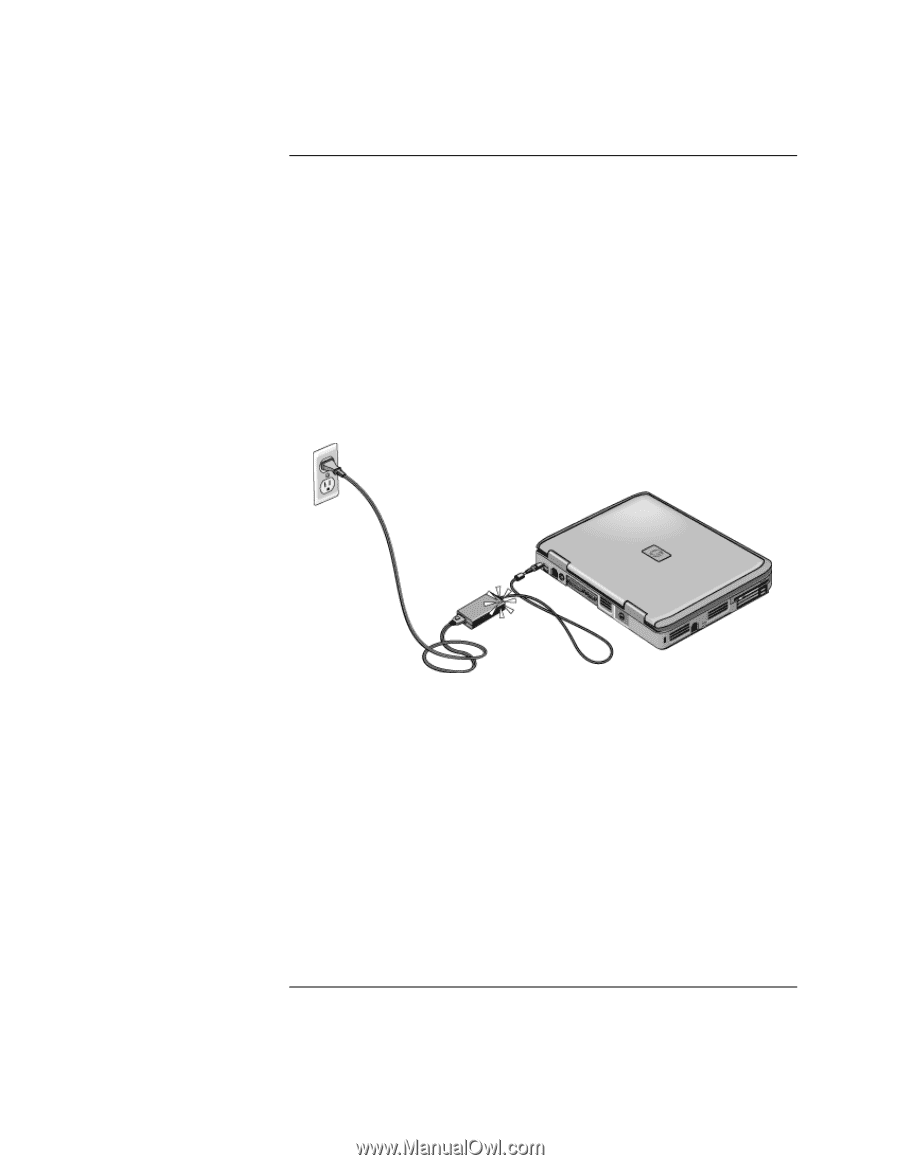
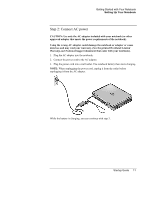
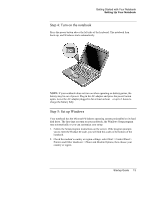
Getting Started with Your Notebook Setting Up Your Notebook Step 2: Connect AC power CAUTION: Use only the AC adapter included with your notebook (or other approved adapter that meets the power requirements of the notebook). Using the wrong AC adapter could damage the notebook or adapter or cause data loss and may void your warranty. (See the printed Worldwide Limited Warranty and Technical Support document that came with your notebook). 1. Plug the AC adapter into the notebook. 2. Connect the power cord to the AC adapter. 3. Plug the power cord into a wall outlet. The notebook battery then starts charging. NOTE: When unplugging the power cord, unplug it from the outlet before unplugging it from the AC adapter. While the battery is charging, you can continue with step 3. Startup Guide 11
-
 1
1 -
2
-
3
-
4
-
5
-
6
-
7
-
8
-
9
-
10
-
11
-
12
-
13
-
 14
14 -
 15
15 -
 16
16 -
 17
17 -
 18
18 -
 19
19 -
 20
20 -
 21
21 -
 22
22 -
 23
23 -
 24
24 -
25
-
26
-
27
-
28
-
29
-
30
-
31
-
32
-
33
-
34
-
35
-
36
-
37
-
38
-
39
-
40
-
41
 |
 |