HP Presario C700 HP G7000 Notebook PC and Compaq Presario C700 Notebook PC - M - Page 60
Reverse this procedure to install the keyboard., Removal and replacement procedures
 |
View all HP Presario C700 manuals
Add to My Manuals
Save this manual to your list of manuals |
Page 60 highlights
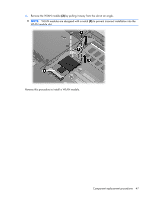
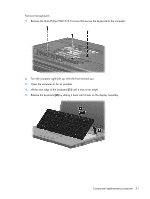
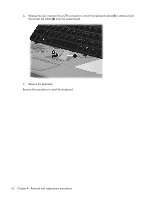
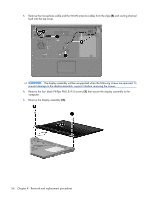
6. Release the zero insertion force (ZIF) connector to which the keyboard cable (1) is attached and disconnect the cable (2) from the system board. 7. Remove the keyboard. Reverse this procedure to install the keyboard. 52 Chapter 4 Removal and replacement procedures
-
 1
1 -
2
-
3
-
4
-
5
-
6
-
7
-
8
-
9
-
10
-
11
-
12
-
13
-
14
-
15
-
16
-
17
-
18
-
19
-
20
-
21
-
22
-
23
-
24
-
25
-
26
-
27
-
28
-
29
-
30
-
31
-
32
-
33
-
34
-
35
-
36
-
37
-
38
-
39
-
40
-
41
-
42
-
43
-
44
-
45
-
46
-
47
-
48
-
49
-
50
-
51
-
52
-
53
-
54
-
 55
55 -
 56
56 -
 57
57 -
 58
58 -
 59
59 -
 60
60 -
 61
61 -
 62
62 -
 63
63 -
 64
64 -
 65
65 -
66
-
67
-
68
-
69
-
70
-
71
-
72
-
73
-
74
-
75
-
76
-
77
-
78
-
79
-
80
-
81
-
82
-
83
-
84
-
85
-
86
-
87
-
88
-
89
-
90
-
91
-
92
-
93
-
94
-
95
-
96
-
97
-
98
-
99
-
100
-
101
-
102
-
103
-
104
-
105
-
106
-
107
-
108
-
109
-
110
-
111
-
112
-
113
-
114
-
115
-
116
-
117
-
118
-
119
-
120
-
121
-
122
-
123
-
124
-
125
-
126
-
127
-
128
-
129
-
130
-
131
-
132
-
133
-
134
-
135
-
136
-
137
-
138
-
139
 |
 |
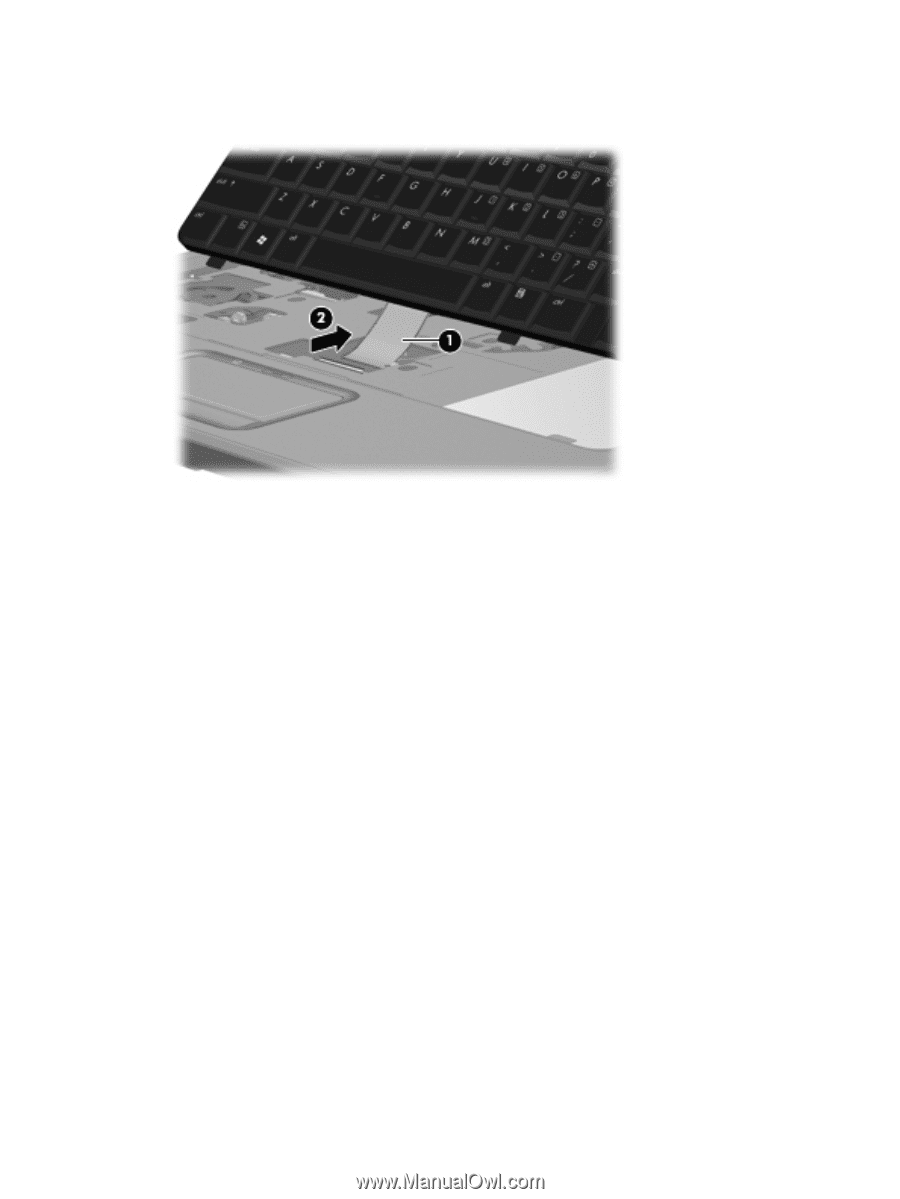
6
.
Release the zero insertion force (ZIF) connector to which the keyboard cable
(1)
is attached and
disconnect the cable
(2)
from the system board.
7
.
Remove the keyboard.
Reverse this procedure to install the keyboard.
52
Chapter
4
Removal and replacement procedures