HP ProLiant ML10 HP ProLiant ML10 Server User Guide - Page 23
Connect the power cord to the power source.
 |
View all HP ProLiant ML10 manuals
Add to My Manuals
Save this manual to your list of manuals |
Page 23 highlights
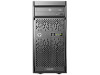
11. Connect the other end of the SATA cable to the system board. 12. Fully insert the drive carrier into the media bay until the screw holes line up with the holes in the chassis, and then secure the drive cage, using the two M3 screws from the option kit. 13. Install the front bezel (on page 14). 14. Install the access panel (on page 14). 15. Return the server to an upright position. 16. Connect the power cord to the server. 17. Connect the power cord to the power source. 18. Press the Power On/Standby button. The server exits standby mode and applies full power to the system. The system power LED changes from amber to green. Hardware options installation 23
-
 1
1 -
2
-
3
-
4
-
5
-
6
-
7
-
8
-
9
-
10
-
11
-
12
-
13
-
14
-
15
-
16
-
17
-
 18
18 -
 19
19 -
 20
20 -
 21
21 -
 22
22 -
 23
23 -
 24
24 -
 25
25 -
 26
26 -
 27
27 -
 28
28 -
29
-
30
-
31
-
32
-
33
-
34
-
35
-
36
-
37
-
38
-
39
-
40
-
41
-
42
-
43
-
44
-
45
-
46
-
47
-
48
-
49
-
50
-
51
-
52
-
53
-
54
-
55
-
56
-
57
-
58
-
59
-
60
-
61
-
62
-
63
-
64
-
65
-
66
-
67
-
68
-
69
-
70
-
71
-
72
-
73
-
74
-
75
-
76
 |
 |

Hardware options installation 23
11.
Connect the other end of the SATA cable to the system board.
12.
Fully insert the drive carrier into the media bay until the screw holes line up with the holes in the chassis,
and then secure the drive cage, using the two M3 screws from the option kit.
13.
Install the front bezel (on page
14
).
14.
Install the access panel (on page
14
).
15.
Return the server to an upright position.
16.
Connect the power cord to the server.
17.
Connect the power cord to the power source.
18.
Press the Power On/Standby button.
The server exits standby mode and applies full power to the system. The system power LED changes
from amber to green.