HP ProLiant ML10 HP ProLiant ML10 Server User Guide - Page 27
Place the drive bracket flush against the wall of the chassis
 |
View all HP ProLiant ML10 manuals
Add to My Manuals
Save this manual to your list of manuals |
Page 27 highlights
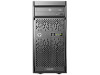
c. Remove the heatsink from the processor backplate. 13. Install the drive bracket: a. Place the drive bracket flush against the wall of the chassis, and then slide it fully to the front of the chassis. b. From outside of the chassis, use two shoulder screws to secure the drive bracket to the chassis front. 14. Connect the system fan cable and the 24 pin power cable to the system board connectors. Hardware options installation 27
-
 1
1 -
2
-
3
-
4
-
5
-
6
-
7
-
8
-
9
-
10
-
11
-
12
-
13
-
14
-
15
-
16
-
17
-
18
-
19
-
20
-
21
-
 22
22 -
 23
23 -
 24
24 -
 25
25 -
 26
26 -
 27
27 -
 28
28 -
 29
29 -
 30
30 -
 31
31 -
 32
32 -
33
-
34
-
35
-
36
-
37
-
38
-
39
-
40
-
41
-
42
-
43
-
44
-
45
-
46
-
47
-
48
-
49
-
50
-
51
-
52
-
53
-
54
-
55
-
56
-
57
-
58
-
59
-
60
-
61
-
62
-
63
-
64
-
65
-
66
-
67
-
68
-
69
-
70
-
71
-
72
-
73
-
74
-
75
-
76
 |
 |

Hardware options installation 27
c.
Remove the heatsink from the processor backplate.
13.
Install the drive bracket:
a.
Place the drive bracket flush against the wall of the chassis, and then slide it fully to the front of the
chassis.
b.
From outside of the chassis, use two shoulder screws to secure the drive bracket to the chassis front.
14.
Connect the system fan cable and the 24 pin power cable to the system board connectors.