HP ProLiant SL4545 HP ProLiant SL4545 G7 Server Node User Guide - Page 72
Appendix: Install the hpahcisr driver for OS installation, Installing a Windows or Linux OS
 |
View all HP ProLiant SL4545 manuals
Add to My Manuals
Save this manual to your list of manuals |
Page 72 highlights
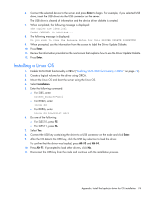
Appendix: Install the hpahcisr driver for OS installation Installing a Windows or Linux OS To take advantage of SATA RAID functionality on the node, you must install the hpahcisr driver. To obtain the driver and install it with the operating system, complete the following steps: 1. Enable SATA RAID functionality in RBSU ("Enabling SATA RAID functionality in RBSU" on page 72). 2. Create a drivers diskette for the OS to be installed on the node: o Creating a drivers diskette for Windows 2008 SP1 OS (on page 72) o Creating a drivers diskette for Linux OS (on page 73) 3. Install the operating system on the node: o Installing a Windows OS (on page 73) o Installing a Linux OS (on page 74) Enabling SATA RAID functionality in RBSU 1. Power up the node. If the node is already powered up, then exit all open applications and restart. 2. During POST, press the F9 key to launch RBSU. 3. In the Advanced Options menu screen, select SATA Controller Options. 4. Select Embedded SATA Configuration. 5. After reading the information in the window that is displayed, press any key to continue. 6. Select Enable SATA RAID support. 7. Press ESC to save and exit RBSU. Creating a drivers diskette for Windows 2008 SP1 OS 1. Mount the Smart Start DVD on any Windows 64-bit server and launch SmartStart. 2. Select the Software tab and then click the Create Driver Diskettes link. 3. In the Create Driver Diskettes window, select the Create Microsoft Windows Server 2008/2008 R2 driver USB key link to create the drivers diskette for the Windows 2008 R2 x64 OS. 4. When the HP USB Punchout Creation Utility launches, mount a USB device to the node and select that device from the drop down list. 5. Click Copy. 6. After the copy is complete, click Exit to close the utility. 7. View the contents of the USB device to verify that the driver was copied to the device. Appendix: Install the hpahcisr driver for OS installation 72
-
 1
1 -
2
-
3
-
4
-
5
-
6
-
7
-
8
-
9
-
10
-
11
-
12
-
13
-
14
-
15
-
16
-
17
-
18
-
19
-
20
-
21
-
22
-
23
-
24
-
25
-
26
-
27
-
28
-
29
-
30
-
31
-
32
-
33
-
34
-
35
-
36
-
37
-
38
-
39
-
40
-
41
-
42
-
43
-
44
-
45
-
46
-
47
-
48
-
49
-
50
-
51
-
52
-
53
-
54
-
55
-
56
-
57
-
58
-
59
-
60
-
61
-
62
-
63
-
64
-
65
-
66
-
 67
67 -
 68
68 -
 69
69 -
 70
70 -
 71
71 -
 72
72 -
 73
73 -
 74
74 -
 75
75 -
 76
76 -
 77
77 -
78
-
79
-
80
-
81
-
82
 |
 |
