HP Scitex FB7500 Advanced Printer Guide Rev. B - Page 101
Printing a Job, Loading/Unloading System Setup, Adding a New Job
 |
View all HP Scitex FB7500 manuals
Add to My Manuals
Save this manual to your list of manuals |
Page 101 highlights
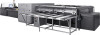
To load the substrate manually: 1 In the FB7500 main window, click Print Job; the printing table moves to the left. 2 Press the pedal; the system deactivates the vacuum to the printing table and raises the registration pins. 3 Place the substrate on the printing table and attach it to the registration pins (see Figure 4-5 on page 91). 4 Release the pedal; the system activates the vacuum to the printing table and lowers the registration pins. A message appears, asking you to confirm that the substrate is loaded properly. Click Yes to start the printing process. Printing a Job 1 Set the loading/unloading system parameters for the selected substrate as described in Loading/Unloading System Setup on page 86. 2 Add a new job as described in Adding a New Job on page 49; the job appears in the Jobs List with the Not Ready status. 3 Select the job and click the Prepare Job Offline icon on the toolbar; the job status changes to Ready. 92 HP Scitex FB7500 Advanced Printer Guide
-
 1
1 -
2
-
3
-
4
-
5
-
6
-
7
-
8
-
9
-
10
-
11
-
12
-
13
-
14
-
15
-
16
-
17
-
18
-
19
-
20
-
21
-
22
-
23
-
24
-
25
-
26
-
27
-
28
-
29
-
30
-
31
-
32
-
33
-
34
-
35
-
36
-
37
-
38
-
39
-
40
-
41
-
42
-
43
-
44
-
45
-
46
-
47
-
48
-
49
-
50
-
51
-
52
-
53
-
54
-
55
-
56
-
57
-
58
-
59
-
60
-
61
-
62
-
63
-
64
-
65
-
66
-
67
-
68
-
69
-
70
-
71
-
72
-
73
-
74
-
75
-
76
-
77
-
78
-
79
-
80
-
81
-
82
-
83
-
84
-
85
-
86
-
87
-
88
-
89
-
90
-
91
-
92
-
93
-
94
-
95
-
 96
96 -
 97
97 -
 98
98 -
 99
99 -
 100
100 -
 101
101 -
 102
102 -
 103
103 -
 104
104 -
 105
105 -
 106
106 -
107
-
108
-
109
-
110
-
111
-
112
-
113
-
114
-
115
-
116
 |
 |
