HP Tango User Guide - Page 26
both edges., down until it stops.
 |
View all HP Tango manuals
Add to My Manuals
Save this manual to your list of manuals |
Page 26 highlights
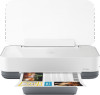
3. Insert a stack of full-size or photo paper into the middle of the input tray with the short edge down. For photo paper, make sure the print side is up, facing out from the printer. Then slide the stack of paper down until it stops. 4. Slide the paper-width guides to the left and right edges of the full-size or photo paper until they stop at both edges. 22 Chapter 3 Set up tray and load media ENWW
-
 1
1 -
2
-
3
-
4
-
5
-
6
-
7
-
8
-
9
-
10
-
11
-
12
-
13
-
14
-
15
-
16
-
17
-
18
-
19
-
20
-
 21
21 -
 22
22 -
 23
23 -
 24
24 -
 25
25 -
 26
26 -
 27
27 -
 28
28 -
 29
29 -
 30
30 -
 31
31 -
32
-
33
-
34
-
35
-
36
-
37
-
38
-
39
-
40
-
41
-
42
-
43
-
44
-
45
-
46
-
47
-
48
-
49
-
50
-
51
-
52
-
53
-
54
-
55
-
56
-
57
-
58
-
59
-
60
-
61
-
62
-
63
-
64
-
65
-
66
-
67
-
68
-
69
-
70
-
71
-
72
-
73
-
74
-
75
-
76
-
77
-
78
-
79
-
80
-
81
-
82
-
83
-
84
-
85
-
86
-
87
-
88
-
89
-
90
-
91
-
92
-
93
-
94
-
95
-
96
-
97
-
98
-
99
-
100
-
101
-
102
 |
 |

3.
Insert a stack of full-size or photo paper into the middle of the input tray with the short edge down. For
photo paper, make sure the print side is up, facing out from the printer. Then slide the stack of paper
down until it stops.
4.
Slide the paper-width guides to the left and right edges of the full-size or photo paper until they stop at
both edges.
22
Chapter 3
Set up tray and load media
ENWW