HP Tango User Guide - Page 58
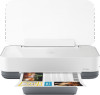
the cartridge latch together, as shown, until the cartridge snaps into place., Close the ink door.
 |
View all HP Tango manuals
Add to My Manuals
Save this manual to your list of manuals |
Page 58 highlights
b. Remove the plastic tape using the pull tab. NOTE: Do not touch the electrical contacts on the cartridge. c. Insert the cartridge into the slot, and then squeeze the front of the cartridge and the back edge of the cartridge latch together, as shown, until the cartridge snaps into place. d. Close the ink door. 54 Chapter 6 Manage cartridges ENWW
-
 1
1 -
2
-
3
-
4
-
5
-
6
-
7
-
8
-
9
-
10
-
11
-
12
-
13
-
14
-
15
-
16
-
17
-
18
-
19
-
20
-
21
-
22
-
23
-
24
-
25
-
26
-
27
-
28
-
29
-
30
-
31
-
32
-
33
-
34
-
35
-
36
-
37
-
38
-
39
-
40
-
41
-
42
-
43
-
44
-
45
-
46
-
47
-
48
-
49
-
50
-
51
-
52
-
 53
53 -
 54
54 -
 55
55 -
 56
56 -
 57
57 -
 58
58 -
 59
59 -
 60
60 -
 61
61 -
 62
62 -
 63
63 -
64
-
65
-
66
-
67
-
68
-
69
-
70
-
71
-
72
-
73
-
74
-
75
-
76
-
77
-
78
-
79
-
80
-
81
-
82
-
83
-
84
-
85
-
86
-
87
-
88
-
89
-
90
-
91
-
92
-
93
-
94
-
95
-
96
-
97
-
98
-
99
-
100
-
101
-
102
 |
 |

b.
Remove the plastic tape using the pull tab.
NOTE:
Do not touch the electrical contacts on the cartridge.
c.
Insert the cartridge into the slot, and then squeeze the front of the cartridge and the back edge of
the cartridge latch together, as shown, until the cartridge snaps into place.
d.
Close the ink door.
54
Chapter 6
Manage cartridges
ENWW