HP j6700 hp workstation J6700 upgrade instructions (a6056-90000) - Page 14
Removing the Hard Disk Drives, Removing the Hard Disk Drives
 |
View all HP j6700 manuals
Add to My Manuals
Save this manual to your list of manuals |
Page 14 highlights
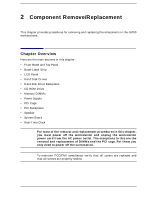
Component Remove/Replacement Component Removal and Replacement Removing the Hard Disk Drives To remove a hard disk drive do the following: Figure 2-4. Removing the Hard Disk Drives 1 1. Remove optional locking thumbscrew 2. Press HDD cover release tab to remove cover Locking Thumbscrew 1 2 Removing a HDD - Pull out bracket - Remove bracket and HDD 2 3 Removing a HDD - Install hard drive in bracket - Insert in HDD cage till firmly seated Adding a HDD - Remove bracket and screws Adding a HDD - Carefully remove bar - Install HDD Carefully remove and discard To replace the hard disk drives, perform the above steps in reverse. You should make sure that the disks are firmly seated. Reinstall the hard disk drive cover and optional locking thumbscrew, if applicable. 14 Chapter 2
-
 1
1 -
2
-
3
-
4
-
5
-
6
-
7
-
8
-
 9
9 -
 10
10 -
 11
11 -
 12
12 -
 13
13 -
 14
14 -
 15
15 -
 16
16 -
 17
17 -
 18
18 -
 19
19 -
20
-
21
-
22
-
23
-
24
-
25
-
26
 |
 |
