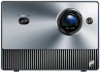
Hisense C1 Mini Projector User Manual - Page 27
Ultra Smooth Motion, Light Sensor Shift
 |
View all Hisense C1 manuals
Add to My Manuals
Save this manual to your list of manuals |
Page 27 highlights
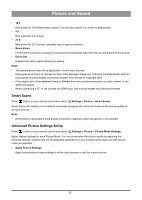
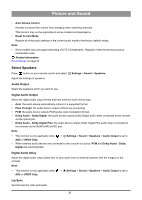
Picture and Sound • Laser Luminance Set the overall brightness of the screen. Note: • The function name may vary depending on the model type. The following option may differ depending on model type, please refer to the actual product. Laser Luminance Level Adjust how bright you want images to appear, lower settings create darker images. This function may not be applicable in some models/countries/regions. Automatic Light Sensor Console will automatically adjust the picture settings according to the amount of ambient light in the room. This function may not be applicable in some models/countries/regions. Light Sensor Shift This feature is adjustable only when Automatic Light Sensor is turned on. If the picture is too bright, decrease the value. If the picture is too dark, increase the value. This function may not be applicable in some models/countries/regions. • Brightness Adjust the Brightness level to generate lighter or darker images. • Contrast Adjust the Contrast level to increase or decrease how bright images appear. • Colour Saturation Adjust the colour intensity of the picture for a more vibrant image. • Sharpness Adjust how sharp or soft the edges of images appear. • Adaptive Contrast Automatically adjust dark areas and light areas of the image to see more detail. • Ultra Smooth Motion Reduce the afterimage effect when viewing fast-moving objects. This function may not be applicable in some models/countries/regions. • Noise Reduction Improve the picture quality by reducing noise. • MPEG Noise Reduction Reduce MPEG block noise to provide clearer edge transitions. • Colour Temperature Adjust how warm (red) or cool (blue) the white areas of an image appears. • Expert Settings Adjust advanced picture settings based on your viewing preference. 26
-
 1
1 -
2
-
3
-
4
-
5
-
6
-
7
-
8
-
9
-
10
-
11
-
12
-
13
-
14
-
15
-
16
-
17
-
18
-
19
-
20
-
21
-
 22
22 -
 23
23 -
 24
24 -
 25
25 -
 26
26 -
 27
27 -
 28
28 -
 29
29 -
 30
30 -
 31
31 -
 32
32 -
33
-
34
-
35
-
36
-
37
-
38
-
39
-
40
-
41
-
42
-
43
-
44
-
45
-
46
-
47
-
48
-
49
-
50
-
51
-
52
-
53
-
54
-
55
-
56
 |
 |
