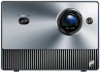
Hisense C1 Mini Projector User Manual - Page 35
Manual Focus, Display Zoom, Position Adjustment, Eye Protection, Correction Settings, Settings
 |
View all Hisense C1 manuals
Add to My Manuals
Save this manual to your list of manuals |
Page 35 highlights
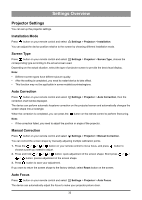
Settings Overview When the focus is completed, you can press the button on the remote control to perform fine-tuning. Note: • If the focus failed, you need to adjust the position or angle of the projector. Manual Focus Press button on your remote control and select Settings > Projector > Manual Focus to manually fine-tune the focus of your projector. Press the / button on the remote control to adjust and press the button to return. Display Zoom You can change the display size. Press button on your remote control and select Settings > Projector > Display Zoom, the display zoom adjustment page will be dispalyed. • Press the or button on the remote control to adjust the display zoom. • Press the button on the remote control to adjust the position of the picture. Position Adjustment You can adjust the position of the picture. Press button on your remote control and select Settings > Projector > Position Adjustment. • Press the button on the remote control to adjust the position of the picture. • Press the button on the remote control to adjust the display zoom. Eye Protection To protect your eyes from light damage, the laser device can reduce the brightness automatically when an object blocks the laser light. Press button on your remote control and select Settings > Projector > Eye Protection, you can choose to turn it on or off. Note: • Wrong judgment may occur when the distance exceeds 2 meters. Correction Settings Allow you to configure advanced correction settings. Press button on your remote control and select Settings > Projector > Correction Settings, you can choose to turn the following functions on or off. • Auto Shift Correction Perform automatic keystone correction when the device is moved. • Auto Obstacle Avoidance Avoid obstacles within the projected area automatically when keystone correction is performed. 34
-
 1
1 -
2
-
3
-
4
-
5
-
6
-
7
-
8
-
9
-
10
-
11
-
12
-
13
-
14
-
15
-
16
-
17
-
18
-
19
-
20
-
21
-
22
-
23
-
24
-
25
-
26
-
27
-
28
-
29
-
 30
30 -
 31
31 -
 32
32 -
 33
33 -
 34
34 -
 35
35 -
 36
36 -
 37
37 -
 38
38 -
 39
39 -
 40
40 -
41
-
42
-
43
-
44
-
45
-
46
-
47
-
48
-
49
-
50
-
51
-
52
-
53
-
54
-
55
-
56
 |
 |
