Hisense C1 Mini Projector User Manual - Page 34
Settings Overview, Projector Settings, Installation Mode, Screen Type, Auto Correction, Auto Focus
 |
View all Hisense C1 manuals
Add to My Manuals
Save this manual to your list of manuals |
Page 34 highlights
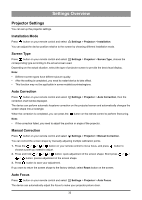
Settings Overview Projector Settings You can set up the projector settings. Installation Mode Press button on your remote control and select Settings > Projector > Installation. You can adjust the device position relative to the screen by choosing different installation mode. Screen Type Press button on your remote control and select Settings > Projector > Screen Type, choose the corresponding type according to the actual screen used. Depending on the actual situation, select the type of projector screen to provide the best visual display. Note: • Different screen types have different picture quality. • After the setting is completed, you need to restart device to take effect. • This function may not be applicable in some models/countries/regions. Auto Correction Press button on your remote control and select Settings > Projector > Auto Correction, then the correction chart will be displayed. The device can perform automatic keystone correction on the projected screen and automatically changes the screen shape into a rectangle. When the correction is completed, you can press the button on the remote control to perform fine-tuning. Note: • If the correction failed, you need to adjust the position or angle of the projector. Manual Correction Press button on your remote control and select Settings > Projector > Manual Correction. You can correct the screen shape by manually adjusting multiple calibration points. 1. Press the button on your remote control to move focus, and press button to choose a point you neeed to adjust. 2. Press and hold button: quick adjustment of the screen shape; Short press / / / button: precise adjustment of the screen shape. 3. Press button to save your adjustment. If you want to return the screen shape to the factory default, select Reset button on the screen. Auto Focus Press button on your remote control and select Settings > Projector > Auto Focus. The device can automatically adjust the focus to make your projector picture clear. 33
-
 1
1 -
2
-
3
-
4
-
5
-
6
-
7
-
8
-
9
-
10
-
11
-
12
-
13
-
14
-
15
-
16
-
17
-
18
-
19
-
20
-
21
-
22
-
23
-
24
-
25
-
26
-
27
-
28
-
 29
29 -
 30
30 -
 31
31 -
 32
32 -
 33
33 -
 34
34 -
 35
35 -
 36
36 -
 37
37 -
 38
38 -
 39
39 -
40
-
41
-
42
-
43
-
44
-
45
-
46
-
47
-
48
-
49
-
50
-
51
-
52
-
53
-
54
-
55
-
56
 |
 |
