Husqvarna 220iL without battery and charger Owner Manual - Page 16
To examine the battery and the battery, charger, To clean the product, the battery and, the battery
 |
View all Husqvarna 220iL without battery and charger manuals
Add to My Manuals
Save this manual to your list of manuals |
Page 16 highlights
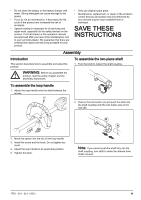
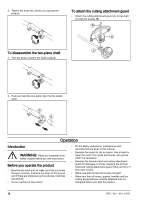
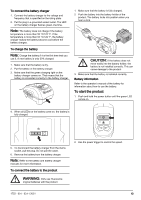
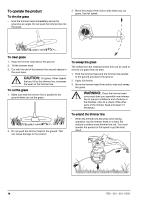
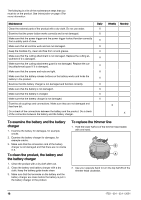
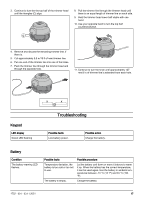
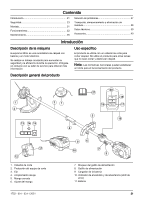
The following is a list of the maintenance steps that you must do on the product. See Introduction on page 15 for more information. Maintenance Clean the external parts of the product with a dry cloth. Do not use water. Examine that the power button works correctly and is not damaged. Make sure that the power trigger and the power trigger lockout function correctly from a safety point of view. Make sure that all controls work and are not damaged. Keep the handles dry, clean and free from oil and grease. Make sure that the cutting attachment is not damaged. Replace the cutting attachment if it is damaged. Make sure that the cutting attachment guard is not damaged. Replace the cutting attachment guard if it is damaged. Make sure that the screws and nuts are tight. Make sure that the battery release buttons on the battery works and locks the battery in the product. Examine that the battery charger is not damaged and function correctly. Make sure that the battery is not damaged. Make sure that the battery is charged. Make sure that the battery charger is not damaged. Examine all couplings and connections. Make sure they are not damaged and free from dirt. Do a check of the connections between the battery and the product. Do a check of the connection between the battery and the battery charger. Daily X X X X X X X X X X X X X Weekly Monthly X X To examine the battery and the battery charger 1. Examine the battery for damages, for example cracks. 2. Examine the battery charger for damages, for example cracks. 3. Make sure that the connection cord of the battery charger is not damaged and that there are no cracks in it. To clean the product, the battery and the battery charger 1. Clean the product with a dry cloth after use. 2. Clean the battery and battery charger with a dry cloth. Keep the battery guide tracks clean. 3. Make sure that the terminals on the battery and the battery charger are clean before the battery is put in the battery charger or the product. To replace the trimmer line 1. Hold the lower half (A) of the trimmer head stable with one hand. B A 2. Use your opposite hand to turn the top half (B) of the trimmer head clockwise. 16 1752 - 001 - 03.11.2021
-
 1
1 -
2
-
3
-
4
-
5
-
6
-
7
-
8
-
9
-
10
-
 11
11 -
 12
12 -
 13
13 -
 14
14 -
 15
15 -
 16
16 -
 17
17 -
 18
18 -
 19
19 -
 20
20 -
 21
21 -
22
-
23
-
24
-
25
-
26
-
27
-
28
-
29
-
30
-
31
-
32
-
33
-
34
-
35
-
36
-
37
-
38
-
39
-
40
-
41
-
42
-
43
-
44
-
45
-
46
-
47
-
48
-
49
-
50
-
51
-
52
-
53
-
54
-
55
-
56
-
57
-
58
-
59
-
60
-
61
-
62
-
63
-
64
 |
 |