Husqvarna 220iL without battery and charger Owner Manual - Page 9
AB BA
 |
View all Husqvarna 220iL without battery and charger manuals
Add to My Manuals
Save this manual to your list of manuals |
Page 9 highlights
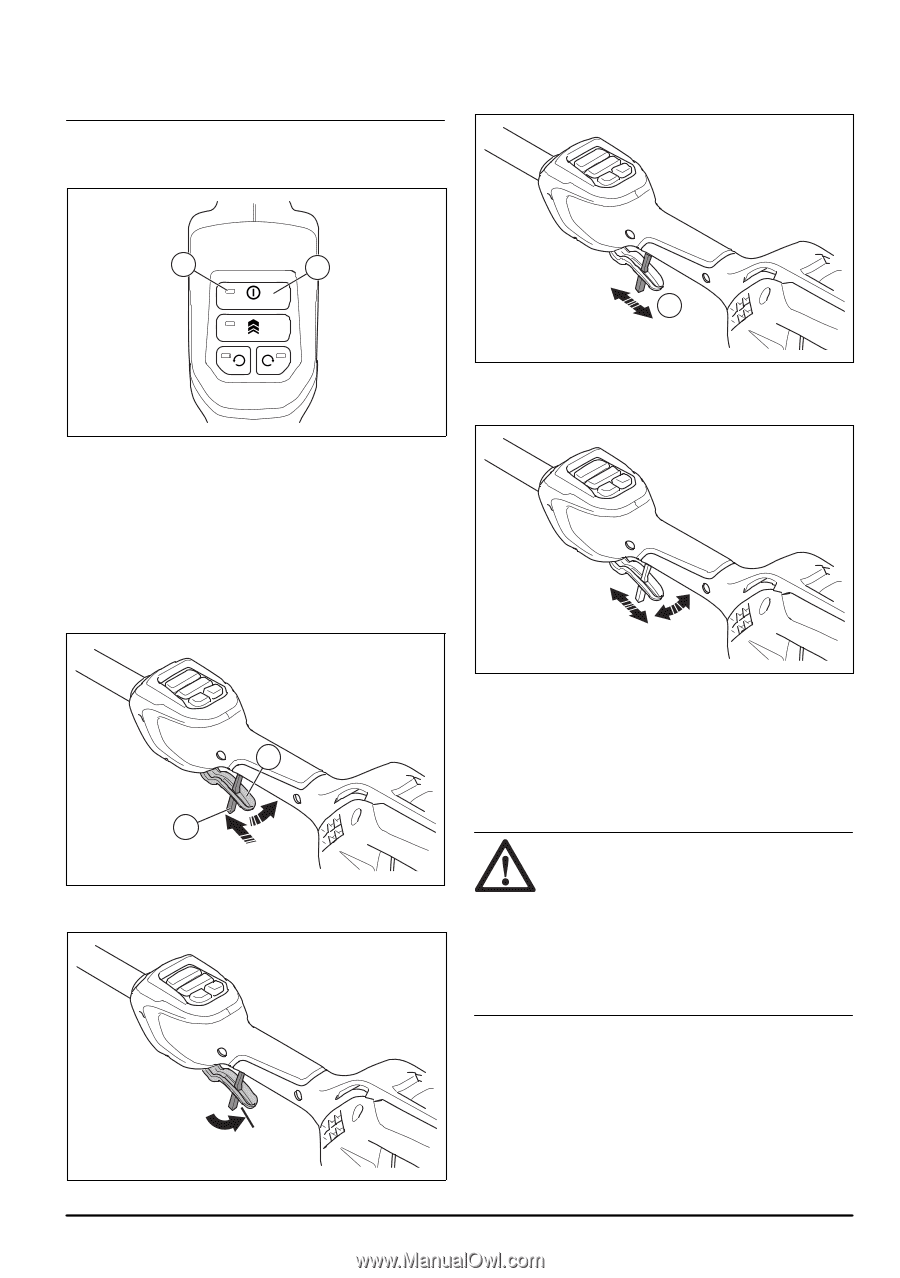
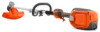
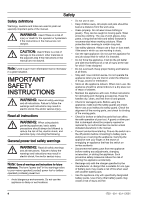
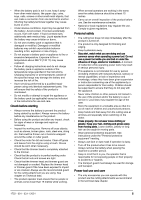
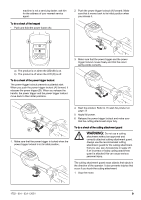
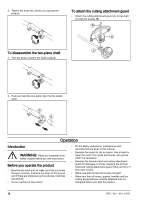
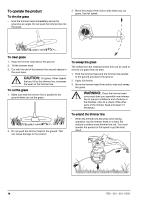
machine is not a servicing dealer, ask him for the address of your nearest service agent. To do a check of the keypad • Push and hold the power button (A). 2. Push the power trigger lockout (A) forward. Make sure that it moves back to its initial position when you release it. B A A a) The product is on when the LED (B) is on. b) The product is off when the LED (B) is off. To do a check of the power trigger lockout The power trigger lockout prevents accidental start. When you push the power trigger lockout (A) forward, it releases the power trigger (B). When you release the handle, the power trigger and the power trigger lockout move back to their initial positions. 3. Make sure that the power trigger and the power trigger lockout moves freely and that the return spring works correctly. B A 1. Make sure that the power trigger is locked when the power trigger lockout is in its initial position. 4. Start the product. Refer to To start the product on page 13. 5. Apply full power. 6. Release the power trigger lockout and make sure that the cutting attachment stops fully. To do a check of the cutting attachment guard WARNING: Do not use a cutting attachment without an approved and correctly attached cutting attachment guard. Always use the recommended cutting attachment guard for the cutting attachment that you use, see Accessories on page 20. If an incorrect or faulty cutting attachment guard is attached this can cause serious personal injury. The cutting attachment guard stops objects that ejects in the direction of the operator. It also prevents injuries that occur if you touch the cutting attachment. 1. Stop the motor. 1752 - 001 - 03.11.2021 9
-
 1
1 -
2
-
3
-
 4
4 -
 5
5 -
 6
6 -
 7
7 -
 8
8 -
 9
9 -
 10
10 -
 11
11 -
 12
12 -
 13
13 -
 14
14 -
15
-
16
-
17
-
18
-
19
-
20
-
21
-
22
-
23
-
24
-
25
-
26
-
27
-
28
-
29
-
30
-
31
-
32
-
33
-
34
-
35
-
36
-
37
-
38
-
39
-
40
-
41
-
42
-
43
-
44
-
45
-
46
-
47
-
48
-
49
-
50
-
51
-
52
-
53
-
54
-
55
-
56
-
57
-
58
-
59
-
60
-
61
-
62
-
63
-
64
 |
 |