Husqvarna AUTOMOWER 450XH Owner Manual - Page 28
> Lawn coverage > Area 1-5 > How far?
 |
View all Husqvarna AUTOMOWER 450XH manuals
Add to My Manuals
Save this manual to your list of manuals |
Page 28 highlights
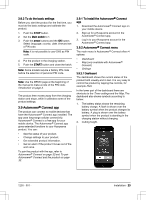
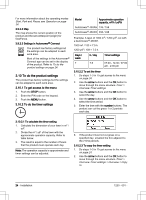
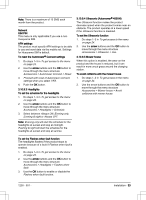
the distance from the charging station on page 28. 6. Push the number buttons to select the distance, measured in m. 7. Use the number buttons to select the % of the cutting time the product must cut the area. The % is equal to the percentage of the area in relation to the complete work area. a) Measure the area. b) Divide the area with the work area. c) Convert the result to %. 20% 30% To do a test of the Lawn coverage function 1. Put the product in the charging station. 2. Do step 1-3 in To get access to the menu on page 24. 3. Use the arrow buttons and the OK button to move through the menu structure Installation > Lawn coverage > Area 1-5 > More > Test. 4. Push the OK button. 5. Push the START button. 6. Close the hatch. 7. Make sure the product can find the area. To measure the distance from the charging station 1. Put the product in the charging station. 2. Do steps 1-3 in To get access to the menu on page 24. 3. Use the arrow buttons and the OK button to move through the menu structure Installation > Lawn coverage > Area 1-5 > How far? 4. Use the number buttons to set m as a distance. 5. Push the OK button. 6. Push the BACK button. 7. Use the arrow buttons and the OK button to move through the menu structure Installation > Lawn coverage > Area 1-5 > More > Test. 8. Push the OK button. 9. Push the START button and close the hatch. 10. Push the STOP button when the product is at the distance you select to measure. The distance shows in the display. To disable or enable the Lawn coverage function Disable the Lawn coverage function for each area. 1. Do steps 1-3 in To get access to the menu on page 24. 2. Use the arrow buttons and the OK button to move through the menu structure Installation > Lawn coverage > Area 1-5 > Disable. 3. Use the left arrow button to disable or enable the Lawn coverage function. 4. Push the OK button. 5. Push the BACK button. 3.10.7.2 Finding the charging station The product can be set to search for the charging station in one or more of the following three ways: 1. Charging station signal 2. Follow boundary wire 3. Follow guide wire The default settings are set so that these 3 search options are combined to find the charging station as fast as possible, but also with a minimum risk of tracks forming on the lawn. The product always starts by searching for the Charging station signal. After a specified time delay, it also uses Follow guide and Follow boundary wire. Common causes why the product cannot follow the wire are: • Obstacles close to the wire have not been isolated. • The charging station, the boundary wire or the guide wire is not installed in accordance with the instructions in To install the charging station on page 20, To install the 28 - Installation 1230 - 001 -
-
 1
1 -
2
-
3
-
4
-
5
-
6
-
7
-
8
-
9
-
10
-
11
-
12
-
13
-
14
-
15
-
16
-
17
-
18
-
19
-
20
-
21
-
22
-
 23
23 -
 24
24 -
 25
25 -
 26
26 -
 27
27 -
 28
28 -
 29
29 -
 30
30 -
 31
31 -
 32
32 -
 33
33 -
34
-
35
-
36
-
37
-
38
-
39
-
40
-
41
-
42
-
43
-
44
-
45
-
46
-
47
-
48
-
49
-
50
-
51
-
52
-
53
-
54
-
55
-
56
-
57
-
58
-
59
-
60
 |
 |
