IBM 39M5657 User Guide - Page 21
Installing, Drive
 |
View all IBM 39M5657 manuals
Add to My Manuals
Save this manual to your list of manuals |
Page 21 highlights
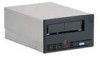
Installing the Drive Attention: To avoid static electricity damage when handling the drive, use the following precautions: v Limit your movement. Movement can cause static electricity to build around you. v Always handle the drive carefully. Never touch exposed circuitry. v Prevent others from touching the drive. v Before unpacking and installing the drive into an enclosure, touch its static-protective packaging to an unpainted metal surface on the enclosure for at least two seconds. This reduces static electricity in the packaging and your body. v When possible, remove the drive from its static-protective packaging and install it directly into an enclosure without setting it down. When this is not possible, place the drive's packaging on a smooth, level surface and place the drive on the packaging. v Do not place the drive on the cover of the enclosure or on any other metal surface. The steps that follow describe how to install the drive into an enclosure. Note: Depending on the type of enclosure, installation procedures may vary. Before starting this installation, read these instructions and compare them to the drive installation instructions for your enclosure. Installation Overview __ 1. "Unpack the Drive" __ 2. "Power Off the Server/Enclosure" on page 6 __ 3. "Set the SCSI ID" on page 7 __ 4. "Mount the Drive into the Server/Enclosure" on page 8 __ 5. "Connect and Test Power to the Drive" on page 9 __ 6. "Connect the Internal SCSI Cable" on page 9 __ 7. "Run Drive Diagnostics" on page 9 __ 8. "Install Device Drivers" on page 10 __ 9. "Connect the Enclosure's External SCSI Interface to the Server" on page 10 Unpack the Drive Unpack the drive and store the packaging for future moves or shipping. © Copyright IBM Corp. 2005 5
-
 1
1 -
2
-
3
-
4
-
5
-
6
-
7
-
8
-
9
-
10
-
11
-
12
-
13
-
14
-
15
-
 16
16 -
 17
17 -
 18
18 -
 19
19 -
 20
20 -
 21
21 -
 22
22 -
 23
23 -
 24
24 -
 25
25 -
 26
26 -
27
-
28
-
29
-
30
-
31
-
32
-
33
-
34
-
35
-
36
-
37
-
38
-
39
-
40
-
41
-
42
-
43
-
44
-
45
-
46
-
47
-
48
-
49
-
50
-
51
-
52
-
53
-
54
-
55
-
56
-
57
-
58
-
59
-
60
-
61
-
62
-
63
-
64
-
65
-
66
-
67
-
68
-
69
-
70
-
71
-
72
-
73
-
74
-
75
-
76
-
77
-
78
-
79
-
80
-
81
-
82
-
83
-
84
-
85
-
86
-
87
-
88
-
89
-
90
-
91
-
92
-
93
-
94
-
95
-
96
-
97
-
98
-
99
-
100
-
101
-
102
-
103
-
104
-
105
-
106
-
107
-
108
-
109
-
110
-
111
-
112
-
113
-
114
-
115
-
116
-
117
-
118
-
119
-
120
 |
 |
