IBM 39M5657 User Guide - Page 23
Setting, Jumpers, Switch, Supplying, TERMPOWER, Drive
 |
View all IBM 39M5657 manuals
Add to My Manuals
Save this manual to your list of manuals |
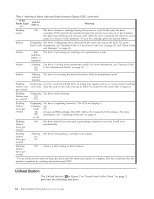
Page 23 highlights
Set the SCSI ID The SCSI ID can be set in one of two ways: v By placing jumpers on the SCSI ID connector v By using a SCSI ID switch that is connected to the SCSI ID connector Setting the SCSI ID with Jumpers The SCSI ID can be set on the drive by installing 2 mm jumpers on the drive's SCSI ID connector (see 2 in Figure 3). Your drive may come set to a default SCSI configuration, with jumpers already installed. You can change the SCSI ID by rearranging, adding, or removing jumpers. To set the SCSI ID: __ 1. Locate the SCSI ID connector ( 2 in Figure 3). __ 2. Before attaching the SCSI bus cable to the server, determine the SCSI ID. Make sure that the ID is not being used by another device. __ 3. Referring to Figure 2, find the ID number that you chose, then place jumpers on the connector pins as shown (use a pair of needle-nose pliers to connect the jumpers to the pins that are shaded). Note: If you set the SCSI ID to 15, the drive will not necessarily be set to that ID; instead, the drive will expect to receive the SCSI ID through a command over its LDI interface. Figure 5. SCSI ID settings on the SCSI ID connector Setting the SCSI ID with a SCSI ID Switch If your enclosure uses a SCSI ID switch (rather than jumpers), connect the switch to the drive's SCSI ID connector 2 in Figure 3 . If any jumpers are preinstalled, be sure to remove them before connecting the switch. The SCSI ID switch must be compatible with the drive's SCSI ID connector and must make an electrical connection between the same pins as the jumpers to achieve the same corresponding SCSI ID. Supplying TERMPOWER (SCSI Drive Only) To supply TERMPOWER to the bus, locate one of the five jumpers shipped with the drive and place it on the SCSI ID connector as shown in the following figure. Place the jumper on the pins that are shaded. Installing the Drive 7
-
 1
1 -
2
-
3
-
4
-
5
-
6
-
7
-
8
-
9
-
10
-
11
-
12
-
13
-
14
-
15
-
16
-
17
-
 18
18 -
 19
19 -
 20
20 -
 21
21 -
 22
22 -
 23
23 -
 24
24 -
 25
25 -
 26
26 -
 27
27 -
 28
28 -
29
-
30
-
31
-
32
-
33
-
34
-
35
-
36
-
37
-
38
-
39
-
40
-
41
-
42
-
43
-
44
-
45
-
46
-
47
-
48
-
49
-
50
-
51
-
52
-
53
-
54
-
55
-
56
-
57
-
58
-
59
-
60
-
61
-
62
-
63
-
64
-
65
-
66
-
67
-
68
-
69
-
70
-
71
-
72
-
73
-
74
-
75
-
76
-
77
-
78
-
79
-
80
-
81
-
82
-
83
-
84
-
85
-
86
-
87
-
88
-
89
-
90
-
91
-
92
-
93
-
94
-
95
-
96
-
97
-
98
-
99
-
100
-
101
-
102
-
103
-
104
-
105
-
106
-
107
-
108
-
109
-
110
-
111
-
112
-
113
-
114
-
115
-
116
-
117
-
118
-
119
-
120
 |
 |
