IBM x3755 Installation Guide
IBM x3755 - System - 7163 Manual
 |
View all IBM x3755 manuals
Add to My Manuals
Save this manual to your list of manuals |
IBM x3755 manual content summary:
- IBM x3755 | Installation Guide - Page 1
System x3755 Types 8877 and 7163 Installation Guide Welcome. Thank you for buying an IBM server. Your server is based on the X-Architecture technology, and it features superior performance, availability, and affordability. Start the server. Did the server No start correctly? Yes Turn off the - IBM x3755 | Installation Guide - Page 2
- IBM x3755 | Installation Guide - Page 3
IBM System x3755 Types 8877 and 7163 Installation Guide - IBM x3755 | Installation Guide - Page 4
, read the general information in "Notices" on page 61, and the IBM Safety Information, Environmental Notices and User Guide, and the Warranty and Support Information documents on the IBM Documentation CD. Third Edition (June 2009) © Copyright International Business Machines Corporation 2009. US - IBM x3755 | Installation Guide - Page 5
IBM ServeRAID Configuration Utility program 31 Using ServeRAID Manager 32 Using the Remote Supervisor Adapter II Web interface 34 Chapter 5. Updating IBM Director 35 Chapter 6. Solving problems 37 Diagnostic tools overview 37 POST beep codes 37 POST error codes 38 Troubleshooting tables - IBM x3755 | Installation Guide - Page 6
from the World Wide Web 59 Software service and support 60 Hardware service and support 60 IBM Taiwan product service 60 Notices 61 Trademarks 61 Important notes ) statement . . . 69 Korean Class A warning statement 69 Index 71 iv IBM System x3755 Types 8877 and 7163: Installation Guide - IBM x3755 | Installation Guide - Page 7
, leggere le Informazioni sulla Sicurezza. Les sikkerhetsinformasjonen (Safety Information) før du installerer dette produktet. Antes de instalar este produto, leia as Informações sobre Segurança. © Copyright IBM Corp. 2009 v - IBM x3755 | Installation Guide - Page 8
statement 1. Be sure to read all caution and danger statements in this documentation before performing the instructions. Read any additional safety information that comes with the server or optional device before you install the device. vi IBM System x3755 Types 8877 and 7163: Installation Guide - IBM x3755 | Installation Guide - Page 9
of fire, water, or structural damage. v Disconnect the attached power cords, telecommunications systems, networks, and modems before you open the device covers, unless instructed otherwise in the installation and configuration procedures. v Connect and disconnect cables as described in the following - IBM x3755 | Installation Guide - Page 10
of the laser product could result in exposure to hazardous laser radiation. There are no serviceable parts inside the device. v Use of controls or adjustments or performance of procedures other , and avoid direct exposure to the beam. viii IBM System x3755 Types 8877 and 7163: Installation Guide - IBM x3755 | Installation Guide - Page 11
(39.7 lb) ≥ 32 kg (70.5 lb) CAUTION: Use safe practices when lifting. Statement 5: ≥ 55 kg (121.2 lb) CAUTION: The power control button on the device and the power switch on the power supply do not turn off the electrical current supplied to the device. The device also might have more than one - IBM x3755 | Installation Guide - Page 12
inside these components. If you suspect a problem with one of these parts, contact a service technician. Statement 26: CAUTION: Do not place any object on top of rack-mounted devices. Statement 27: CAUTION: Hazardous moving parts are nearby. x IBM System x3755 Types 8877 and 7163: Installation Guide - IBM x3755 | Installation Guide - Page 13
in the following table. You will need this information when you register the server with IBM. Product name Machine type Model number Serial number IBM System x3755 8877 or 7163 The model number and serial number are on the ID labels, one on the front of the bezel and the other on the right - IBM x3755 | Installation Guide - Page 14
server and displays the documents in the language for that region (if available). If a document is not available in the language for that region, the English-language version is displayed. Use one of the following procedures to start the Documentation Browser: 2 IBM System x3755 Types 8877 and 7163 - IBM x3755 | Installation Guide - Page 15
in the multilingual Safety Information document, which is on the IBM System x Documentation CD. Each statement is numbered for reference to problem situations. v Attention: These notices indicate potential damage to programs, devices, or data. An attention notice is placed just before the instruction - IBM x3755 | Installation Guide - Page 16
Humidity: - Server on: 8% to 80% - Server off: 8% to 80% Power supply: v Standard: One dual-rated power supply - 1500 watts at 220 V ac input - 750 watts at 110 V ac input v Upgradeable to two power supplies (redundant at 220 V ac only) 4 IBM System x3755 Types 8877 and 7163: Installation Guide - IBM x3755 | Installation Guide - Page 17
which means that if the server and operating system support hot-swap capability, you can remove or install the component while the server is running. (Orange can also indicate touch points on hot-swap components.) See the instructions for removing or installing a specific hot-swap component for any - IBM x3755 | Installation Guide - Page 18
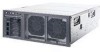
from your hardware. Top cover DIMM Hot-swap fan Microprocessor/ memory card Hot-swap power supply I/O board Passthru card DVD drive Operator information panel Hot-swap hard disk drive Hard disk drive filler panel Power supply filler 6 IBM System x3755 Types 8877 and 7163: Installation Guide - IBM x3755 | Installation Guide - Page 19
that any known issues are addressed and that your server is ready to function at maximum levels of performance. To download firmware updates for your server, go to http://www.ibm.com/servers/eserver/support/xseries/index.html, select System x3755 from the Hardware list, and click the Download tab - IBM x3755 | Installation Guide - Page 20
-fitting wrist watches. v Remove items from your shirt pocket, such as pens and pencils, that might fall into the server as you lean over it. v Avoid dropping any metallic objects, such as paper clips, hairpins, and screws, into the server. 8 IBM System x3755 Types 8877 and 7163: Installation Guide - IBM x3755 | Installation Guide - Page 21
that the operating system starts, if an operating system is installed, or that a 19990305 error code is displayed, indicating that an operating system was not found but the server is otherwise working correctly. If the server is not working correctly, see Chapter 6, "Solving problems," on page 37 - IBM x3755 | Installation Guide - Page 22
server, configure the disk arrays before you install the operating system. See the ServeRAID documentation on the IBM ServeRAID Support CD for additional information about RAID operation and complete instructions for using ServeRAID Manager. 10 IBM System x3755 Types 8877 and 7163: Installation Guide - IBM x3755 | Installation Guide - Page 23
DIMMs: v You can configure your server to use online-spare memory, Chipkill memory, and memory scrubbing. For detailed information about configuring your server and using these features, see the User's Guide on the IBM System x Documentation CD. v The server supports up to four microprocessor - IBM x3755 | Installation Guide - Page 24
"Installation guidelines" on page 7. 2. Turn off the server and peripheral devices, and disconnect the power cords and all external cables necessary to replace the device. gently. 6. Lift open the microprocessor/memory card air baffle. 12 IBM System x3755 Types 8877 and 7163: Installation Guide - IBM x3755 | Installation Guide - Page 25
each end of the DIMM connector. 8. Touch the static-protective package that contains the DIMM to any unpainted metal surface on the outside of the server; then, remove the DIMM from the package. 9. Turn the DIMM so that the DIMM keys align correctly with the slot. DIMM Retaining clip 10. Insert - IBM x3755 | Installation Guide - Page 26
microprocessor/memory cards, populate the microprocessor/memory card connectors in numeric order on the I/O board, starting with connector 2. Install the microprocessor/memory cards in the order shown in the following illustration. 14 IBM System x3755 Types 8877 and 7163: Installation Guide - IBM x3755 | Installation Guide - Page 27
2 Slot 1 and slot 2 None Slot 1, slot 2, and slot 3 Slot 4 Slot 1, slot 2, slot 3, and slot 4 None v All 6 fans must be installed to support some microprocessor/memory card configurations. See Table 4 for the fan requirements. Table 4. Fan requirements Slots populated with microprocessor - IBM x3755 | Installation Guide - Page 28
memory card, complete the following steps: 1. Read the safety information that begins on page v and "Installation guidelines" on page 7. 2. Turn off the server and peripheral devices, and disconnect the power install adapters in the server. 16 IBM System x3755 Types 8877 and 7163: Installation Guide - IBM x3755 | Installation Guide - Page 29
guidelines" on page 7. 2. Turn off the server and peripheral devices, and disconnect the power cords and all external cables necessary to install the and align it with the guide and the connector on the I/O board. Attention: Incomplete insertion might cause damage to the I/O board or the adapter. 5. - IBM x3755 | Installation Guide - Page 30
, review the following information: v A ServeRAID-8k SAS controller can be installed only in the dedicated slot on the I/O board. v The ServeRAID-8k SAS controller is not cabled to the server, and adapter Bus speed 100 MHz 133 MHz 100 MHz 18 IBM System x3755 Types 8877 and 7163: Installation Guide - IBM x3755 | Installation Guide - Page 31
/memory cards must be installed to support a HyperTransport adapter. To install an adapter, complete the following steps: 1. Read the safety information that begins on page v and "Installation guidelines" on page 7. 2. Turn off the server and peripheral devices, and disconnect the power - IBM x3755 | Installation Guide - Page 32
. The Configuration/Setup Utility program starts automatically so that you can save the new configuration settings. For more information, see the section about configuring the server in the User's Guide on the IBM System x Documentation CD. 20 IBM System x3755 Types 8877 and 7163: Installation Guide - IBM x3755 | Installation Guide - Page 33
might have to upgrade the operating system to support SMP. For more information, see the section about using the ServerGuide Setup and Installation CD in the User's Guide on the IBM System x Documentation CD and the operating-system documentation. If the server is configured for RAID operation and - IBM x3755 | Installation Guide - Page 34
22 IBM System x3755 Types 8877 and 7163: Installation Guide - IBM x3755 | Installation Guide - Page 35
LED System-error LED Power-on LED Power-control button Release latch USB connectors The following controls and LEDs are on the operator information panel: Power-control button: Press this button to turn the server on and off manually. A power-control-button shield comes with the server. Power-on - IBM x3755 | Installation Guide - Page 36
: On some server models, each hot- If the server is configured for RAID Power supply Gigabit Ethernet 1 activity LED Gigabit Ethernet 2 activity LED Serial Mouse USB Gigabit Ethernet 2 Locator LED Power server and the network. 24 IBM System x3755 Types 8877 and 7163: Installation Guide - IBM x3755 | Installation Guide - Page 37
port. Power-supply connector: Connect the power cord to power from the server, you must disconnect the power cords from the electrical outlets. Locator LED: When this LED is lit, it has been lit remotely by the system administrator to aid in visually locating the server. System-error BMC). The BMC - IBM x3755 | Installation Guide - Page 38
supply do not turn off the electrical current supplied to the device. The device also might have more than one power cord. To remove all electrical current from the device, ensure that all power cords are disconnected from the power source. 26 IBM System x3755 Types 8877 and 7163: Installation Guide - IBM x3755 | Installation Guide - Page 39
of the following ways: v You can turn off the server from the operating system, if your operating system supports this feature. After an orderly shutdown of the operating system, the server will be turned off automatically. v You can press the power-control button to start an orderly shutdown of the - IBM x3755 | Installation Guide - Page 40
28 IBM System x3755 Types 8877 and 7163: Installation Guide - IBM x3755 | Installation Guide - Page 41
the User's Guide on the IBM System x Documentation CD. Using the ServerGuide Setup and Installation CD The ServerGuide Setup and Installation CD provides programs to detect the server model and installed optional hardware devices, configure the server hardware, provide device drivers, and help you - IBM x3755 | Installation Guide - Page 42
server so that it does not impede airflow through the front of the server. Use the baseboard management controller utility programs to configure the baseboard management controller, download firmware updates, and remotely manage a network. 30 IBM System x3755 Types 8877 and 7163: Installation Guide - IBM x3755 | Installation Guide - Page 43
drive and restart the server. 2. From a command-line prompt, type bmc_cfg and press Enter. 3. Follow the instructions on the screen. See the User's Guide on the IBM System x Documentation CD for details. Using the RAID configuration programs Use the IBM ServeRAID Configuration Utility program and - IBM x3755 | Installation Guide - Page 44
By running ServeRAID Manager in Startable CD mode, you can configure the RAID controller before you install the operating system. The information in this section assumes that you are running ServeRAID Manager in Startable CD mode. 32 IBM System x3755 Types 8877 and 7163: Installation Guide - IBM x3755 | Installation Guide - Page 45
Click Express configuration. 3. Click Next. 4. In the "Configuration summary" window, review the information. To change the configuration, click Modify from the CD-RW/DVD drive. 11. Restart the server. Viewing the configuration You can use ServeRAID Manager to view information about RAID controllers - IBM x3755 | Installation Guide - Page 46
Configuration/Setup Utility program or from your network administrator. v You can connect directly to the server or use an Ethernet network to access the service . See the User's Guide on the IBM System x Documentation CD for instructions. 34 IBM System x3755 Types 8877 and 7163: Installation Guide - IBM x3755 | Installation Guide - Page 47
the instructions on the Web page to download the latest version. 2. Install the IBM Director program. 3. Download and install any applicable updates or interim fixes for the server: a. Go to http://www.ibm.com/servers/eserver/support/xseries/index.html. b. From the Hardware list, select System x3755 - IBM x3755 | Installation Guide - Page 48
36 IBM System x3755 Types 8877 and 7163: Installation Guide - IBM x3755 | Installation Guide - Page 49
that POST detected a problem. Error messages also appear during startup if POST detects a hardware-configuration problem. See "POST beep codes," and the Problem Determination and Service Guide on the IBM System x Documentation CD for more information. v Troubleshooting tables These tables list - IBM x3755 | Installation Guide - Page 50
POST. See the Problem Determination and Service Guide on the IBM System x Documentation CD for more information about the POST error codes and messages. For updated technical information, go to http://www.ibm.com/servers/eserver/support/xseries/index.html, select System x3755, click the Install - IBM x3755 | Installation Guide - Page 51
that are not available. 1. See http://www.ibm.com/servers/eserver/support/xseries/ index.html and search for MIGR-61663 for additional information on the error code. 2. Make sure that the BIOS code is at the latest level. 3. Run the Configuration/Setup Utility program to verify that the interrupt - IBM x3755 | Installation Guide - Page 52
. The CD or DVD drive tray is not 1. Make sure that the server is turned on. working. 2. Insert the end of a straightened paper clip into the manual tray-release opening. 3. Reseat the CD or DVD drive. 4. Replace the CD or DVD drive. 40 IBM System x3755 Types 8877 and 7163: Installation Guide - IBM x3755 | Installation Guide - Page 53
problem is solved. v See the parts listing in the Problem Determination and Service Guide hard disk drives have the minimum firmware levels. The server stops responding during the hard disk hard disk drive was not detected while the operating system was being started. Reseat all hard disk drives - IBM x3755 | Installation Guide - Page 54
disconnect the keyboard from the hub and connect it directly to the server. 5. Replace the following components one at a time, in the order shown, restarting the server each time: a. Keyboard b. (Trained service technician only) I/O board 42 IBM System x3755 Types 8877 and 7163: Installation Guide - IBM x3755 | Installation Guide - Page 55
the mouse or pointing device from the hub and connect it directly to the server. 4. Replace the following components one at a time, in the order shown, restarting the server each time: a. Mouse or pointing device b. (Trained service technician only) I/O board Chapter 6. Solving problems 43 - IBM x3755 | Installation Guide - Page 56
, making sure that the DIMMs on each card match. 7. Reseat the following components: a. DIMMs b. Microprocessor/memory cards 8. Replace the components listed in step 7 one at a time, in the order shown, restarting the server each time. 44 IBM System x3755 Types 8877 and 7163: Installation Guide - IBM x3755 | Installation Guide - Page 57
service technician only) If the error is associated with a microprocessor/memory card connector, replace the I/O board. Monitor problems Some IBM monitors have their own self-tests. If you suspect a problem with your monitor, see the documentation that comes with the monitor for instructions - IBM x3755 | Installation Guide - Page 58
v You installed the necessary device drivers for the application. 2. Run video diagnostics. v If the server passes the video diagnostics, the video is good. v (Trained service technician only) If the problem remains, replace the I/O board. 46 IBM System x3755 Types 8877 and 7163: Installation Guide - IBM x3755 | Installation Guide - Page 59
is displayed, update the BIOS code with the correct screen. language. 2. Reseat the monitor. 3. Replace the following components one at a time, in the order shown, restarting the server each time: a. Monitor b. (Trained service technician only) I/O board Chapter 6. Solving problems 47 - IBM x3755 | Installation Guide - Page 60
updated the configuration information in the Configuration/Setup Utility program. Whenever memory or any other device is changed, you must update the configuration the server. 4. Reseat the failing device. 5. Replace the failing device. 48 IBM System x3755 Types 8877 and 7163: Installation Guide - IBM x3755 | Installation Guide - Page 61
Microprocessor/memory cards b. Power switch connector c. (Trained service technician only) I/O board 5. If you just installed an optional device, remove it, and restart the server. If the server now starts, you might have installed more devices than the power supply supports. The server does not - IBM x3755 | Installation Guide - Page 62
see Chapter 3, "Server controls, connectors, LEDs, and power," on page 23 server each time: a. Failing serial device b. Serial cable c. Remote Supervisor Adapter II SlimLine (if one is present) d. (Trained service technician only) I/O board 50 IBM System x3755 Types 8877 and 7163: Installation Guide - IBM x3755 | Installation Guide - Page 63
performed only by a trained service technician. Symptom Action You suspect a software problem. 1. To determine whether the problem is caused by the software, make sure that: v The server has the minimum memory that is needed to use the software. For memory requirements, see the information that - IBM x3755 | Installation Guide - Page 64
LED is lit, it indicates that a noncritical event has occurred. An LED on the light path diagnostics panel is also lit to help isolate the error. 52 IBM System x3755 Types 8877 and 7163: Installation Guide - IBM x3755 | Installation Guide - Page 65
in the server and that light path diagnostics might light an additional LED to help diagnose the problem. The following illustration shows the operator information panel. Locator LED Information LED Hard disk drive activity LED System-error LED Power-on LED Power-control button Release - IBM x3755 | Installation Guide - Page 66
button Microprocessor/memory card error LED Microprocessor error LED Light path diagnostics LEDs The following table lists the LEDs on the light path diagnostics panel, the problems that they indicate, and actions to solve the problems. 54 IBM System x3755 Types 8877 and 7163: Installation Guide - IBM x3755 | Installation Guide - Page 67
to identify the failed component. 4. Reseat the microprocessor/memory card. 5. Replace the microprocessor/memory card. CNFG A microprocessor/memory card configuration error has occurred. 1. See the BMC log or the system-error log for the source of the fault. 2. Make sure that the microprocessor - IBM x3755 | Installation Guide - Page 68
3. Replace the following components one at a time, in the order shown, restarting the server each time: a. Failing hard disk drive b. SAS hard disk drive backplane cables c. SAS backplane d. (Trained service technician only) I/O board 56 IBM System x3755 Types 8877 and 7163: Installation Guide - IBM x3755 | Installation Guide - Page 69
problem is solved. v See the parts listing in the Problem Determination and Service Guide specifications" on page 4). 6. If one of the microprocessors indicates "hot," remove ac power before restoring dc power. BRD An error has occurred on the I/O board. 1. See the BMC log or the system-error - IBM x3755 | Installation Guide - Page 70
58 IBM System x3755 Types 8877 and 7163: Installation Guide - IBM x3755 | Installation Guide - Page 71
v Use the troubleshooting information in your system documentation, and use the diagnostic tools that come with your system. Information about diagnostic tools is in the Problem Determination and Service Guide on the IBM Documentation CD that comes with your system. v Go to the IBM support Web site - IBM x3755 | Installation Guide - Page 72
U.K., these services are available Monday through Friday, from 9 a.m. to 6 p.m. IBM Taiwan product service IBM Taiwan product service contact information: IBM Taiwan Corporation 3F, No 7, Song Ren Rd. Taipei, Taiwan Telephone: 0800-016-888 60 IBM System x3755 Types 8877 and 7163: Installation Guide - IBM x3755 | Installation Guide - Page 73
of any non-IBM product, program, or service. IBM may have patents inaccuracies or typographical errors. Changes are IBM may use or distribute any of the information you supply in any way it believes appropriate without incurring any obligation to you. Trademarks IBM, the IBM logo, and ibm - IBM x3755 | Installation Guide - Page 74
purpose. These products are offered and warranted solely by third parties. IBM makes no representations or warranties with respect to non-IBM products. Support (if any) for the non-IBM products is provided by the third party, not IBM. 62 IBM System x3755 Types 8877 and 7163: Installation Guide - IBM x3755 | Installation Guide - Page 75
manuals server to malfunction or cease functioning altogether. This specification control systems: Airborne IBM encourages owners of information technology (IT) equipment to responsibly recycle their equipment when it is no longer needed. IBM offers a variety of product return programs and services - IBM x3755 | Installation Guide - Page 76
, recycling, and recovery of WEEE. Customer participation is important to minimize any potential effects of EEE on the environment and human health due to 64 IBM System x3755 Types 8877 and 7163: Installation Guide - IBM x3755 | Installation Guide - Page 77
collection and treatment, contact your local IBM representative. Battery return program This product may contain a sealed lead acid, nickel cadmium, nickel metal hydride, lithium, or lithium ion battery. Consult your user manual or service manual for specific battery information. The battery must be - IBM x3755 | Installation Guide - Page 78
be sure to include the publication part number and title. When you send information to IBM, you grant IBM a nonexclusive right to use or distribute the information in any way it believes appropriate without incurring any obligation to you. 66 IBM System x3755 Types 8877 and 7163: Installation Guide - IBM x3755 | Installation Guide - Page 79
installed and used in accordance with the instruction manual, may cause harmful interference to radio communications used in order to meet FCC emission limits. IBM is not responsible for any radio or television indirect connection to public telecommunication systems in the United Kingdom. European - IBM x3755 | Installation Guide - Page 80
which case the user may be required to take adequate measures. European Community contact: IBM Technical Regulations Pascalstr. 100, Stuttgart, Germany 70569 Telephone: 0049 (0)711 785 1176 Fax Maßnahmen zu ergreifen und dafür aufzukommen." 68 IBM System x3755 Types 8877 and 7163: Installation Guide - IBM x3755 | Installation Guide - Page 81
mit dem Deutschen EMVG das EG-Konformitätszeichen - CE - zu führen. Verantwortlich für die Konformitätserklärung des EMVG ist die IBM Deutschland GmbH, 70548 Stuttgart. Generelle Informationen: Das Gerät erfüllt die Schutzanforderungen nach EN 55024 und EN 55022 Klasse A. People's Republic - IBM x3755 | Installation Guide - Page 82
70 IBM System x3755 Types 8877 and 7163: Installation Guide - IBM x3755 | Installation Guide - Page 83
features 4 filler panel, hard disk drive bay 10 firmware updates 1 Fixed Disk Test 41 G gaseous contamination 63 getting help 59 Gigabit Ethernet connector 25 H hard disk drive diagnostic tests, types of 41 problems 41 status LED 24 hardware service and support 60 heat output 4 help, getting 59 hot - IBM x3755 | Installation Guide - Page 84
ServerGuide CD 1 service processor user interface 34 size 4 slots 4 software problems 51 software service and support 60 solving problems 37 specifications 4 Standby mode 26 statements and notices 3 support, web site 59 system-error LED 24 72 IBM System x3755 Types 8877 and 7163: Installation Guide - IBM x3755 | Installation Guide - Page 85
61 troubleshooting chart 40 turning off the server 26 turning on the server 26 U United States electronic emission Class A notice 67 United States FCC Class A notice 67 Universal Serial Bus (USB) problems 52 USB connector 24, 25 user interface, service processor 34 utility program Configuration - IBM x3755 | Installation Guide - Page 86
74 IBM System x3755 Types 8877 and 7163: Installation Guide - IBM x3755 | Installation Guide - Page 87
- IBM x3755 | Installation Guide - Page 88
Part Number: 49Y1730 Printed in USA (1P) P/N: 49Y1730
-
 1
1 -
 2
2 -
 3
3 -
 4
4 -
 5
5 -
 6
6 -
 7
7 -
8
-
9
-
10
-
11
-
12
-
13
-
14
-
15
-
16
-
17
-
18
-
19
-
20
-
21
-
22
-
23
-
24
-
25
-
26
-
27
-
28
-
29
-
30
-
31
-
32
-
33
-
34
-
35
-
36
-
37
-
38
-
39
-
40
-
41
-
42
-
43
-
44
-
45
-
46
-
47
-
48
-
49
-
50
-
51
-
52
-
53
-
54
-
55
-
56
-
57
-
58
-
59
-
60
-
61
-
62
-
63
-
64
-
65
-
66
-
67
-
68
-
69
-
70
-
71
-
72
-
73
-
74
-
75
-
76
-
77
-
78
-
79
-
80
-
81
-
82
-
83
-
84
-
85
-
86
-
87
-
88
 |
 |

Welcome.
Thank you for buying an
IBM server.
This server
contains information for setting
up and configuring your server.
For detailed information about
your server, view the publications
on the
You can also find the most
current information about
your server at http://www.ibm.com/
support/
.
Your server
is based on the X-Architecture
technology, and it features
superior performance, availability,
and affordability.
Documentation CD.
Installation Guide
servers/eserver/support/
xseries/index.html
Installation Guide
System x3755
Types 8877 and 7163
Turn off the server
and install options.
Did the server
start correctly?
Yes
No
Go to the Server Support
flow chart on the reverse
side of this page.
Start the server.
Did the server
start correctly?
Yes
No
Install the server in the rack cabinet
and cable the server and options;
then, restart the server.
Was the
server setup
completed?
Use
ServerGuide to
install the operating
system?
The server is ready to use.
Go to
to register the server.
Go to the Web for instructions:
servers/eserver/support/
xseries/index.html
No
Yes
Yes
No
Use the IBM
ServerGuide
program
to set up and
configure hardware.
Go to the Server Support
flow chart on the reverse
side of this page.
Install applications,
such as IBM systems
management software
and IBM ServeRAID
programs