IBM x3755 Installation Guide - Page 31
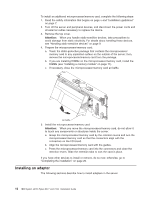
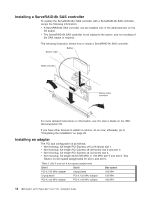
Non-hot-plug, half-length HyperTransport HTX slot.
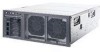 |
View all IBM x3755 manuals
Add to My Manuals
Save this manual to your list of manuals |
Page 31 highlights
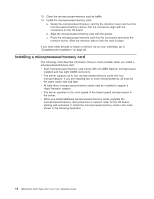
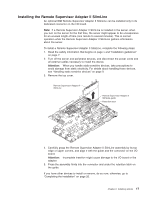
v Non-hot-plug, half-length HyperTransport (HTX) slot. Note: At least three microprocessor/memory cards must be installed to support a HyperTransport adapter. To install an adapter, complete the following steps: 1. Read the safety information that begins on page v and "Installation guidelines" on page 7. 2. Turn off the server and peripheral devices, and disconnect the power cords and all external cables necessary to install the device. Attention: When you handle static-sensitive devices, take precautions to avoid damage from static electricity. For details about handling these devices, see "Handling static-sensitive devices" on page 9. 3. Remove the top cover. 4. Determine which PCI expansion slot you will use for the adapter. Pin Pin hole Adapter retention bar Adapter retention latch 5. See the documentation that comes with the adapter for instructions for setting jumpers or switches and for cabling. Note: Route adapter cables before you install the adapter. 6. Install the adapter: a. Open the adapter retention latch by lifting the front edge. b. Remove the expansion-slot cover. c. Lift up on the adapter retention bar. d. Carefully grasp the adapter by its top edge or upper corners, and align it with the connector on the I/O board. e. If necessary, remove the adapter guide before you install a full-length adapter. f. Press the adapter firmly into the adapter connector. g. Replace the adapter retention bar to stabilize the adapter. h. Close the adapter retention latch. Be sure to align the pin on the latch with the matching hole in the chassis. 7. Connect any required cables to the adapter. Chapter 2. Installing options 19
-
 1
1 -
2
-
3
-
4
-
5
-
6
-
7
-
8
-
9
-
10
-
11
-
12
-
13
-
14
-
15
-
16
-
17
-
18
-
19
-
20
-
21
-
22
-
23
-
24
-
25
-
 26
26 -
 27
27 -
 28
28 -
 29
29 -
 30
30 -
 31
31 -
 32
32 -
 33
33 -
 34
34 -
 35
35 -
 36
36 -
37
-
38
-
39
-
40
-
41
-
42
-
43
-
44
-
45
-
46
-
47
-
48
-
49
-
50
-
51
-
52
-
53
-
54
-
55
-
56
-
57
-
58
-
59
-
60
-
61
-
62
-
63
-
64
-
65
-
66
-
67
-
68
-
69
-
70
-
71
-
72
-
73
-
74
-
75
-
76
-
77
-
78
-
79
-
80
-
81
-
82
-
83
-
84
-
85
-
86
-
87
-
88
 |
 |
