Insignia NS-BK2TBK8 User Guide - Page 20
Replacing kegs, Replacing the CO2 tank, Storing your kegerator
 |
View all Insignia NS-BK2TBK8 manuals
Add to My Manuals
Save this manual to your list of manuals |
Page 20 highlights
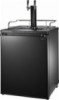
NS-BK2TBS8/NS-BK2TBK8 Replacing kegs 1 Unplug your kegerator from the wall outlet to turn it off. 2 Close the main valve on the CO2 tank. 3 Close the shut-off valve on the CO2 regulator. 4 Pull the black handle on the keg coupler and press it upward to close the connection between the beer keg and the keg coupler. 5 Pull on the tap handle(s) to help drain beer from the lines. 6 Disconnect the beer line and CO2 gas line from the keg coupler. 7 Put the beer line in a bucket to drain the remaining beer from the line. 8 Remove the beer keg(s). 9 Remove the keg coupler(s) from the keg(s). 10 Follow the steps in "Installing the keg coupler" on page 14 to insert a new keg. Replacing the CO2 tank 1 Unplug your kegerator from the wall outlet to turn it off. 2 Close the main valve on the CO2 tank. 3 Close the shut-off valve on the CO2 regulator. 4 Disconnect the CO2 gas line from the keg coupler. 5 Remove the CO2 tank. 6 Follow the steps in "Installing the CO2 regulator and tank" on page 12 to insert a new tank. Storing your kegerator If you will be away from your kegerator for more than three weeks: 1 Unplug your kegerator from the wall outlet to turn it off. 2 Remove all kegs and all beverages. 3 Clean and dry the interior of the kegerator. 4 Leave the door open slightly to avoid possible formation of condensation, mold, or odor. Caution Use extreme caution with children. The unit should not be accessible to child's play. 20 www.insigniaproducts.com
-
 1
1 -
2
-
3
-
4
-
5
-
6
-
7
-
8
-
9
-
10
-
11
-
12
-
13
-
14
-
 15
15 -
 16
16 -
 17
17 -
 18
18 -
 19
19 -
 20
20 -
 21
21 -
 22
22 -
 23
23 -
 24
24 -
 25
25 -
26
-
27
 |
 |
