Insignia NS-TDRG75W1 User Guide - Page 23
Step 3: Connect the exhaust ducting, Important, Clean all old ducts before
 |
View all Insignia NS-TDRG75W1 manuals
Add to My Manuals
Save this manual to your list of manuals |
Page 23 highlights
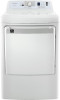
INSTALLATION INSTRUCTIONS 10-Cycle Electric and Gas Dryers Step 3: Connect the exhaust ducting Important: Before you connect the exhaust ducting, review ducting requirements in Duct requirements on page 16. WARNING: • Make sure that your dryer is installed properly so it exhausts air easily. Dryer Wall Duct exhaust • Keep ducts as straight as possible. • Use a 4 in. (10.2 cm) diameter rigid or semi-rigid metal duct. Tape all joints, including at the dryer. 4" Wall Duct • DO NOT use sheet metal screws that can accumulate lint when assembling the ducting. Joints should be taped. • DO NOT let the duct tape cover the ventilation slots on the back of your dryer. • Clean all old ducts before installing your new dryer. Be sure the vent flap opens and closes freely. Inspect and clean the exhaust system annually. • DO NOT restrict your dryer with a poor exhaust system. • DO NOT use unnecessarily long ducts that have many elbows. • DO NOT use a plastic, thin foil, or non-metal flexible duct. • DO NOT use plastic flexible exhaust material. • DO NOT use dented or clogged ducts and vent. www.insigniaproducts.com 23
-
 1
1 -
2
-
3
-
4
-
5
-
6
-
7
-
8
-
9
-
10
-
11
-
12
-
13
-
14
-
15
-
16
-
17
-
 18
18 -
 19
19 -
 20
20 -
 21
21 -
 22
22 -
 23
23 -
 24
24 -
 25
25 -
 26
26 -
 27
27 -
 28
28 -
29
-
30
-
31
-
32
-
33
-
34
-
35
-
36
-
37
-
38
-
39
-
40
-
41
-
42
-
43
-
44
 |
 |
