Insignia NS-TDRG75W1 User Guide - Page 28
If you don't have a putty knife, you can use a flathead screwdriver.
 |
View all Insignia NS-TDRG75W1 manuals
Add to My Manuals
Save this manual to your list of manuals |
Page 28 highlights
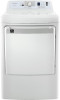
INSTALLATION INSTRUCTIONS 6 Remove the remaining 14 screws that secure the inside door cover to your dryer door. Dryer door Door latch 7 To remove the inside door cover, insert a putty knife next to each of the five tabs (three at the top and two at the bottom) and pry the cover off. Note: If you don't have a putty knife, you can use a flathead screwdriver. Be careful: a screwdriver may scratch your dryer door. Consider wrapping your screwdriver with a thin cloth. Tabs 28 www.insigniaproducts.com
-
 1
1 -
2
-
3
-
4
-
5
-
6
-
7
-
8
-
9
-
10
-
11
-
12
-
13
-
14
-
15
-
16
-
17
-
18
-
19
-
20
-
21
-
22
-
 23
23 -
 24
24 -
 25
25 -
 26
26 -
 27
27 -
 28
28 -
 29
29 -
 30
30 -
 31
31 -
 32
32 -
 33
33 -
34
-
35
-
36
-
37
-
38
-
39
-
40
-
41
-
42
-
43
-
44
 |
 |

28
www.insigniaproducts.com
INSTALLATION INSTRUCTIONS
6
Remove the remaining 14 screws that secure the inside door cover to your
dryer door.
7
To remove the inside door cover, insert a putty knife next to each of the five
tabs (three at the top and two at the bottom) and pry the cover off.
Note
: If you don’t have a putty knife, you can use a flathead screwdriver. Be
careful: a screwdriver may scratch your dryer door. Consider wrapping your
screwdriver with a thin cloth.
Dryer door
Door latch
Tabs