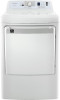
Insignia NS-TDRG75W1 User Guide - Page 24
We recommend that, you have a professional install the exhaust hood., Step 4: Level your dryer
 |
View all Insignia NS-TDRG75W1 manuals
Add to My Manuals
Save this manual to your list of manuals |
Page 24 highlights
INSTALLATION INSTRUCTIONS 1 Make sure that the exhaust hood flapper or louvers move freely. If you do not have an exhaust hood installed, see Exhaust hood types on page 16 for information about recommended hood types. We recommend that you have a professional install the exhaust hood. 2 Connect one end of the exhaust ducting to your dryer, then use duct tape to secure the ducting to your dryer. The crimped ends of the duct sections must point away from your dryer. Use a 4 in. (10.2 cm) diameter rigid metal duct. 3 Connect the other end of the ducting to the exhaust hood. Tape all joints, including at the dryer. Step 4: Level your dryer • If your dryer is not level, carefully tilt your dryer just enough to adjust the leveling feet on the bottom of your dryer. Extend the feet only as much as is necessary. If the feet are extended too much, your dryer may vibrate. Level Loosen Tighten Adjustable leg Step 5: Connect the power cord (U.S. models only) Important: Before you connect the power cord, review the electric requirements in Electric requirements on page 17. Before testing or operating your dryer, make sure that your dryer is grounded. See Grounding requirements on page 20. • Determine whether your electric outlet is a three-wire or four-wire outlet. See Power outlet types on page 18. 24 www.insigniaproducts.com
-
 1
1 -
2
-
3
-
4
-
5
-
6
-
7
-
8
-
9
-
10
-
11
-
12
-
13
-
14
-
15
-
16
-
17
-
18
-
 19
19 -
 20
20 -
 21
21 -
 22
22 -
 23
23 -
 24
24 -
 25
25 -
 26
26 -
 27
27 -
 28
28 -
 29
29 -
30
-
31
-
32
-
33
-
34
-
35
-
36
-
37
-
38
-
39
-
40
-
41
-
42
-
43
-
44
 |
 |
