Intel DG41MJ Product Guide - Page 35
Removing DIMMs, Using the Serial ATA (SATA) Cables
 |
UPC - 735858206907
View all Intel DG41MJ manuals
Add to My Manuals
Save this manual to your list of manuals |
Page 35 highlights
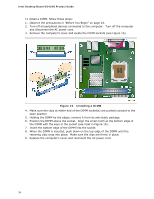
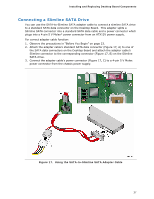
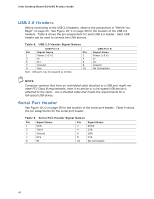
Installing and Replacing Desktop Board Components Removing DIMMs To remove a DIMM, follow these steps: 1. Observe the precautions in "Before You Begin" on page 23. 2. Turn off all peripheral devices connected to the computer. Turn off the computer. 3. Remove the AC power cord from the computer. 4. Remove the computer's cover. 5. Gently spread the retaining clips at each end of the DIMM socket. The DIMM pops out of the socket. 6. Hold the DIMM by the edges, lift it away from the socket, and store it in an anti-static package. 7. Reinstall and reconnect any parts you removed or disconnected to reach the DIMM sockets. 8. Replace the computer's cover and reconnect the AC power cord. Using the Serial ATA (SATA) Cables Two SATA cables are provided with the Desktop Board: • a standard SATA data cable • a SATA-to-Slimline SATA adapter cable (with power) that allows you to connect a Slimline SATA drive to the board Each cable can be used to connect a single internal SATA drive to the Desktop Board. 35
-
 1
1 -
2
-
3
-
4
-
5
-
6
-
7
-
8
-
9
-
10
-
11
-
12
-
13
-
14
-
15
-
16
-
17
-
18
-
19
-
20
-
21
-
22
-
23
-
24
-
25
-
26
-
27
-
28
-
29
-
 30
30 -
 31
31 -
 32
32 -
 33
33 -
 34
34 -
 35
35 -
 36
36 -
 37
37 -
 38
38 -
 39
39 -
 40
40 -
41
-
42
-
43
-
44
-
45
-
46
-
47
-
48
-
49
-
50
-
51
-
52
-
53
-
54
-
55
-
56
-
57
-
58
-
59
-
60
-
61
-
62
-
63
-
64
-
65
-
66
-
67
-
68
 |
 |
