Invacare SPT Owners Manual - Page 42
Installing/Removing T-Arms, Installing T-Arms, Removing T-Arms
 |
View all Invacare SPT manuals
Add to My Manuals
Save this manual to your list of manuals |
Page 42 highlights
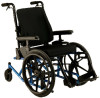
SECTION 5-ARMS 2. Replace the existing clothing guard with the new clothing guard and securely tighten with the existing hardware. 3. Repeat STEPS 1-2 for the opposite side if necessary. Installing/Removing T-Arms NOTE: For this procedure, refer to FIGURE 5.3. Installing T-Arms 1. Position the T-Arm over the T-Arm socket on the wheelchair frame. NOTE: Make sure the locking lever is towards the front of the wheelchair. 2. Slide T-Arm into T-Arm socket until the locking lever is in the slot in the T-Arm socket and an audible "click" is heard. 3. Pull up on T-Arm to make sure T-Arm is locked in place. NOTE: If the T-Arm does not slide in the T-Arm socket as desired, adjust the T-Arm socket. Refer to Adjusting T-Arm Sockets on page 45. 4. Adjust the T-Arm for desired height, width and depth, if necessary. Refer to Adjusting The T-Arms on page 43. 5. Repeat STEPS 1-4 for opposite side of wheelchair. Removing T-Arms 1. Press the locking lever in and lift the T-Arm straight up and out of the T-Arm socket. NOTE: If the T-Arm does not slide up and down in the T-Arm socket as desired, adjust the T-Arm socket. Refer to Adjusting T-Arm Sockets on page 45. 2. Repeat STEP 1 for opposite side of the wheelchair. Wheelchair Frame T-Arm Socket T-Arm Locking Lever (towards the front of the wheelchair) Slot FIGURE 5.3 Installing/Removing T-Arms Compass™SPT™ 42 Part No 1122134
-
 1
1 -
2
-
3
-
4
-
5
-
6
-
7
-
8
-
9
-
10
-
11
-
12
-
13
-
14
-
15
-
16
-
17
-
18
-
19
-
20
-
21
-
22
-
23
-
24
-
25
-
26
-
27
-
28
-
29
-
30
-
31
-
32
-
33
-
34
-
35
-
36
-
 37
37 -
 38
38 -
 39
39 -
 40
40 -
 41
41 -
 42
42 -
 43
43 -
 44
44 -
 45
45 -
 46
46 -
 47
47 -
48
-
49
-
50
-
51
-
52
-
53
-
54
-
55
-
56
-
57
-
58
-
59
-
60
-
61
-
62
-
63
-
64
 |
 |
