Invacare SPT Owners Manual - Page 52
Installing/Replacing Chest Positioning Straps, Installing, Replacing
 |
View all Invacare SPT manuals
Add to My Manuals
Save this manual to your list of manuals |
Page 52 highlights
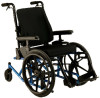
SECTION 6-BACK/SEAT Installing/Replacing Chest Positioning Straps NOTE: For this procedure, refer to FIGURE 6.6. Installing 1. Position the chest positioning strap to one of the holes on the back cane. NOTE: The standard recommended position for the chest positioning strap is in the top hole of the back cane, but may be mounted according to the userʹs needs. 2. Secure the chest positioning strap to the back canes with the new/existing hex screw and locknut (FIGURE 6.6). 3. Repeat STEPS 1-2 for opposite side. Replacing 1. Remove the hex screw that secures the chest positioning strap to the back cane. 2. Discard existing chest positioning strap. 3. Repeat STEPS 1-2 for opposite side, if necessary. 4. Install the new chest positioning strap. Refer to Installing/Replacing Chest Positioning Straps on page 52. Back Cane Hex Screw Locknut Chest Positioning Strap FIGURE 6.6 Installing/Replacing Chest Positioning Straps Compass™SPT™ 52 Part No 1122134
-
 1
1 -
2
-
3
-
4
-
5
-
6
-
7
-
8
-
9
-
10
-
11
-
12
-
13
-
14
-
15
-
16
-
17
-
18
-
19
-
20
-
21
-
22
-
23
-
24
-
25
-
26
-
27
-
28
-
29
-
30
-
31
-
32
-
33
-
34
-
35
-
36
-
37
-
38
-
39
-
40
-
41
-
42
-
43
-
44
-
45
-
46
-
 47
47 -
 48
48 -
 49
49 -
 50
50 -
 51
51 -
 52
52 -
 53
53 -
 54
54 -
 55
55 -
 56
56 -
 57
57 -
58
-
59
-
60
-
61
-
62
-
63
-
64
 |
 |
