Invacare TDXSP Owners Manual 4 - Page 41
SETUP/MAINTENANCE, Part No 1143195, Invacare® Van Seat
 |
View all Invacare TDXSP manuals
Add to My Manuals
Save this manual to your list of manuals |
Page 41 highlights
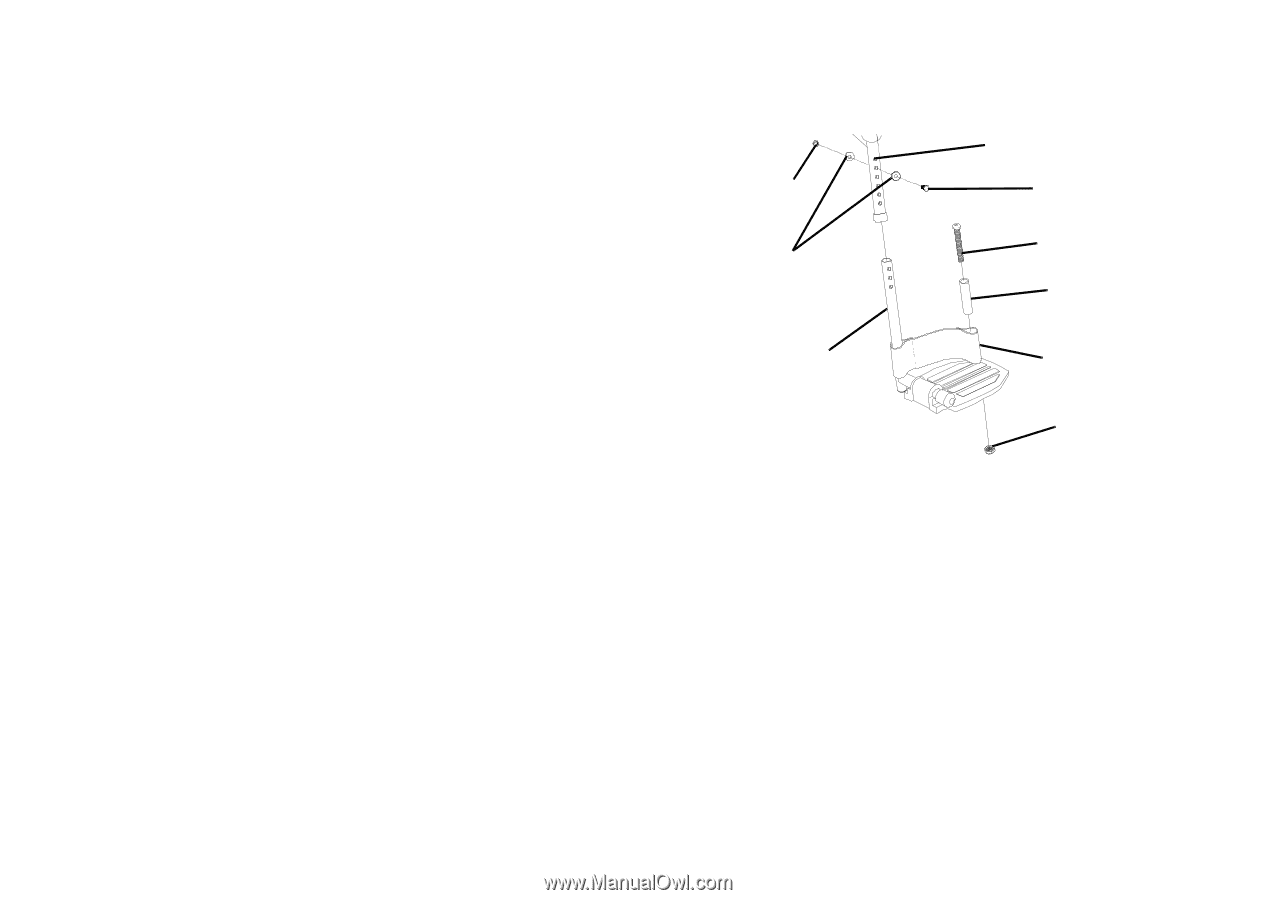
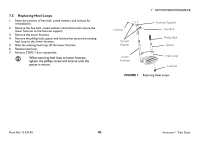
7.5 Replacing Heel Loops 1. Note the position of hex bolt, coved washers and locknut for reinstallation. 2. Remove the hex bolt, coved washers and locknut that secure the lower footrest to the footrest support. 3. Remove the lower footrest. 4. Remove the phillips bolt, spacer and locknut that secure the existing heel loop to the lower footrest. 5. Slide the existing heel loop off the lower footrest. 6. Replace heel loop. 7. Reverse STEPS 1-6 to reassemble. When securing heel loop to lower footrest, tighten the phillips screw and locknut until the spacer is secure. 7 SETUP/MAINTENANCE Locknut Coved Washer Footrest Support Hex Bolt Phillips Bolt Spacer Lower Footrest Heel Loop Locknut FIGURE 1 Replacing Heel Loops Part No 1143195 41 Invacare® Van Seat
-
 1
1 -
2
-
3
-
4
-
5
-
6
-
7
-
8
-
9
-
10
-
11
-
12
-
13
-
14
-
15
-
16
-
17
-
18
-
19
-
20
-
21
-
22
-
23
-
24
-
25
-
26
-
27
-
28
-
29
-
30
-
31
-
32
-
33
-
34
-
35
-
 36
36 -
 37
37 -
 38
38 -
 39
39 -
 40
40 -
 41
41 -
 42
42 -
 43
43 -
 44
44
 |
 |