JVC GV-LS2W Detailed User Guide - Page 20
Changing the Connection Destination
 |
View all JVC GV-LS2W manuals
Add to My Manuals
Save this manual to your list of manuals |
Page 20 highlights
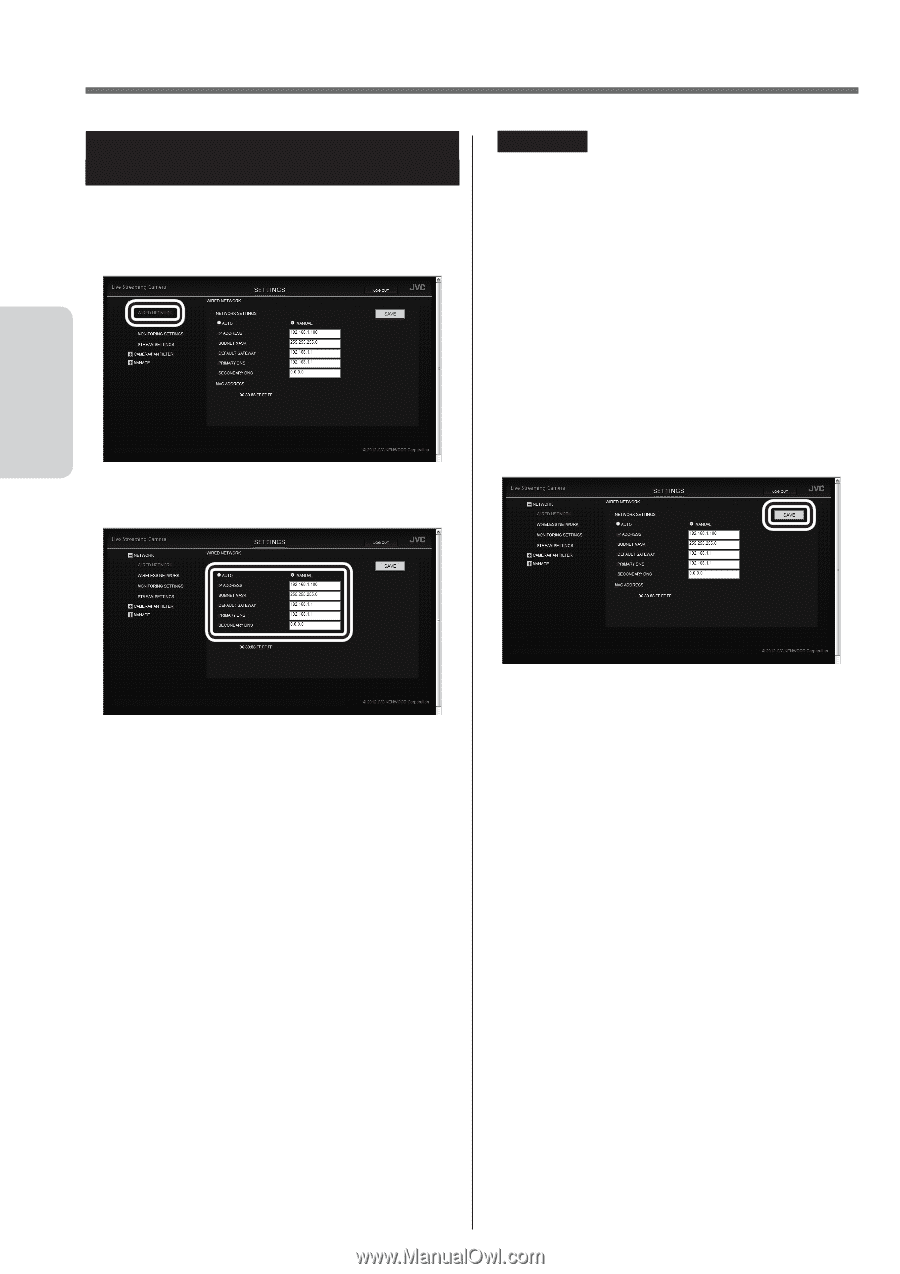
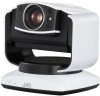
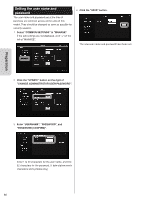
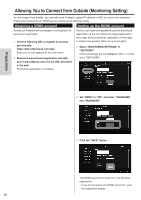
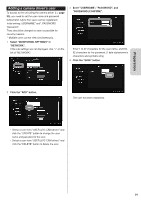
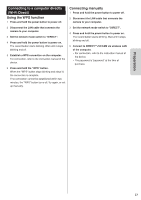
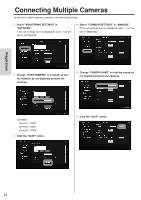
Changing the Connection Destination If necessary, change the connection destination to the access point (wireless LAN router). Establishing a wired connection to the access point 1 Select "WIRED NETWORK" in "NETWORK". If the sub settings are not displayed, click "+" on the left of "NETWORK". CAUTION • For how to set the access point, refer to the instruction manual, etc. of the access point. • When multiple cameras are set up in the same network, assign different IP addresses so that they do not duplicate each other. • If the network setting is set to "AUTO", the camera's IP address is assigned automatically by the access point. For values to be assigned, refer to the setting screen, etc. of the access point. • If the IP address of the unit is unknown, confirm the displayed information of the PC application, Android application or iOS application. 3 Click the "SAVE" button to save the settings. 2 Configure the following settings: Preparation • IP ADDRESS First three values separated by dot (.): Same as those of the access point Last value: Different from that of the access point within the range of 1 to 254 (Example) If the access point is 192.168.1.1, set 192.168.1.2. • SUBNET MASK Same as the access point (Example) 255.255.255.0 • DEFAULT GATEWAY Same as the IP address of the access point (Example) 192.168.1.1 • PRIMARY DNS Same as the IP address of the access point (Example) 192.168.1.1 • SECONDARY DNS Blank The settings to be configured on a browser have been complete. Close the browser, and shutdown the computer. 4 Press and hold the power button to power off. 5 Connect the camera to the LAN port of the access point via the LAN cable. ( ➭ page 27) 6 Set the network mode switch to "LAN(OFF)". 7 Press and hold the power button to power on. When the "WPS" button stops blinking and stays lit, the connection is complete. 20
-
 1
1 -
2
-
3
-
4
-
5
-
6
-
7
-
8
-
9
-
10
-
11
-
12
-
13
-
14
-
 15
15 -
 16
16 -
 17
17 -
 18
18 -
 19
19 -
 20
20 -
 21
21 -
 22
22 -
 23
23 -
 24
24 -
 25
25 -
26
-
27
-
28
-
29
-
30
-
31
-
32
-
33
-
34
-
35
-
36
-
37
-
38
-
39
-
40
-
41
-
42
-
43
-
44
-
45
-
46
-
47
-
48
-
49
-
50
-
51
-
52
-
53
-
54
-
55
-
56
-
57
-
58
-
59
-
60
 |
 |