JVC GV-LS2W Detailed User Guide - Page 22
Connecting manually
 |
View all JVC GV-LS2W manuals
Add to My Manuals
Save this manual to your list of manuals |
Page 22 highlights
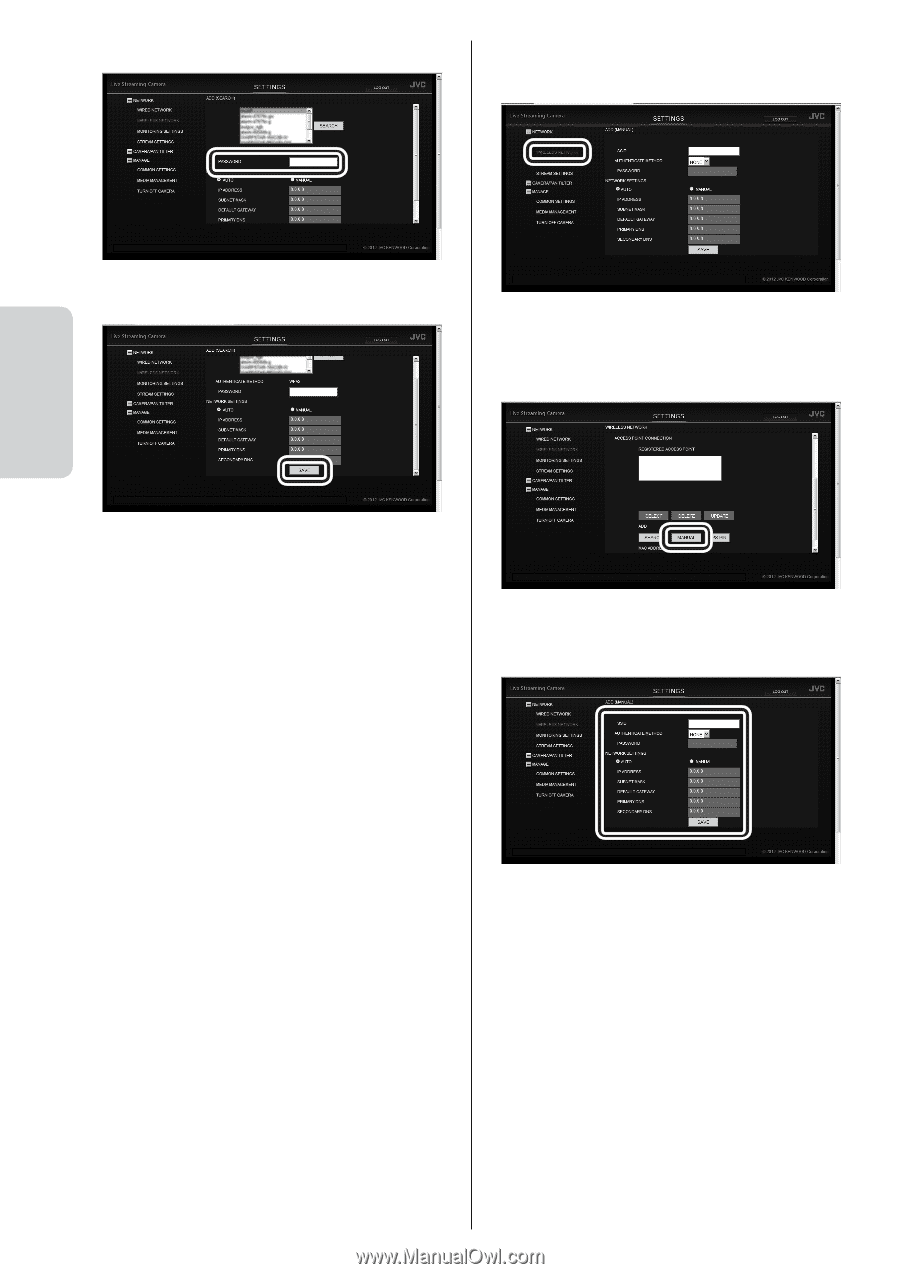
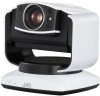
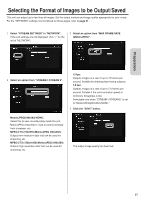
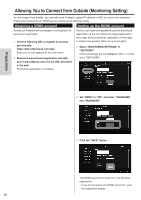
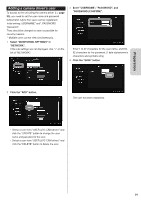
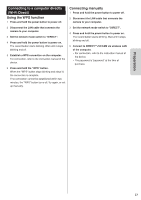
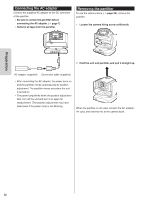
4 Enter "PASSWORD". Connecting manually 1 Select "WIRELESS NETWORK" in "NETWORK". Preparation 5 Click the "SAVE" button. If the sub settings are not displayed, click "+" on the left of "NETWORK". 2 Click the "MANUAL" button. The settings to be configured on a browser have been complete. Close the browser, and shutdown the computer. 6 Press and hold the power button to power off. 7 Disconnect the LAN cable that connects the camera to your computer. 8 Set the network mode switch to "WLAN". 9 Press and hold the power button to power on. When the "WPS" button stops blinking and stays lit, the connection is complete. 3 Enter the information, and click the "SAVE" button. The settings to be configured on a browser have been complete. Close the browser, and shutdown the computer. 4 Press and hold the power button to power off, and disconnect the LAN cable that connects the camera to your computer. 5 Set the network mode switch to "WLAN". 6 Press and hold the power button to power on. When the "WPS" button stops blinking and stays lit, the connection is complete. 22
-
 1
1 -
2
-
3
-
4
-
5
-
6
-
7
-
8
-
9
-
10
-
11
-
12
-
13
-
14
-
15
-
16
-
 17
17 -
 18
18 -
 19
19 -
 20
20 -
 21
21 -
 22
22 -
 23
23 -
 24
24 -
 25
25 -
 26
26 -
 27
27 -
28
-
29
-
30
-
31
-
32
-
33
-
34
-
35
-
36
-
37
-
38
-
39
-
40
-
41
-
42
-
43
-
44
-
45
-
46
-
47
-
48
-
49
-
50
-
51
-
52
-
53
-
54
-
55
-
56
-
57
-
58
-
59
-
60
 |
 |