JVC GY-HM150U GY-HM150U ProHD Camcorder 104-page owner's manual - Page 17
Grip Belt Side, ADJ./VOL.] Adjustment/Volume knob
 |
View all JVC GY-HM150U manuals
Add to My Manuals
Save this manual to your list of manuals |
Page 17 highlights
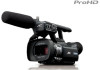
Ⅵ Rear Ⅵ Grip Belt Side SR M A B OIS OPEN SHUTTER AE ʶ CLOSE ACCESS CAM MEDIA REC L K ADJ./ VOL. PUSH DC C D EF GHI J NO REMOTE PQ Ⅵ Rear A [OIS] Optical Image Stabilizer button (A Page 37) For switching the image stabilizer feature ON or OFF. B [SHUTTER] Shutter Speed button (A Page 35) Press this button to set the shutter speed manually. C [AE±] Exposure button (A Page 31) Press this button to set the exposure manually. D [ADJ./VOL.] Adjustment/Volume knob [ADJ.] [VOL.] : For adjusting the shutter speed (A Page 35) and exposure (A Page 31). : Also for adjusting the volume of a headphone and the built-in speaker. (A Page 39) E Battery mount (A Page 16) F [HDMI] terminal (A Page 91) G [ ] USB terminal (A Page 90) H [DC] input terminal I Battery lock release button (A Page 16) J [REC] Record trigger button (A Page 27) For starting or stopping recording. K [MEDIA] Media mode indicating lamp (A Page 25) Lights up in red during the Media mode. L [CAM] Camera mode indicating lamp (A Page 25) Lights up in red during the Camera mode. Memo : ● During the USB mode, both the [MEDIA] indicating lamp K and [CAM] indicating lamp L go out. M [ACCESS] Access indicating lamp Lights up or blinks during recording or playback. Ⅵ Grip Belt Side N [STANDBY/ON OFF]/[CAM/MEDIA] Power/Operation mode selection switch STANDBY/ON OFF : Turns the power On/Off. (A Page 17) CAM/MEDIA : Sets this camera recorder to the Camera or Media mode. Memo : ● To switch to the Media mode, fix the switch at the [CAM/ MEDIA] position for 1 second or longer. O Grip belt mount (A Page 15) P [ ] Headphone jack (A Page 39) Q [REMOTE] Remote terminal (A Page 91) For connecting a separately sold wired remote control. R [INPUT1] Audio input 1 terminal (A Page 38) For connecting an XLR microphone. S [INPUT2] Audio input 2 terminal (A Page 38) For connecting an XLR microphone. 13
-
 1
1 -
2
-
3
-
4
-
5
-
6
-
7
-
8
-
9
-
10
-
11
-
 12
12 -
 13
13 -
 14
14 -
 15
15 -
 16
16 -
 17
17 -
 18
18 -
 19
19 -
 20
20 -
 21
21 -
 22
22 -
23
-
24
-
25
-
26
-
27
-
28
-
29
-
30
-
31
-
32
-
33
-
34
-
35
-
36
-
37
-
38
-
39
-
40
-
41
-
42
-
43
-
44
-
45
-
46
-
47
-
48
-
49
-
50
-
51
-
52
-
53
-
54
-
55
-
56
-
57
-
58
-
59
-
60
-
61
-
62
-
63
-
64
-
65
-
66
-
67
-
68
-
69
-
70
-
71
-
72
-
73
-
74
-
75
-
76
-
77
-
78
-
79
-
80
-
81
-
82
-
83
-
84
-
85
-
86
-
87
-
88
-
89
-
90
-
91
-
92
-
93
-
94
-
95
-
96
-
97
-
98
-
99
-
100
-
101
-
102
-
103
-
104
 |
 |
