JVC TKC215V12U Instructions - Page 4

Contents, Operating Precautions

Page 4 highlights

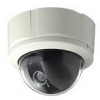
Introduction (continued) Contents Introduction Safety Precautions 2 Characteristics 5 Contents 6 Operating Precautions 7 Name of Parts 8 Camera 8 Camera (Interior 9 Setting the Lens and Switches (TK-C215V4 10 Setting the Lens and Switches (TK-C215V12 12 Setting the Lens and Switches (TK-C210FW 14 Installation and connection About Connection Cables 14 Video signal cables 14 Installing the Ferrite core (TK-C210FW only 14 DC 12 V or AC 24 V power supply cable 15 Electrical Specifications of Alarm Input Terminals 15 System diagram 16 Mounting the Camera to the Ceiling 17 Getting Started 17 Selecting a mounting method 17 Embedding the camera to the ceiling ........ 18 When mounting the camera directly to the ceiling or on the wall 20 When mounting the camera to the electrical box 22 Mount by allowing the cable to exit from the side 22 Adjusting Image Adjusting Images 23 Mounting the test monitor 23 Adjusting the camera direction 23 Adjusting the field angle/focus/ brightness 24 Mounting the Dome Cover 26 White-spot correction 27 Others Specifications 28 6 Operating Precautions ⅷ To save energy, when it is not being used turn the system's power off. ⅷ This camera has been designed for indoor use. It cannot be used outdoors. ⅷ Do not install or use the camera in the following places. ● In a place exposed to rain or moisture. ● In a place with vapor or oil soot, for example in a kitchen. ● In a temperature outside the operating temperature range (-10 f to 50 f). ● Near a source of radiation, X-rays, strong radio waves or magnetism. ● In a place where corrosive gasses are generated. ● In a place subject to vibration. ● In a place with excessive dirt. ● In an environment where there is cold air or near the air outlet of an air conditioner. ⅷ If this camera and the cables connected to this camera are used where there are strong electromagnetic waves or where there is magnetism present, for example near a radio or TV transmitter, power transformer or an electric motor, the picture may produce noise and the colors may be affected. ⅷ This camera incorporates an AGC circuit. As a result, when it is used under low light conditions, the camera sensitivity is automatically boosted and the picture may look uneven. This is not a malfunction however. ⅷ When this camera is used in the ATW mode, the recorded colors may be slightly different from the actual colors due to the operational principles of the auto-tracking white balance circuit. This is however not a malfunction. ⅷ If a high-intensity object (such as a lamp) is shot, the image on the screen may have vertical lines (smear) or blur (blooming) at its periphery. This is a characteristic of the CCD, and is not a defect. ⅷ Observe the following when carrying out camera maintenance. ⅷ Turn the power OFF before proceeding to carry out maintenance. ⅷ Clean the dome cover lens using a lens wiper cloth (or a tissue). If it is contaminated seriously, clean the contaminated part with a cloth (or a tissue) which has been soaked in a solution of water and a neutral detergent. ⅷ If the DAY/NIGHT switch is turned on, the mode changes automatically to black and white in dark places. As the sensitivity increases, the image may look grainy and white spots may appear. When changing modes, bright portions of image may be emphasized but this is not a failure of the camera. (TK-C215V4/TK-C215V12 only) ⅷ When the supply voltage of the camera is low, the input protection circuit within the camera may be triggered and the power of the camera may turn off automatically. Make sure to use a supply voltage for the camera that is within -10 % of the rated voltage. ⅷ Upon switching between the HOME and ALARM positions, the camera focus may change slightly after the zoom operation comes to a stop. This is due to the built-in lens performance and is not a malfunction. (TK-C215V12 only) ⅷ When the camera is moved from a cold area to room temperature, condensation may occur causing the camera to malfunction as a result. In this case, turn on the power after waiting for a few hours. ⅷ This unit enlarges the rotation angle to support wide range set up. For TK-C215V4 and TK-C215V12, when the zoom of the lens is set to WIDE end and the tilt angle is set around ±80 Њ, the dome cover can be visible into the image depending on the rotation angle. In this case, adjust the image angle if necessary. (A pg. 23) ⅷ All Interconnecting Equipment must be UL Listed. Ⅵ Note on consumable parts (TK-C215V12 only) The following parts are consumable and should be replaced after a certain number of hours or a count of operations. The service lives given below are only typical values. They may vary depending on the operating environment and conditions. Note that the replacement of consumable parts is chargeable even when they are replaced before the termination of the warranty period. ● Zoom lens assembly Zooming operation: 2 million times 7

  • 1
  • 2
  • 3
  • 4
  • 5
  • 6
  • 7
  • 8
  • 9
  • 10
  • 11
  • 12
  • 13
  • 14
  • 15
  • 16

6
Introduction (continued)
Introduction
Safety Precautions
..........................................
2
Characteristics
................................................
5
Contents
..........................................................
6
Operating Precautions
....................................
7
Name of Parts
.................................................
8
Camera
........................................................
8
Camera (Interior)
.........................................
9
Setting the Lens and Switches
(TK-C215V4)
.................................................
10
Setting the Lens and Switches
(TK-C215V12)
...............................................
12
Setting the Lens and Switches
(TK-C210FW)
................................................
14
Installation and connection
About Connection Cables
.............................
14
Video signal cables
...................................
14
Installing the Ferrite core
(TK-C210FW only)
....................................
14
DC 12 V or AC 24 V power supply
cable
..........................................................
15
Electrical Specifications of Alarm Input
Terminals
...................................................
15
System diagram
............................................
16
Mounting the Camera to the Ceiling
..............
17
Getting Started
..........................................
17
Selecting a mounting method
....................
17
Embedding the camera to the ceiling
........
18
When mounting the camera directly to
the ceiling or on the wall
............................
20
When mounting the camera to the
electrical box
.............................................
22
Mount by allowing the cable to exit from
the side
......................................................
22
Adjusting Image
Adjusting Images
...........................................
23
Mounting the test monitor
..........................
23
Adjusting the camera direction
..................
23
Adjusting the field angle/focus/
brightness
..................................................
24
Mounting the Dome Cover
............................
26
White-spot correction
....................................
27
Others
Specifications
................................................
28
Contents
7
±
To save energy, when it is not being used turn
the system’s power off.
±
This camera has been designed for indoor
use. It cannot be used outdoors.
±
Do not install or use the camera in the
following places.
In a place exposed to rain or moisture.
In a place with vapor or oil soot, for
example in a kitchen.
In a temperature outside the operating
temperature range (
-
10
f
to 50
f
).
Near a source of radiation, X-rays, strong
radio waves or magnetism.
In a place where corrosive gasses are
generated.
In a place subject to vibration.
In a place with excessive dirt.
In an environment where there is cold air
or near the air outlet of an air conditioner.
±
If this camera and the cables connected to this
camera are used where there are strong
electromagnetic waves or where there is
magnetism present, for example near a radio
or TV transmitter, power transformer or an
electric motor, the picture may produce noise
and the colors may be affected.
±
This camera incorporates an AGC circuit. As a
result, when it is used under low light
conditions, the camera sensitivity is
automatically boosted and the picture may
look uneven. This is not a malfunction
however.
±
When this camera is used in the ATW mode,
the recorded colors may be slightly different
from the actual colors due to the operational
principles of the auto-tracking white balance
circuit. This is however not a malfunction.
±
If a high-intensity object (such as a lamp) is
shot, the image on the screen may have
vertical lines (smear) or blur (blooming) at its
periphery. This is a characteristic of the CCD,
and is not a defect.
±
Observe the following when carrying out
camera maintenance.
±
Turn the power OFF before proceeding to
carry out maintenance.
±
Clean the dome cover lens using a lens wiper
cloth (or a tissue). If it is contaminated
seriously, clean the contaminated part with a
cloth (or a tissue) which has been soaked in a
solution of water and a neutral detergent.
±
If the DAY/NIGHT switch is turned on, the
mode changes automatically to black and
white in dark places. As the sensitivity
increases, the image may look grainy and
white spots may appear.
When changing modes, bright portions of
image may be emphasized but this is not a
failure of the camera.
(TK-C215V4/TK-C215V12 only)
±
When the supply voltage of the camera is low,
the input protection circuit within the camera
may be triggered and the power of the camera
may turn off automatically. Make sure to use a
supply voltage for the camera that is within -10
% of the rated voltage.
±
Upon switching between the HOME and
ALARM positions, the camera focus may
change slightly after the zoom operation
comes to a stop. This is due to the built-in lens
performance and is not a malfunction.
(TK-C215V12 only)
±
When the camera is moved from a cold area
to room temperature, condensation may occur
causing the camera to malfunction as a result.
In this case, turn on the power after waiting for
a few hours.
±
This unit enlarges the rotation angle to
support wide range set up.
For TK-C215V4 and TK-C215V12, when the
zoom of the lens is set to WIDE end and the
tilt angle is set around ±80
, the dome cover
can be visible into the image depending on the
rotation angle.
In this case, adjust the image angle if
necessary. (
A
pg. 23)
±
All Interconnecting Equipment must be UL
Listed.
Operating Precautions
²
Note on consumable parts
(TK-C215V12 only)
The following parts are consumable and should
be replaced after a certain number of hours or
a count of operations. The service lives given
below are only typical values. They may vary
depending on the operating environment and
conditions. Note that the replacement of
consumable parts is chargeable even when
they are replaced before the termination of the
warranty period.
Zoom lens assembly
Zooming operation: 2 million times