Kenmore 5894 Use and Care Guide - Page 10
Refrigerator Use
 |
UPC - 883049132563
View all Kenmore 5894 manuals
Add to My Manuals
Save this manual to your list of manuals |
Page 10 highlights
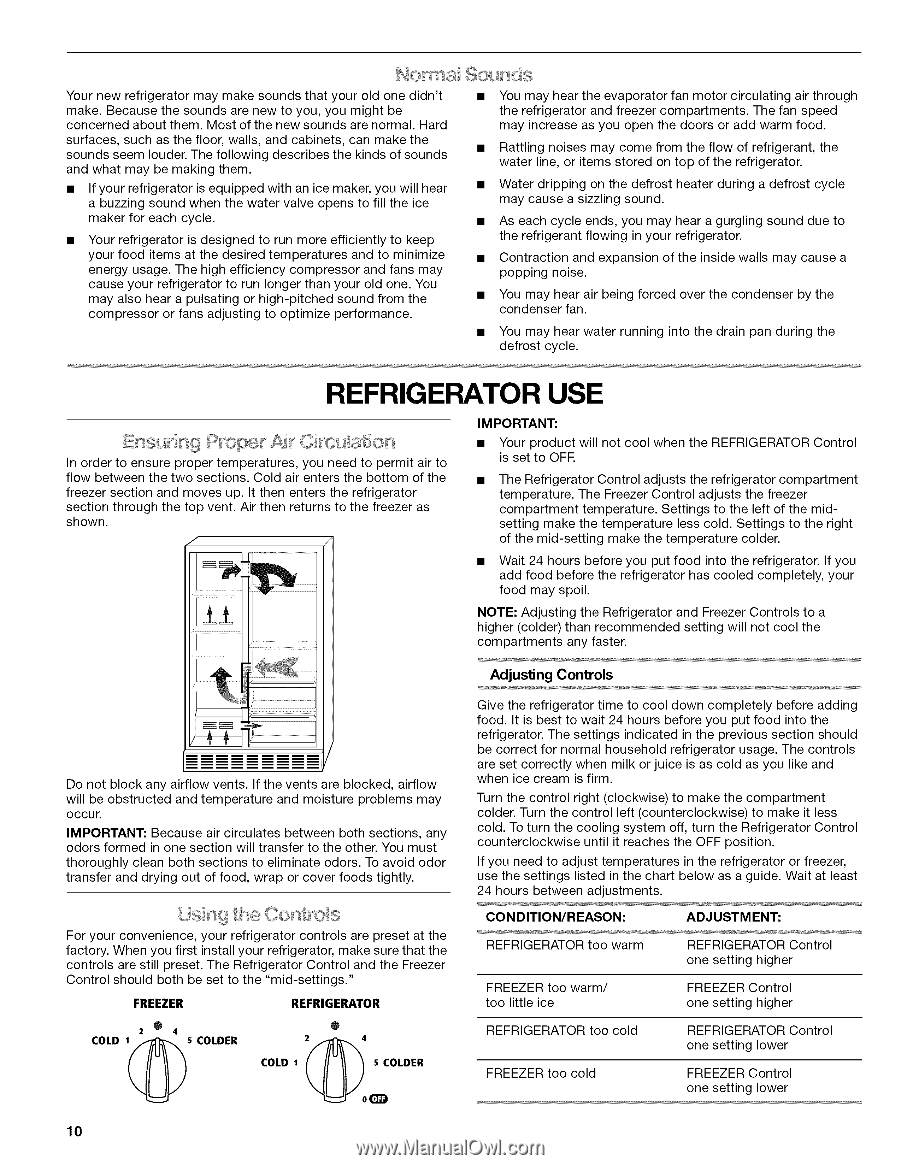
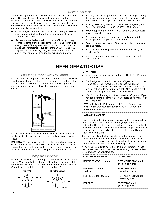
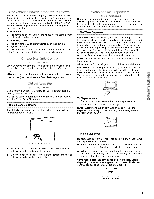
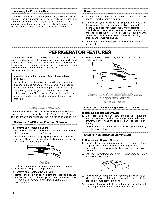
Your new refrigerator may make sounds that your old one didn't make. Because the sounds are new to you, you might be concerned about them. Most of the new sounds are normal. Hard surfaces, such as the floor, walls, and cabinets, can make the sounds seem louder. The following describes the kinds of sounds and what may be making them. • If your refrigerator is equipped with an ice maker, you will hear a buzzing sound when the water valve opens to fill the ice maker for each cycle. • Your refrigerator is designed to run more efficiently to keep your food items at the desired temperatures and to minimize energy usage. The high efficiency compressor and fans may cause your refrigerator to run longer than your old one. You may also hear a pulsating or high-pitched sound from the compressor or fans adjusting to optimize performance. • You may hear the evaporator fan motor circulating air through the refrigerator and freezer compartments. The fan speed may increase as you open the doors or add warm food. • Rattling noises may come from the flow of refrigerant, the water line, or items stored on top of the refrigerator. • Water dripping on the defrost heater during a defrost cycle may cause a sizzling sound. • As each cycle ends, you may hear a gurgling sound due to the refrigerant flowing in your refrigerator. • Contraction and expansion of the inside walls may cause a popping noise. • You may hear air being forced over the condenser by the condenser fan. You may hear water running into the drain pan during the defrost cycle. REFRIGERATOR USE In order to ensure proper temperatures, you need to permit air to flow between the two sections. Cold air enters the bottom of the freezer section and moves up. It then enters the refrigerator section through the top vent. Air then returns to the freezer as shown. IMPORTANT: Your product will not cool when the REFRIGERATOR Control is set to OFE The Refrigerator Control adjusts the refrigerator compartment temperature. The Freezer Control adjusts the freezer compartment temperature. Settings to the left of the midsetting make the temperature less cold. Settings to the right of the mid-setting make the temperature colder. • Wait 24 hours before you put food into the refrigerator. If you add food before the refrigerator has cooled completely, your food may spoil. NOTE: Adjusting the Refrigerator and Freezer Controls to a higher (colder) than recommended setting will not cool the compartments any faster. Adjusting Controls Do not block any airflow vents. If the vents are blocked, airflow will be obstructed and temperature and moisture problems may occur. IMPORTANT: Because air circulates between both sections, any odors formed in one section will transfer to the other. You must thoroughly clean both sections to eliminate odors. To avoid odor transfer and drying out of food, wrap or cover foods tightly. For your convenience, your refrigerator controls are preset at the factory. When you first install your refrigerator, make sure that the controls are still preset. The Refrigerator Control and the Freezer Control should both be set to the "mid-settings." FREEZER REFRIGERATOR o @ 2 4 COLD '@s COLDER COLD 1 z_4 s COLDER o_ Give the refrigerator time to cool down completely before adding food. It is best to wait 24 hours before you put food into the refrigerator. The settings indicated in the previous section should be correct for normal household refrigerator usage. The controls are set correctly when milk or juice is as cold as you like and when ice cream is firm. Turn the control right (clockwise) to make the compartment colder. Turn the control left (counterclockwise) to make it less cold. To turn the cooling system off, turn the Refrigerator Control counterclockwise until it reaches the OFF position. If you need to adjust temperatures in the refrigerator or freezer, use the settings listed in the chart below as a guide. Wait at least 24 hours between adjustments. CONDITION/REASON: ADJUSTMENT: REFRIGERATOR too warm REFRIGERATOR Control one setting higher FREEZER too warm/ too little ice FREEZER Control one setting higher REFRIGERATOR too cold REFRIGERATOR Control one setting lower FREEZER too cold FREEZER Control one setting lower 10
-
 1
1 -
2
-
3
-
4
-
 5
5 -
 6
6 -
 7
7 -
 8
8 -
 9
9 -
 10
10 -
 11
11 -
 12
12 -
 13
13 -
 14
14 -
 15
15 -
16
-
17
-
18
-
19
-
20
-
21
-
22
-
23
-
24
-
25
-
26
-
27
-
28
-
29
-
30
-
31
-
32
-
33
-
34
-
35
-
36
-
37
-
38
-
39
-
40
-
41
-
42
-
43
-
44
-
45
-
46
-
47
-
48
-
49
-
50
-
51
-
52
-
53
-
54
-
55
-
56
-
57
-
58
-
59
-
60
-
61
-
62
-
63
-
64
-
65
-
66
-
67
-
68
-
69
-
70
-
71
-
72
-
73
-
74
-
75
-
76
-
77
-
78
-
79
-
80
-
81
-
82
-
83
-
84
 |
 |