Kenmore 7952 Installation Instructions - Page 9
Kenmore 7952 - Pro 30 in. Dual Fuel Range Manual
 |
View all Kenmore 7952 manuals
Add to My Manuals
Save this manual to your list of manuals |
Page 9 highlights
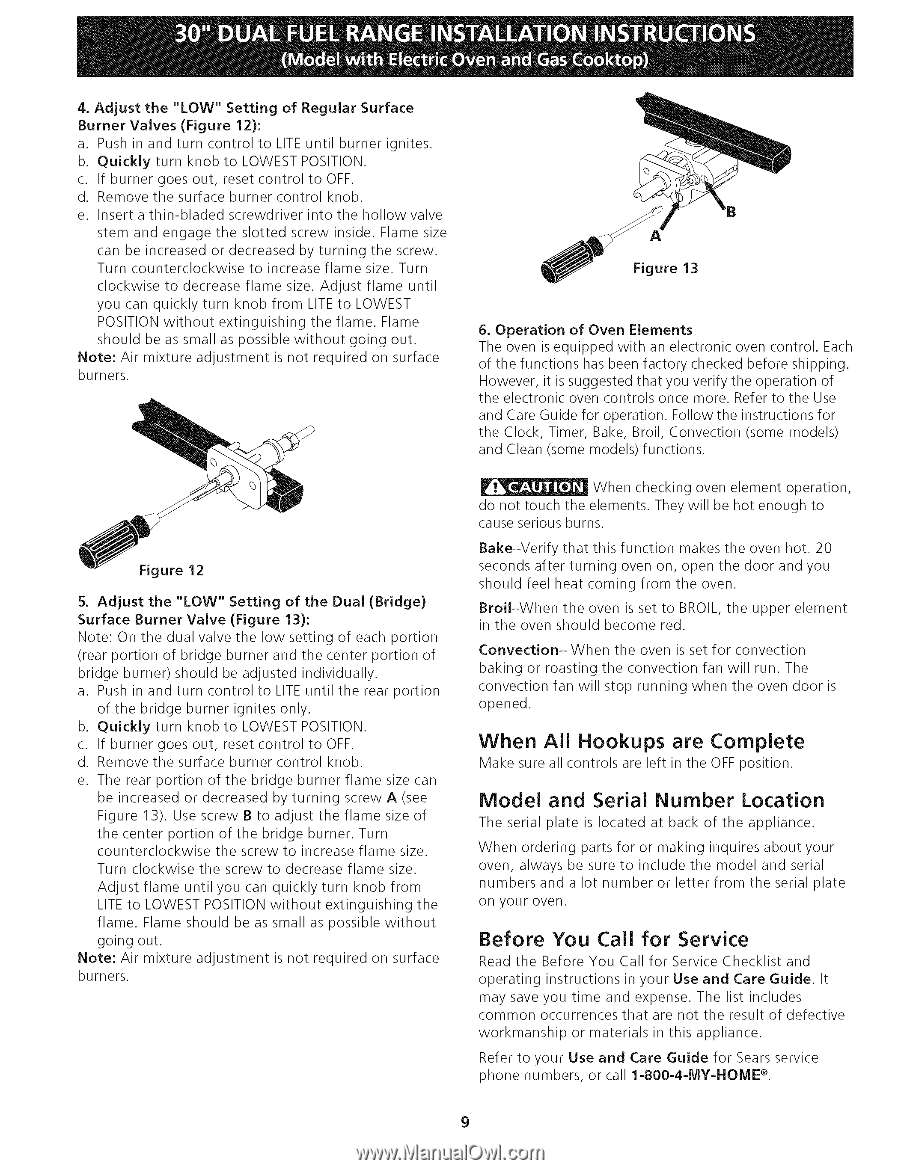
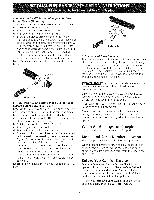
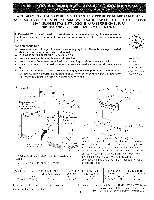
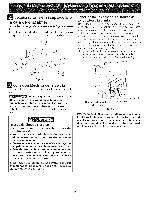
4.Adjustthe "LOW"Settingof RegularSurface BurnerValves(Figure12): a. Push inandturn control to LITE untilburner ignites. b. Quicklyturn knobto LOWEST POSITION. c. If burner goes out,reset control to OFF. d. Remove thesurface burner controlknob. e. Insert athin-bladed screwdriver intothe hollowvalve stemandengage the slottedscrewinside. Flame size canbeincreased or decreased byturningthe screw. Turncounterclockwise to increase flamesize. Turn clockwise to decrease flamesize. Adjustflameuntil youcanquickly turn knobfromLITE to LOWEST POSITION withoutextinguishing theflame.Flame shouldbeassmall aspossible withoutgoingout. Note:Air mixture adjustment isnot required onsurface burners. Figure 13 6. Operation of Oven Elements The oven is equipped with an electronic oven control. Each of the functions has been factory checked before shipping. However, it is suggested that you verify the operation of the electronic oven controls once more. Refer to the Use and Care Guide for operation. Follow the instructions for the Clock, Timer, Bake, Broil, Convection (some models) and Clean (some models) functions. When checking oven element operation, do not touch the elements. They will be hot enough to cause serious burns. Bake-Verify that this function makes the oven hot. 20 seconds after turning oven on, open the door and you should feel heat coming from the oven. Broil-When the oven is set to BROIL, the upper element in the oven should become red. ConvectionWhen the oven is set for convection Figure 12 5. Adjust the "LOW" Setting of the Dual (Bridge} Surface Burner Valve (Figure 13): Note: On the dual valve the low setting of each portion (rear portion of bridge burner and the center portion of bridge burner) should be adjusted individually. a. Push in and turn control to LITEuntil the rear portion of the bridge burner ignites only. b. Quickly turn knob to LOWEST POSITION. c. If burner goes out, reset control to OFF. d. Remove the surface burner control knob. e. The rear portion of the bridge burner flame size can be increased or decreased by turning screw A (see Figure 13). Use screw B to adjust the flame size of the center portion of the bridge burner. Turn counterclockwise the screw to increase flame size. Turn clockwise the screw to decrease flame size. Adjust flame until you can quickly turn knob from LITEto LOWEST POSITION without extinguishing the flame. Flame should be as small as possible without going out. Note: Air mixture adjustment is not required on surface burners. baking or roasting the convection fan will run. The convection fan will stop running when the oven door is opened. When Model All Hookups are Complete Location Make sure all controls are left in the OFF position. and Serial Number The serial plate is located at back of the appliance. When ordering parts for or making inquires about your oven, always be sure to include the model and serial numbers and a lot number or letter from the serial plate on your oveR. Before You Call for Service Read the Before You Call for Service Checklist and operating instructions in your Use and Care Guide. It may save you time and expense. The list includes common occurrences that are not the result of defective workmanship or materials in this appliance. Refer to your Use and Care Guide for Sears service phone numbers, or call 1-800-4-MY-HOME ®.
-
 1
1 -
2
-
3
-
 4
4 -
 5
5 -
 6
6 -
 7
7 -
 8
8 -
 9
9 -
 10
10 -
 11
11 -
 12
12 -
 13
13 -
 14
14 -
15
-
16
-
17
-
18
-
19
-
20
-
21
-
22
-
23
-
24
 |
 |