Kenwood DDX4017BT Instruction Manual - Page 71
Connecting a smartphone, Connecting external components
 |
View all Kenwood DDX4017BT manuals
Add to My Manuals
Save this manual to your list of manuals |
Page 71 highlights
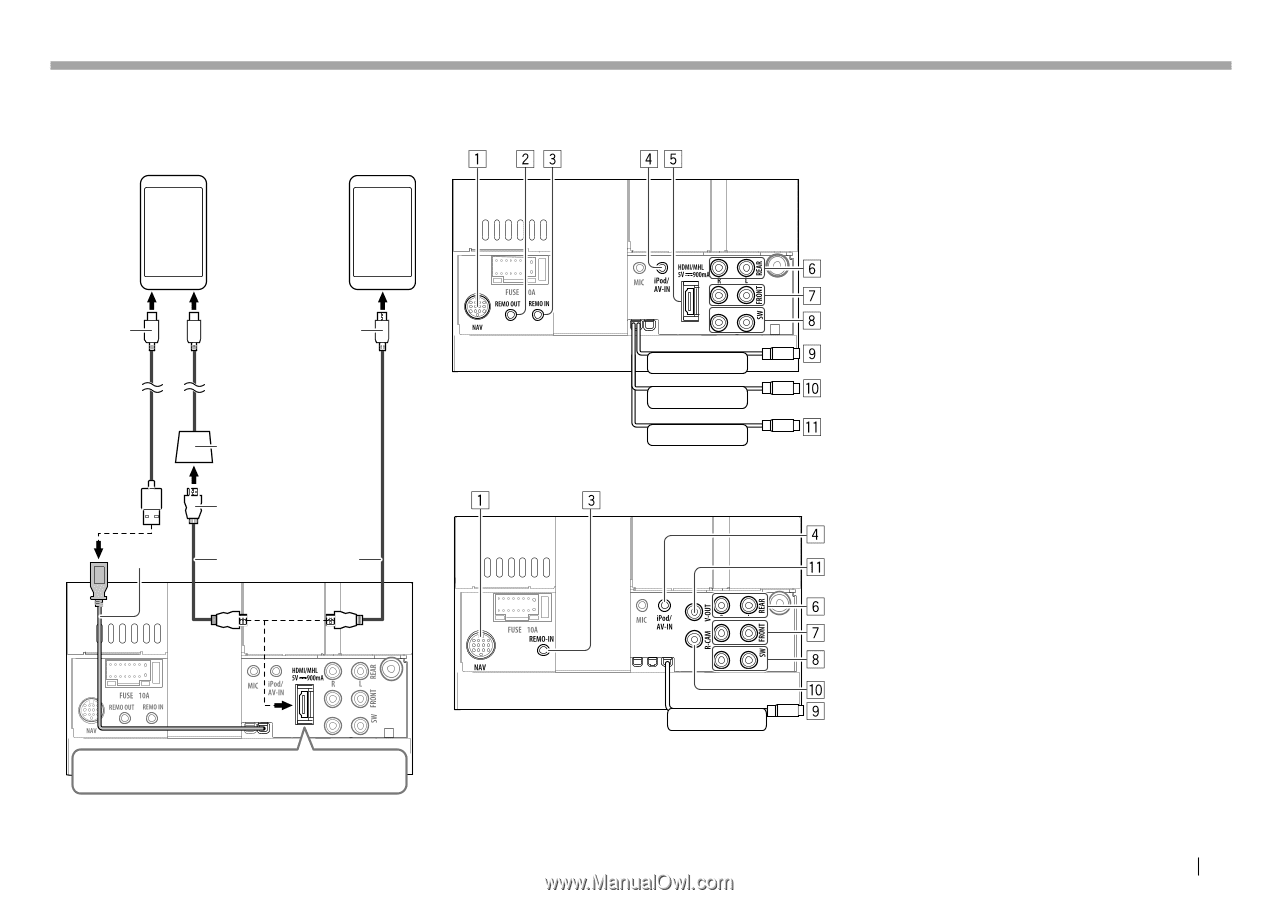
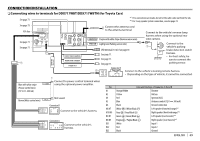
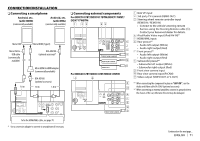
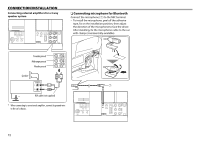
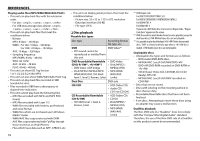
CONNECTION/INSTALLATION ❏ Connecting a smartphone Android, etc. (with HDMI) (commercially available) Android, etc. (with MHL) (commercially available) ❏ Connecting external components For DDX7017BT/DDX7017BTM/DDX717WBT/ DDX717WBTM Micro USB Micro USB to USB cable (commercially available) 1.0 m Micro HDMI (Type D) KCA-MH100 (optional accessory)* Micro HDMI to HDMI adapter (commercially available) KCA-HD100 (optional accessory) 1.8 m 1.8 m FRONT VIEW CAMERA REAR VIEW CAMERA VIDEO OUT For DDX4017BT/DDX417BT/DDX417BTM 1 NAV I/F input 2 3rd party TV terminal (REMO OUT) 3 Steering wheel remote controller input (REMO IN / REMO-IN) • Connect to the vehicle's steering remote harness using the Steering Remote cable (6). Contact your Kenwood dealer for details. 4 iPod/Audio Video input (iPod/AV-IN)*1 5 HDMI/MHL input 6 Rear preout*2 • Audio left output (White) • Audio right output (Red) 7 Front preout*2 • Audio left output (White) • Audio right output (Red) 8 Subwoofer preout*2 • Subwoofer left output (White) • Subwoofer right output (Red) 9 Front view camera input p Rear view camera input (R-CAM) q Video output (VIDEO OUT or V-OUT) *1 When connecting the component to play on "AV-IN", use the Audio and Video cable CA-C3AV (optional accessory). *2 When connecting an external amplifier, connect its ground wire to the chassis of the car; otherwise the unit may be damaged. To fix the HDMI/MHL cable, see page 70. * Use a conversion adapter to connect to smartphones if necessary. FRONT VIEW CAMERA Continued on the next page... ENGLISH 71
-
 1
1 -
2
-
3
-
4
-
5
-
6
-
7
-
8
-
9
-
10
-
11
-
12
-
13
-
14
-
15
-
16
-
17
-
18
-
19
-
20
-
21
-
22
-
23
-
24
-
25
-
26
-
27
-
28
-
29
-
30
-
31
-
32
-
33
-
34
-
35
-
36
-
37
-
38
-
39
-
40
-
41
-
42
-
43
-
44
-
45
-
46
-
47
-
48
-
49
-
50
-
51
-
52
-
53
-
54
-
55
-
56
-
57
-
58
-
59
-
60
-
61
-
62
-
63
-
64
-
65
-
 66
66 -
 67
67 -
 68
68 -
 69
69 -
 70
70 -
 71
71 -
 72
72 -
 73
73 -
 74
74 -
 75
75 -
 76
76 -
77
-
78
-
79
-
80
-
81
-
82
-
83
-
84
 |
 |