Kenwood DMX8018S Operation Manual - Page 38
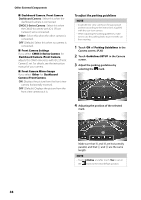
To adjust the parking guidelines, CMOS 3-Series Camera
 |
View all Kenwood DMX8018S manuals
Add to My Manuals
Save this manual to your list of manuals |
Page 38 highlights
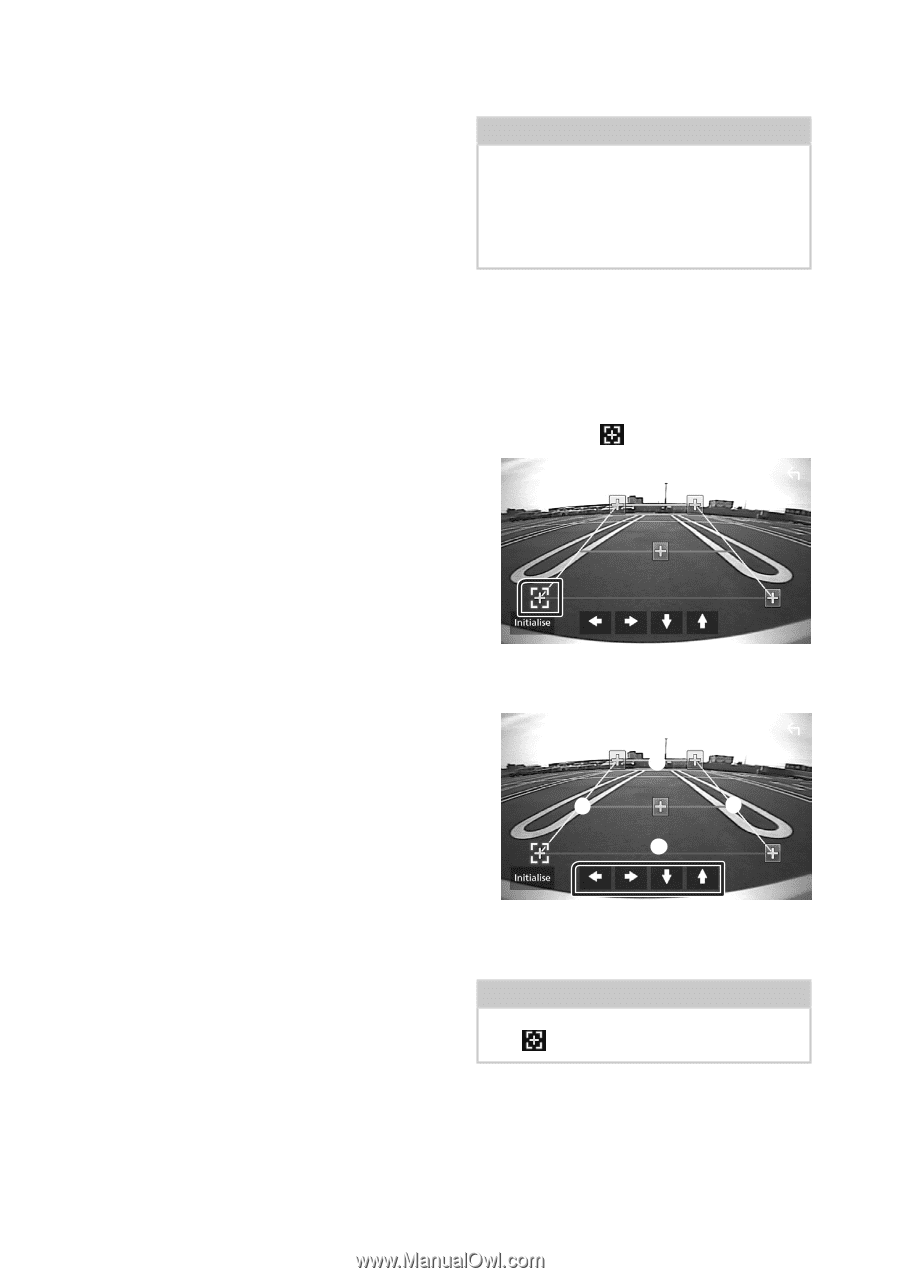
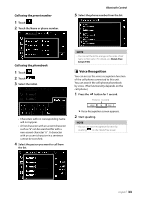
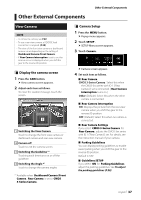
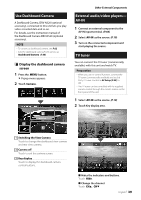
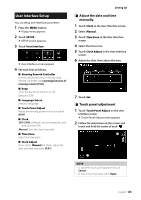
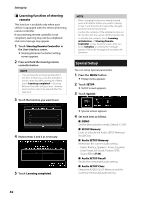
Other External Components ■■[Dashboard Camera /Front Camera] [Dashboard Camera]: Select this when the dashboard camera is connected. [CMOS 3-Series Camera]: Select this when the CMOS-3xx series with ID 2 ("Front Camera") set is connected. [Other]: Select this when the other camera is connected. [OFF ](Default): Select this when no camera is connected. ■■[Front Camera Settings] If you select [CMOS 3-Series Camera] for [Dashboard Camera /Front Camera], adjusts the CMOS-3xx series with ID 2 ("Front Camera") set. For details, see the instruction manual of your camera. ■■[Front Camera Mirror Image] If you select [Other] for [Dashboard Camera /Front Camera]. [ON]: Displays the picture from the front view camera horizontally reversed. [OFF ](Default): Displays the picture from the front view camera as it is. To adjust the parking guidelines NOTE • Install the rear view camera in the appropriate position according to the instructions supplied with the rear view camera. • When adjusting the parking guidelines, make sure to use the parking brake to prevent the car from moving. 1 Touch [ON] of [Parking Guidelines] in the Camera screen. (P.37) 2 Touch [Guidelines SETUP] in the Camera screen. 3 Adjust the parking guidelines by selecting the mark. 4 Adjusting the position of the selected mark. A C D B Make sure that A and B are horizontally parallel, and that C and D are the same length. NOTE • Touch [Initialise] and after touch [Yes] to set all the marks to the initial default position. 38
-
 1
1 -
2
-
3
-
4
-
5
-
6
-
7
-
8
-
9
-
10
-
11
-
12
-
13
-
14
-
15
-
16
-
17
-
18
-
19
-
20
-
21
-
22
-
23
-
24
-
25
-
26
-
27
-
28
-
29
-
30
-
31
-
32
-
 33
33 -
 34
34 -
 35
35 -
 36
36 -
 37
37 -
 38
38 -
 39
39 -
 40
40 -
 41
41 -
 42
42 -
 43
43 -
44
-
45
-
46
-
47
-
48
-
49
-
50
-
51
-
52
-
53
-
54
-
55
-
56
-
57
-
58
-
59
-
60
-
61
-
62
-
63
-
64
-
65
-
66
-
67
-
68
-
69
-
70
-
71
-
72
 |
 |