Kenwood LSF-1010 User Manual - Page 19
Wall Mount
 |
View all Kenwood LSF-1010 manuals
Add to My Manuals
Save this manual to your list of manuals |
Page 19 highlights
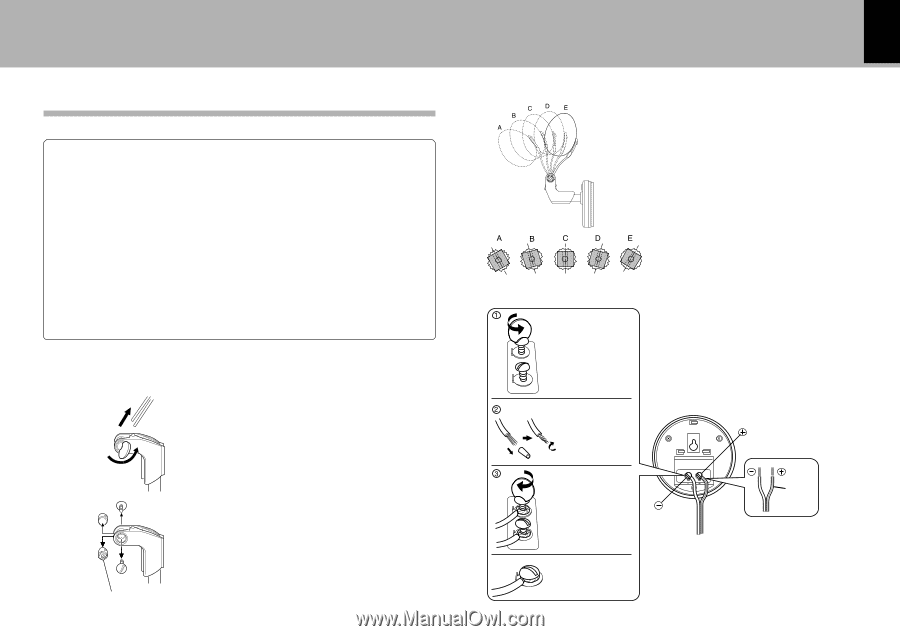
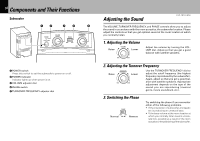
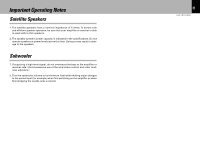
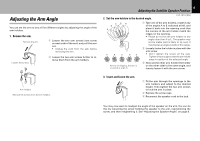
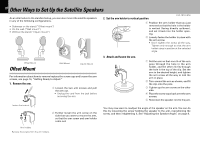
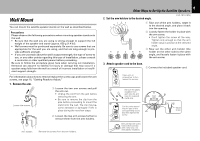
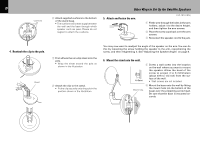
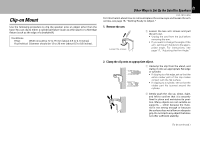
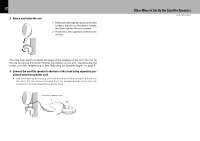
Wall Mount You can mount the satellite speaker stands on the wall as described below. Precautions Please observe the following precautions when mounting speaker stands onto the wall. • Be sure that the wall you are using is strong enough to support the full weight of the speaker and stand (approx. 650 g [1.4 lb]). • Wall screws must be purchased separately. Be sure to use screws that are appropriate for the wall you are using, and that are long enough to provide sufficient strength. • If you are uncertain about the wall's support strength, the type of screw to use, or any other points regarding this type of installation, please consult a contractor or other qualified person before proceeding. Be sure to follow the procedure given here when carrying out installation. Kenwood can assume no liability for injury or damage that may occur if a speaker setup falls from the wall as a result of incorrect installation or insufficient support strength. For information about how to remove/replace the screw caps and loosen the arm screws, see page 16, "Getting Ready to Adjust." 1. Remove the arm. Loosen the screws. 1 Loosen the two arm screws and pull the arm out. • Unplug the cord from the jack before removing the arm. • Be sure to remove the clip from the pole before proceeding to mount the stand onto the wall. The clip may become stressed or damaged if left in place during the next few steps. 2 Loosen the two arm screws further to remove them from the arm holders. Arm holders Remove the screws from the arm holders. 19 Other Ways to Set Up the Satellite Speakers 2. Set the arm holders to the desired angle. LSF-1010 (EN) 1 Take one of the arm holders, rotate it to the desired angle, and place it back into the opening. 2 Loosely fasten the holder in place with the arm screw. • Donít tighten the screw all the way. Tighten only enough so that the arm holder stays in position at the selected angle. 3 Now set the other arm holder (the holder on the other side) to the same angle, and loosely fasten it place with the arm screw. 3. Attach speaker cord to the base. 1 Connect the included speaker cord. Use a coin or screwdriver to turn loosen the screws. Remove the plastic insulation from each wire tip, and twist the exposed metal wire. Curl the wire around the thin part of the corresponding screw, and then tighten the screw. Be sure that the screw head makes contact with metal only, not with plastic insulation. White stripe ESPAÑOL ITALIANO NEDERLANDS DEUTSCH FRANÇAIS
-
 1
1 -
2
-
3
-
4
-
5
-
6
-
7
-
8
-
9
-
10
-
11
-
12
-
13
-
 14
14 -
 15
15 -
 16
16 -
 17
17 -
 18
18 -
 19
19 -
 20
20 -
 21
21 -
 22
22 -
 23
23 -
 24
24 -
25
-
26
 |
 |