KitchenAid KDRP467KSS Use and Care Guide - Page 16
WARNING, Keep Warm, Timed Cooking - no lights on display
 |
View all KitchenAid KDRP467KSS manuals
Add to My Manuals
Save this manual to your list of manuals |
Page 16 highlights
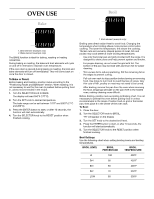
Keep Warm WARNING Food Poisoning Hazard Do not let food sit in oven more than one hour before or after cooking. Doing so can result in food poisoning or sickness. The Keep Warm function allows hot cooked foods to stay warm before serving. It can also be used at the end of a timed cook. (See "Timed Cooking" section.) To Use: 1. Turn the SELECTOR knob to PROOF/KEEP WARM. 2. Adjust SET knob to 170°F (77°C). 3. Press ENTER button to start, or after 10 seconds, the function will atart automatically. 4. Turn the SELCTOR knob to the RESET position when finished. Timed Cooking WARNING Food Poisoning Hazard Do not let food sit in oven more than one hour before or after cooking. Doing so can result in food poisoning or sickness. Timed Cooking allows the oven to be set to turn on at a certain time of day, cook for a set length of time, and/or shut off automatically. Delay start should not be used for food such as breads and cakes because they may not bake properly. If there is a pause of 20 seconds between any of the following steps, the function will automatically begin with the current settings. To Set a Cook Time: 1. Turn the SELECTOR knob to the desired cook function. 2. Turn the SET knob to the desired temperature. 3. Press the ENTER button twice. The DURATION LED will blink and "-0:00" will show on the display. 4. Turn the SET knob to set the length of time to cook. 5. Press the ENTER button again to view the stop time. To set a different stop time, turn the SET knob. 6. Press the ENTER button. Proceed to next section for Browning function, or Timed Cooking will automatically begin in 20 seconds. To Use the Browning Function (available in Bake, Convection Bake, and Convection Roast): After completing the Cook Time setting steps above, the browning light will blink. Turn the SET knob to "brn1", "brn2", or "brn3". (Select "brn0" to cancel browning function.) Press the ENTER button and the browning light will glow (if selected). Proceed to next section, or timed Cooking will automatically begin in 20 seconds. To Use the Keep Warm Function: After completing the Cook Time and Browning Function setting steps above, the Keep Warm light will blink. Turn the SET knob to choose a Keep Warm temperature of 170°F (77°C), or "---F" to cancel the Keep Warm function. Press the ENTER button and the Keep Warm light will glow (if selected). If using the KEEP WARM function after cooking foods, open the oven door to allow the oven to cool, or shorten the cook time as the oven maintains temperature. When END appears in the display and the oven beeps, the Timed Cooking function is complete. Turn the SELECTOR knob to the RESET position. To Cancel Duration, Stop Time, Browning and Keep Warm Functions: Turn the SELECTOR knob to the RESET position or press the CANCEL button. 16
-
 1
1 -
2
-
3
-
4
-
5
-
6
-
7
-
8
-
9
-
10
-
 11
11 -
 12
12 -
 13
13 -
 14
14 -
 15
15 -
 16
16 -
 17
17 -
 18
18 -
 19
19 -
 20
20 -
 21
21 -
22
-
23
-
24
-
25
-
26
-
27
-
28
-
29
-
30
-
31
-
32
-
33
-
34
-
35
-
36
-
37
-
38
-
39
-
40
-
41
-
42
-
43
-
44
 |
 |
