Konica Minolta C83hc High Chroma EF-103 AccurioPress C3080/C3080P/C3070/Print
Konica Minolta C83hc High Chroma Manual
 |
View all Konica Minolta C83hc High Chroma manuals
Add to My Manuals
Save this manual to your list of manuals |
Konica Minolta C83hc High Chroma manual content summary:
- Konica Minolta C83hc High Chroma | EF-103 AccurioPress C3080/C3080P/C3070/Print - Page 1
- Konica Minolta C83hc High Chroma | EF-103 AccurioPress C3080/C3080P/C3070/Print - Page 2
Contents 1 Introduction 1.1 1.2 1.2.1 1.2.2 1.2.3 Introduction ...1-2 Safety Precautions...1-3 Notices for Safety ...1-3 Precautions When Replacing Units 1-4 Warning and Caution Labels...1-6 2 Installing Fusing Unit EF-103 2.1 2.2 2.2.1 2.2.2 2.2.3 Replacement Parts ...2-2 Installation - Konica Minolta C83hc High Chroma | EF-103 AccurioPress C3080/C3080P/C3070/Print - Page 3
1 Introduction - Konica Minolta C83hc High Chroma | EF-103 AccurioPress C3080/C3080P/C3070/Print - Page 4
replacing the machine units, please follow the instructions described in the User's Guide. To perform replacement tasks safely and reliably, keep this User's Guide and do not lose them. If you lose the document, please contact your service representative. Registered Trademarks KONICA MINOLTA, the - Konica Minolta C83hc High Chroma | EF-103 AccurioPress C3080/C3080P/C3070/Print - Page 5
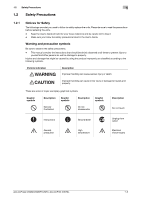
precautions listed in the User's Guide. Warning and precaution symbols Be sure to observe the safety precautions. - This manual contains the instructions that should be strictly observed Do not touch Instructions Ground/Earth Unplug from outlet General precaution High temperature Electrical - Konica Minolta C83hc High Chroma | EF-103 AccurioPress C3080/C3080P/C3070/Print - Page 6
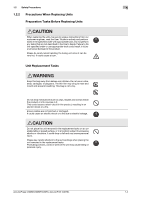
1 1.2.2 Precautions When Replacing Units Preparation Tasks Before Replacing Units When replacing the units, be sure to receive instructions from our customer engineer, read the User' Guide in entirety and perform tasks in the specified order with appropriate tools. Do not perform any tasks that - Konica Minolta C83hc High Chroma | EF-103 AccurioPress C3080/C3080P/C3070/Print - Page 7
cause a fire. Actions in Response to Troubles Do not keep using this product, if then call your Technical Representative or your authorized service representative. If you keep on using it as The inside of this product has areas subject to high temperature, which may cause burns. When checking the - Konica Minolta C83hc High Chroma | EF-103 AccurioPress C3080/C3080P/C3070/Print - Page 8
a specific part to be alert for unexpected trouble or injury. If you find any warning or caution label removed or illegible due to soilage, please contact your service representative. Caution Labels on Fusing Part of Conveyance Fixing Unit CAUTION: High temperature! Burn You may get burned. DO - Konica Minolta C83hc High Chroma | EF-103 AccurioPress C3080/C3080P/C3070/Print - Page 9
2 Installing Fusing Unit EF-103 - Konica Minolta C83hc High Chroma | EF-103 AccurioPress C3080/C3080P/C3070/Print - Page 10
the task. NOTICE When replacing the fusing unit, be sure to receive instructions from our customer engineer. NOTICE Please do not dispose of the packaging EF-103 1 2 Side auxiliary guide *1 2 3 Rear assist guide/Lw*2 1 4 Rear assist guide/Up*2 1 AccurioPress C3080/C3080P/C3070, AccurioPrint - Konica Minolta C83hc High Chroma | EF-103 AccurioPress C3080/C3080P/C3070/Print - Page 11
Name Shape 5 Bottom auxiliary guide assy[A] *3 6 Side auxiliary guide assy[B] *3 7 Tip auxiliary guide/rear assy[C] *3 8 Tip auxiliary guide/front assy[C] *3 9 Bottom auxiliary plate assy[D] *3 10 Adjusting block assy *3 11 Guide shaft *3 2 Q'ty 1 2 1 1 1 2 1 *1: Packaged together - Konica Minolta C83hc High Chroma | EF-103 AccurioPress C3080/C3080P/C3070/Print - Page 12
counterclockwise. NOTICE Please confirm that process unit has not been pulled out when pulling out the conveyance fixing unit. 4 Open the paper exit guide [2] while releasing the lever M6 [1] at the bottom. Loosen the screw [3] (1 piece). AccurioPress C3080/C3080P/C3070, AccurioPrint C3070L 2-4 - Konica Minolta C83hc High Chroma | EF-103 AccurioPress C3080/C3080P/C3070/Print - Page 13
the exit section is open before setting Fusing Unit EF-103 to the machine. When you try to set the fusing unit with the exit guide unit closed, the machine may be damaged. AccurioPress C3080/C3080P/C3070, AccurioPrint C3070L 2-5 - Konica Minolta C83hc High Chroma | EF-103 AccurioPress C3080/C3080P/C3070/Print - Page 14
2.2 Installation Procedures 2 9 Holding the handles on the front and rear sides [2] of Fus- ing Unit EF-103 [1] with both hands, slide it to the direction of arrow until it knocks in place. Return the fixing plate [3] to its original position. 10 Tighten the screw [1] (1 piece) and close the exit - Konica Minolta C83hc High Chroma | EF-103 AccurioPress C3080/C3080P/C3070/Print - Page 15
Parts in the Tray (when Paper Feeder Unit PF-707m is installed) Depending on the size of the envelope to be used, the attached auxiliary guides need to be installed on Paper Feeder Unit PF-707m. For details on the envelope size, refer to page 5-2. NOTICE Trays cannot be withdrawn when - Konica Minolta C83hc High Chroma | EF-103 AccurioPress C3080/C3080P/C3070/Print - Page 16
(2 pieces). Otherwise, the paper feeding performance may degrade. 4 Install the rear assist guide/Lw. % Hit the rear assist guide/Lw to the gap of the rear guide plate. 5 Install the rear assist guide/Up to the rear guide. 6 Push in tray 5 until it locks into place. Using Envelopes of 139.7 to - Konica Minolta C83hc High Chroma | EF-103 AccurioPress C3080/C3080P/C3070/Print - Page 17
2.2 Installation Procedures 2 to be removed. 3 Push in tray 5 until it locks into place. AccurioPress C3080/C3080P/C3070, AccurioPrint C3070L 2-9 - Konica Minolta C83hc High Chroma | EF-103 AccurioPress C3080/C3080P/C3070/Print - Page 18
Follow the procedure below to use envelopes of the above size. Auxiliary guides (2 pieces) are not needed. 1 Open the upper door. paper in the arrowed direction, and remove it. 3 Install the bottom auxiliary guide assy [A] in the Large Ca- pacity Unit LU-202m/LU-202XL/LU-202XLm tray. % - Konica Minolta C83hc High Chroma | EF-103 AccurioPress C3080/C3080P/C3070/Print - Page 19
229 mm) C6/C5 (114 x 229 mm) 5 Install the tip auxiliary guide/rear assy [C] (1 piece) and the tip auxiliary guide/front assy [C] (1 piece) to the paper guide side plate. % Align the installation hole in the tip auxiliary guide assy with the positioning pin. % Align the cutout of the tip auxiliary - Konica Minolta C83hc High Chroma | EF-103 AccurioPress C3080/C3080P/C3070/Print - Page 20
the holding paper. % Hold the projection with your fingers and slide the holding paper in the arrowed direction, and remove it. 3 Install the bottom auxiliary guide assy [A] in the Large Ca- pacity Unit LU-202m/LU-202XL/LU-202XLm tray. % Align the positioning pin of the bottom auxiliary - Konica Minolta C83hc High Chroma | EF-103 AccurioPress C3080/C3080P/C3070/Print - Page 21
install them. % Align the mark on the adjusting block assy with the mark on the indicating label. 2 K2 (240 x 332 mm) 5 Install the guide shaft to the back edge guide base of the bottom auxiliary guide assy [A]. 6 Close the upper door. AccurioPress C3080/C3080P/C3070, AccurioPrint C3070L 2-13 - Konica Minolta C83hc High Chroma | EF-103 AccurioPress C3080/C3080P/C3070/Print - Page 22
the holding paper. % Hold the projection with your fingers and slide the holding paper in the arrowed direction, and remove it. 3 Install the bottom auxiliary guide assy [A] in the Large Ca- pacity Unit LU-202m/LU-202XL/LU-202XLm tray. % Align the positioning pin of the bottom auxiliary - Konica Minolta C83hc High Chroma | EF-103 AccurioPress C3080/C3080P/C3070/Print - Page 23
plate. (2 places) % Be sure to align the installation holes in the side auxiliary guide assy with the positioning screws. NOTICE Turn the machine power on, and lower the tray bottom plate to the lowest place by pressing the tray bottom plate lowering button of the Large Capacity Unit LU-202m/LU202XL - Konica Minolta C83hc High Chroma | EF-103 AccurioPress C3080/C3080P/C3070/Print - Page 24
2.2 Installation Procedures 2 3 Install the bottom auxiliary guide assy [A] in the Large Ca- pacity Unit installation hole of the tray. % Align the detent of the bottom auxiliary guide assy [A] with the groove on the back end guide. 4 Hold the flap of the envelope to use and droop vertically. 5 - Konica Minolta C83hc High Chroma | EF-103 AccurioPress C3080/C3080P/C3070/Print - Page 25
the bottom auxiliary plate assy [D] with the mark line on the bottom auxiliary guide assy [A]. Align the edge of the PET sheet with the edge of the bottom auxiliary guide assy [A]. Then, install them. % Be sure to move the back edge guide base to the end edge. 8 Close the upper door. 2 Back edge - Konica Minolta C83hc High Chroma | EF-103 AccurioPress C3080/C3080P/C3070/Print - Page 26
3 Removing Fusing Unit EF-103 - Konica Minolta C83hc High Chroma | EF-103 AccurioPress C3080/C3080P/C3070/Print - Page 27
to page 2-4. 3.1.2 Removing Parts from the Tray (when Paper Feeder Unit PF-707m is installed) When you remove the auxiliary guides (2 pieces) installed on the side guide of tray 5, follow the installation procedure in reverse. For the installation procedure of parts to the tray, please refer to - Konica Minolta C83hc High Chroma | EF-103 AccurioPress C3080/C3080P/C3070/Print - Page 28
4 Copy/Print Operation - Konica Minolta C83hc High Chroma | EF-103 AccurioPress C3080/C3080P/C3070/Print - Page 29
9.63"), Length: 148 to 375 mm (5.82" to 14.73") - Use auxiliary guides to load envelopes of 100 to 140 mm (3.92" to 5.50") in width when /C5, K2, N3, N4*) 50 sheetsv (K0, K1) *: The N4 envelope is supported only when the Large Capacity Unit LU202m/LU-202XL/LU-202XLm is installed. Envelopes with a - Konica Minolta C83hc High Chroma | EF-103 AccurioPress C3080/C3080P/C3070/Print - Page 30
4.1 Loading Envelopes in the Tray 4 4.1.1 Loading Envelopes in the Tray 5 of Paper Feeder Unit PF-707m 1 Pull out tray 5. 2 Widen the side guides and rear guide. 3 Place envelopes with the print side up. % Align the envelopes to the left side of the tray with the flaps on the right. 4 Align the - Konica Minolta C83hc High Chroma | EF-103 AccurioPress C3080/C3080P/C3070/Print - Page 31
4.1 Loading Envelopes in the Tray 4 % Be sure to set the envelopes so that both sides of their leading edge and their flaps do not droop. OK NG 3 Adjust the guide shaft to the size of the envelope. AccurioPress C3080/C3080P/C3070, AccurioPrint C3070L 4-4 - Konica Minolta C83hc High Chroma | EF-103 AccurioPress C3080/C3080P/C3070/Print - Page 32
weight of 80 g/m2 or less> 6 Remove the front edge lift up materials from the side of the bottom auxiliary guide assy [A]. 7 Install the front edge lift up materials on the bottom auxil- iary guide assy [A] as shown in the right figure. AccurioPress C3080/C3080P/C3070, AccurioPrint C3070L 4-5 - Konica Minolta C83hc High Chroma | EF-103 AccurioPress C3080/C3080P/C3070/Print - Page 33
mm) Envelopes 1 Open the upper door. 2 Set N4 or N3 envelopes on the bottom auxiliary guide assy [A], and adjust the guide shaft to the size of the envelope moving it to right and left. 3 Adjust both paper guide side plates to the size of the en- velop. 4 Close the upper door. Using K1 - Konica Minolta C83hc High Chroma | EF-103 AccurioPress C3080/C3080P/C3070/Print - Page 34
1/2 Envelopes 1 Open the upper door. 2 Set the envelops to use on the bottom auxiliary guide assy [A], and adjust the guide shaft to the size of the envelope moving it to right and left. 3 Adjust both paper guide side plates to the size of the en- velop. 4 Close the upper door. AccurioPress C3080 - Konica Minolta C83hc High Chroma | EF-103 AccurioPress C3080/C3080P/C3070/Print - Page 35
load originals, and how to make copy settings, refer to the HTML user's guide. 0 With Multi Bypass Tray MB-506 installed on the main body, only and the output side to Face Up. 1 Press [Paper Setting] on the Machine Screen. 2 Select the tray, and then press [Recall]. % When you install Multi Bypass - Konica Minolta C83hc High Chroma | EF-103 AccurioPress C3080/C3080P/C3070/Print - Page 36
that setting is automatically selected (other settings become unavailable) on the screen. In this case, modify the items as necessary. 3 Press [OK]. % Press [Change Set] to display the Change IndividualSet Screen. [Envelope] is automatically selected for Paper Type (other types are unavailable) on - Konica Minolta C83hc High Chroma | EF-103 AccurioPress C3080/C3080P/C3070/Print - Page 37
m2] as required. % Make other paper settings as necessary. When all the setting is completed, press [OK] to return to the Machine Screen. 6 Place the original on the original glass or ADF. 7 Press the [COPY] tab to display the Copy Screen. AccurioPress C3080/C3080P/C3070, AccurioPrint C3070L 4-10 - Konica Minolta C83hc High Chroma | EF-103 AccurioPress C3080/C3080P/C3070/Print - Page 38
4.2 Copy Operation 4 8 Select the tray. % When you install Multi Bypass Tray MB-506, select [Bypass]. % When you install Paper Feeder Unit PF-707m, select [Tray5]. % When you install Large Capacity Unit LU-202m/LU-202XL/LU-202XLm, select [Tray3]. 9 Choose the Simplex/Duplex setting. % When - Konica Minolta C83hc High Chroma | EF-103 AccurioPress C3080/C3080P/C3070/Print - Page 39
ADF. In either case, select [Face Up] for Face and [1 to N] for Order. Press [OK] on the Output Setting Screen to return to the Copy Screen. 11 Make other copy settings refer to the HTML user's guide. 12 Press Start on the. control panel. AccurioPress C3080/C3080P/C3070, AccurioPrint C3070L 4-12 - Konica Minolta C83hc High Chroma | EF-103 AccurioPress C3080/C3080P/C3070/Print - Page 40
4.3 Print Operation 4 4.3 Print Operation The operation varies depending on the type of your printer driver. Follow the appropriate procedure to perform your print operation. For PS Plug-in Driver 1 Select the Print command of your application, then select the appropriate printer driver. 2 Click - Konica Minolta C83hc High Chroma | EF-103 AccurioPress C3080/C3080P/C3070/Print - Page 41
4.3 Print Operation 4 For PPD Driver 1 Select the Print command of your application, then select the appropriate printer driver. 2 Click [Detail Setting] or [Properties]. The Printing Preferences window of the printer driver is displayed. 3 Click the [Paper/Quality] tab, then select [Paper Source - Konica Minolta C83hc High Chroma | EF-103 AccurioPress C3080/C3080P/C3070/Print - Page 42
5 Specifications - Konica Minolta C83hc High Chroma | EF-103 AccurioPress C3080/C3080P/C3070/Print - Page 43
dimensions Width (crosswise direction): 100 to 245 mm (3.92" to 9.63") Auxiliary guide available range: 100 to 140 mm (3.92" to 5.50") (when Paper 241 152 229 162 229 114 240 332 120 235 90 205 N4 is supported only when the Large Capacity Unit LU-202m/LU-202XL/LU202XLm is installed. • - Konica Minolta C83hc High Chroma | EF-103 AccurioPress C3080/C3080P/C3070/Print - Page 44
, N3, N4) 50 sheets (K0, K1) Output tray: Approx. 50 sheets* (Output Tray OT-511) For other output options, please contact your service representative. * The N4 envelope is supported only when the Large Capacity Unit LU202m/LU-202XL/LU-202XLm is installed. 200 (W) e 690 (D) e 235 (H) mm (Fusing unit - Konica Minolta C83hc High Chroma | EF-103 AccurioPress C3080/C3080P/C3070/Print - Page 45
http://konicaminolta.com
-
 1
1 -
 2
2 -
 3
3 -
 4
4 -
 5
5 -
 6
6 -
 7
7 -
8
-
9
-
10
-
11
-
12
-
13
-
14
-
15
-
16
-
17
-
18
-
19
-
20
-
21
-
22
-
23
-
24
-
25
-
26
-
27
-
28
-
29
-
30
-
31
-
32
-
33
-
34
-
35
-
36
-
37
-
38
-
39
-
40
-
41
-
42
-
43
-
44
-
45
 |
 |
