Konica Minolta Kodak i1405 Setup Guide - Page 12
Scan Area dialog box, enable this option to control the dimensions of the preview
 |
View all Konica Minolta Kodak i1405 manuals
Add to My Manuals
Save this manual to your list of manuals |
Page 12 highlights
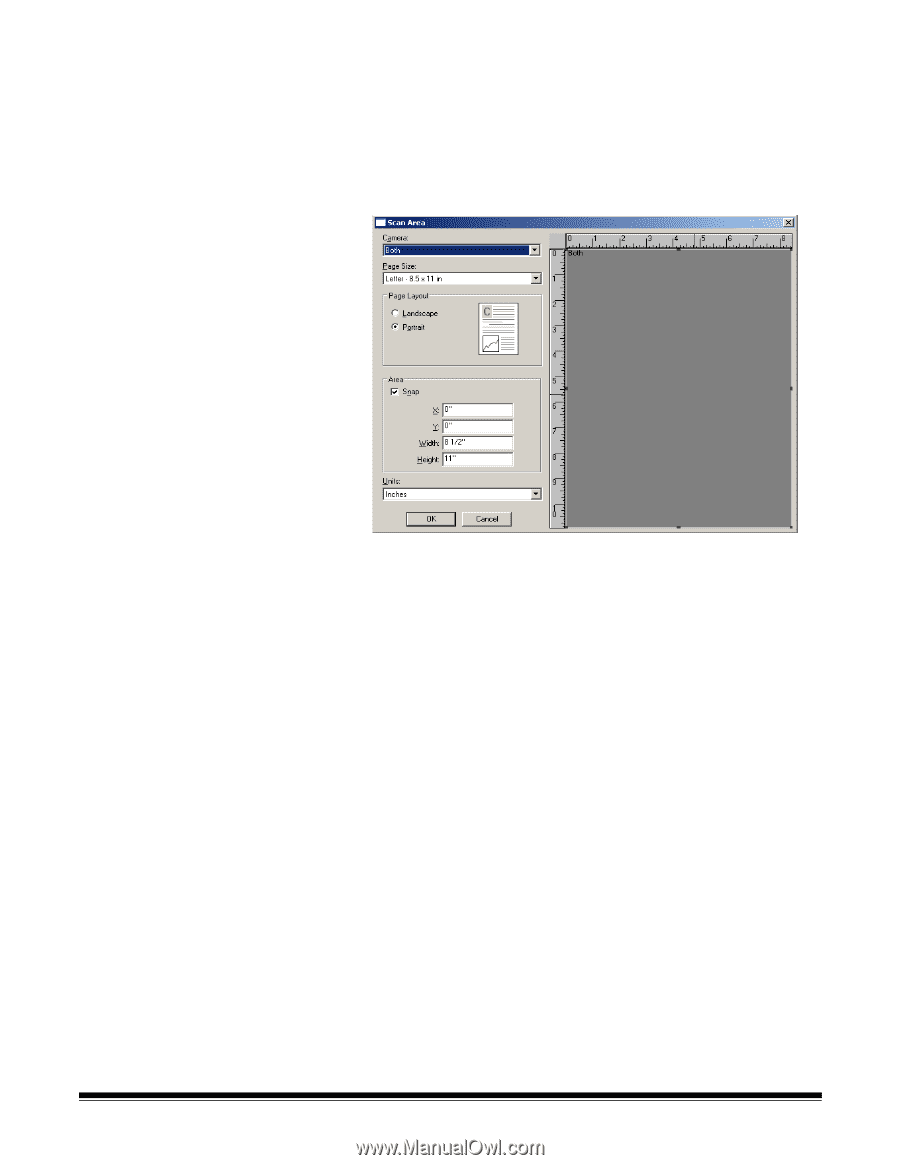
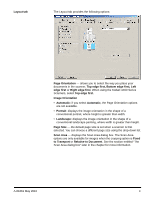
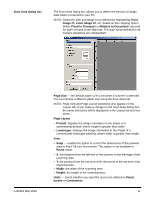
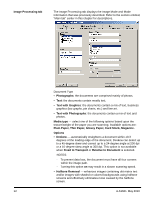
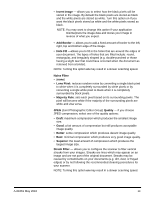
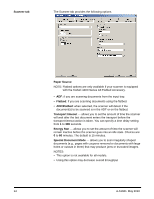
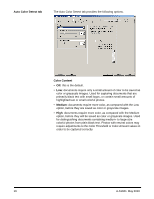
Scan Area dialog box The Scan Area dialog box allows you to define the amount of image data which is returned to your PC. NOTE: Select the side and image to be defined by highlighting Front Image #1, Front Image #2, etc. based on the cropping option (either Fixed to Transport or Relative to Document) selected for each of these in the Main tab. The scan areas defined for all camera selections are independent. A-61661 May 2010 Page Size ⎯ the default paper size is set when a scanner is selected. You can choose a different paper size using the drop-down list. NOTE: Page Size and Page Layout selections also appear on the Layout tab. If you make a change on the Scan Area dialog box, the same selections will be displayed on the Layout tab and vice versa. Page Layout • Portrait: displays the image orientation in the shape of a conventional portrait, where height is greater than width. • Landscape: displays the image orientation in the shape of a conventional landscape painting, where width is greater than height. Area • Snap ⎯ enable this option to control the dimensions of the preview area to fixed 1/8-inch increments. This option is not available in Pixels mode. • X: the distance from the left end of the scanner to the left-edge of the scanning area. • Y: the position from the top end of the document to the top end of the scanning area. • Width: the width of the scanning area. • Height: the height of the scanning area. Units - select whether you want the area to be defined in Pixels, Inches or Centimeters. 11
-
 1
1 -
2
-
3
-
4
-
5
-
6
-
 7
7 -
 8
8 -
 9
9 -
 10
10 -
 11
11 -
 12
12 -
 13
13 -
 14
14 -
 15
15 -
 16
16 -
 17
17 -
18
-
19
-
20
-
21
-
22
-
23
-
24
-
25
-
26
 |
 |