Konica Minolta Kodak i4200 Plus User Guide - Page 19
Scanning, Quick start, Getting your scanner ready to scan, Adjusting the input elevator
 |
View all Konica Minolta Kodak i4200 Plus manuals
Add to My Manuals
Save this manual to your list of manuals |
Page 19 highlights
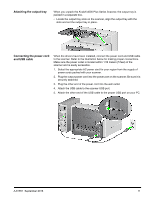
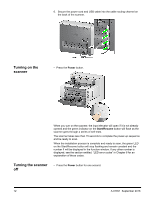
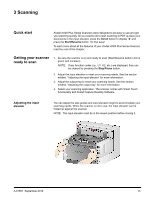
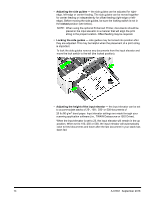
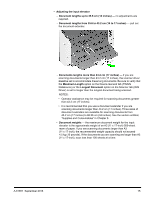
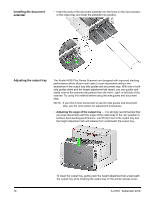
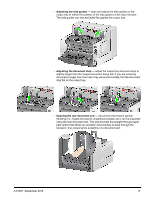
3 Scanning Quick start Kodak i4000 Plus Series Scanners were designed to be easy to use and get you scanning quickly. All you need to do to start scanning to PDF is place your documents in the input elevator, press the Scroll button to display "2" and press the Start/Resume button. It's that easy! To learn more about all the features of your Kodak i4000 Plus Series Scanner, read the rest of this chapter. Getting your scanner ready to scan 1. Be sure the scanner is on and ready to scan (Start/Resume button LED is green and constant). NOTE: If any function codes (i.e., U1, U2, etc.) are displayed, they can be cleared by pressing the Stop/Pause button. 2. Adjust the input elevator to meet your scanning needs. See the section entitled, "Adjusting the input elevator" for more information. 3. Adjust the output tray to meet your scanning needs. See the section entitled, "Adjusting the output tray" for more information. 4. Select your scanning application. The scanner comes with Smart Touch functionality and Kodak Capture Desktop Software. Adjusting the input elevator You can adjust the side guides and input elevator height to accommodate your scanning needs. When the scanner is not is use, the input elevator can be folded up against the scanner. NOTE: The input elevator must be in the lowest position before closing it. A-61651 September 2016 13
-
 1
1 -
2
-
3
-
4
-
5
-
6
-
7
-
8
-
9
-
10
-
11
-
12
-
13
-
 14
14 -
 15
15 -
 16
16 -
 17
17 -
 18
18 -
 19
19 -
 20
20 -
 21
21 -
 22
22 -
 23
23 -
 24
24 -
25
-
26
-
27
-
28
-
29
-
30
-
31
-
32
-
33
-
34
-
35
-
36
-
37
-
38
-
39
-
40
-
41
-
42
-
43
-
44
-
45
-
46
-
47
-
48
-
49
-
50
-
51
-
52
-
53
-
54
-
55
-
56
-
57
-
58
-
59
-
60
-
61
-
62
-
63
-
64
-
65
-
66
 |
 |
