Konica Minolta bizhub PRESS 1052 User Guide - Page 44
Installing the printer driver by specifying the IP address using the Add Printer, Wizard
 |
View all Konica Minolta bizhub PRESS 1052 manuals
Add to My Manuals
Save this manual to your list of manuals |
Page 44 highlights
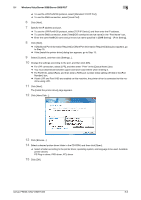
5.1 Windows Vista/Server 2008/Server 2008 R2/7 5 % In Windows 7, open [Computer] and click [Network]. If [Network] is not displayed in [Computer], click the [Network and Internet] category on the [control panel], and also click [View network computers and devices]. Connected computers and devices are detected. 5 Right click the device name and select [Install]. % To check the device name, select [Network Setting] - [Controller NIC Setting] - [Web Service Setting] - [Print Setting] in [Administrator Settings] of this machine. In the default setting, the last six characters of [printer name] correspond to the low-order three bytes of the MAC address. To check the MAC address, select [Configuration Page]. For details on how to output [Configuration Page], refer to page 15-4. The printer driver for this machine is detected and this machine is ready to print. 6 After finishing the installation, make sure that the icon for the installed printer is displayed in the [Devic- es and Printers] or [Printers] window. Reference - If the printer driver is not correctly installed, the driver must be updated using [Update Driver...]. For details, refer to page 5-14. - In Windows Vista/Server 2008/Server 2008 R2, you can continue the task and specify the printer driver installation disk to install the printer driver if it is not installed in advance. When the [Found New Hardware] window appears, follow the displayed messages to perform the procedure. For details, refer to Steps 11 through 20 in the succeeding section. - In Windows 7/Server 2008 R2, you cannot specify the installation disk after the machine is connected to the computer. Install the printer driver in advance (Step 1). Installing the printer driver by specifying the IP address using the Add Printer Wizard In Windows Vista/Server 2008/Server 2008 R2, you can add a Web service device using the adding printer function of the after connecting this machine. Reference - In Windows 7, a window for specifying an installation disk does not appear after the machine is con- nected to the computer. Install the printer driver in advance and connect the driver as described in "Making the printer driver known from the Network window". 0 Installing the driver to Windows Vista/Server 2008/Server 2008 R2 based computers requires the administrator authority. 1 Turn on the power of the machine while it is connected to the network. Since the printer is searched for during the installation, be sure to connect this machine to the network before turning it on. 2 To use the Web service print, check that [Network discovery] is enabled in [Network and Sharing Cent- er] on the computer. 3 Insert the Driver CD-ROM into the CD-ROM drive. 4 Click [Start], and then select [Control Panel]. % In Windows Vista/Server 2008/Server 2008 R2, click [Printers] under [Control Panel] - [Hardware and Sound]. When [Control Panel] is displayed in Classic View, double-click [Printers]. 5 Click [Printers] under [Hardware and Sound]. % When [Control Panel] is displayed in Classic View, double-click [Printers]. 6 Click [Add a printer] on the toolbar. % In Windows Vista: bizhub PRESS 1250/1250P/1052 5-10
-
 1
1 -
2
-
3
-
4
-
5
-
6
-
7
-
8
-
9
-
10
-
11
-
12
-
13
-
14
-
15
-
16
-
17
-
18
-
19
-
20
-
21
-
22
-
23
-
24
-
25
-
26
-
27
-
28
-
29
-
30
-
31
-
32
-
33
-
34
-
35
-
36
-
37
-
38
-
 39
39 -
 40
40 -
 41
41 -
 42
42 -
 43
43 -
 44
44 -
 45
45 -
 46
46 -
 47
47 -
 48
48 -
 49
49 -
50
-
51
-
52
-
53
-
54
-
55
-
56
-
57
-
58
-
59
-
60
-
61
-
62
-
63
-
64
-
65
-
66
-
67
-
68
-
69
-
70
-
71
-
72
-
73
-
74
-
75
-
76
-
77
-
78
-
79
-
80
-
81
-
82
-
83
-
84
-
85
-
86
-
87
-
88
-
89
-
90
-
91
-
92
-
93
-
94
-
95
-
96
-
97
-
98
-
99
-
100
-
101
-
102
-
103
-
104
-
105
-
106
-
107
-
108
-
109
-
110
-
111
-
112
-
113
-
114
-
115
-
116
-
117
-
118
-
119
-
120
-
121
-
122
-
123
-
124
-
125
-
126
-
127
-
128
-
129
-
130
-
131
-
132
-
133
-
134
-
135
-
136
-
137
-
138
-
139
-
140
-
141
-
142
-
143
-
144
-
145
-
146
-
147
-
148
-
149
-
150
-
151
-
152
-
153
-
154
-
155
-
156
-
157
-
158
-
159
-
160
-
161
-
162
-
163
-
164
-
165
-
166
-
167
-
168
-
169
-
170
-
171
-
172
-
173
-
174
-
175
-
176
-
177
-
178
-
179
-
180
-
181
-
182
-
183
-
184
-
185
-
186
-
187
-
188
-
189
-
190
-
191
-
192
-
193
-
194
-
195
-
196
-
197
-
198
-
199
-
200
-
201
-
202
-
203
-
204
-
205
-
206
-
207
-
208
-
209
-
210
-
211
-
212
-
213
-
214
-
215
-
216
-
217
-
218
-
219
-
220
-
221
-
222
-
223
-
224
-
225
-
226
-
227
-
228
-
229
-
230
-
231
-
232
-
233
-
234
-
235
-
236
-
237
-
238
-
239
-
240
-
241
-
242
-
243
-
244
-
245
-
246
-
247
-
248
-
249
-
250
-
251
-
252
-
253
-
254
-
255
-
256
-
257
-
258
-
259
-
260
-
261
-
262
-
263
-
264
-
265
-
266
-
267
-
268
-
269
-
270
-
271
-
272
-
273
-
274
-
275
-
276
-
277
-
278
-
279
-
280
-
281
-
282
 |
 |
