Kyocera ECOSYS FS-4100DN FS-2100DN/4100DN/4200DN/4300DN Operation Guide - Page 56
Printing from Applications, Canceling a Printing Job, Print Size
 |
View all Kyocera ECOSYS FS-4100DN manuals
Add to My Manuals
Save this manual to your list of manuals |
Page 56 highlights
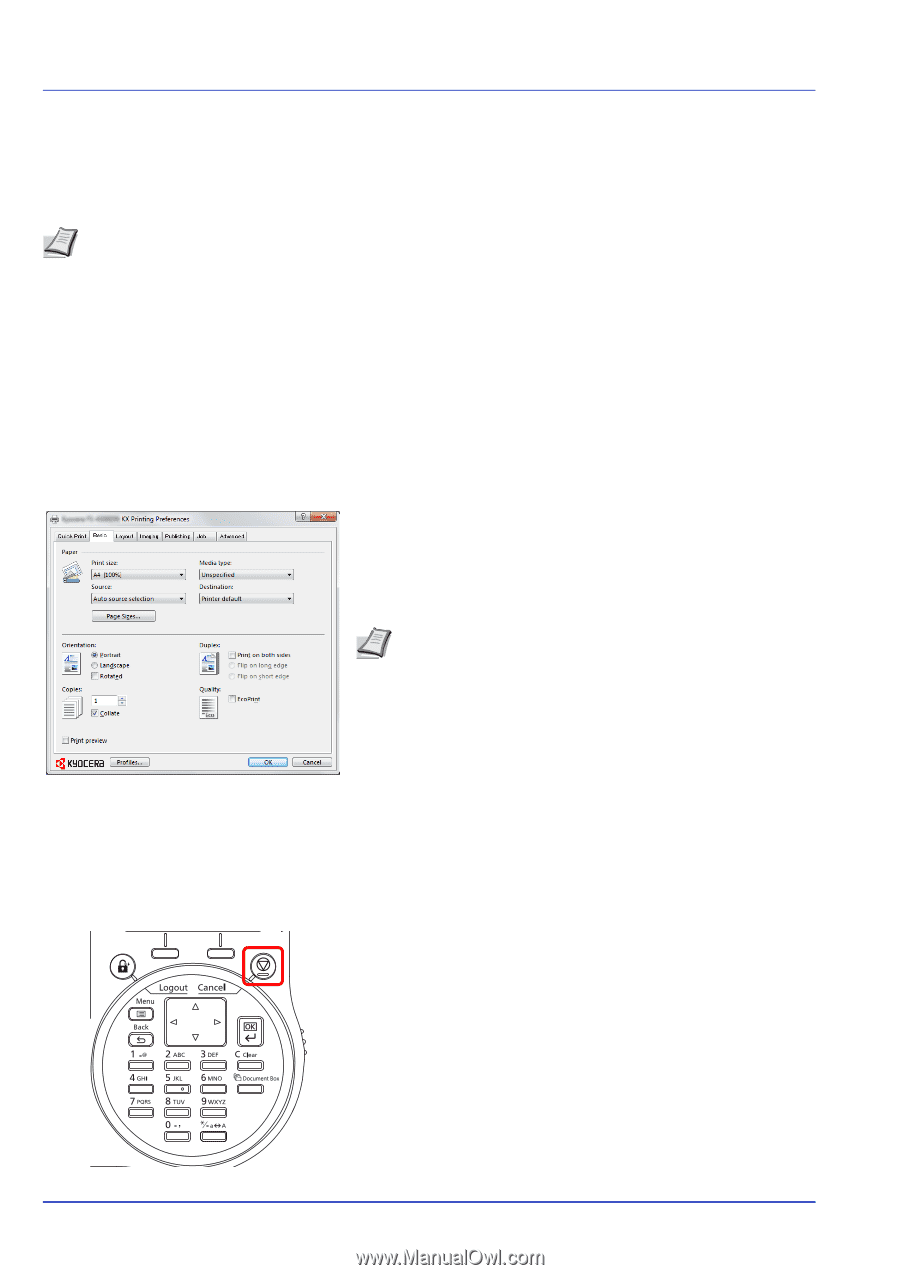
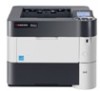
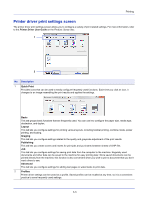
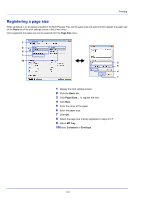
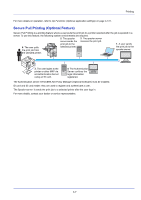
Printing Printing from Applications This section provides basic instructions for printing documents. Instructions are based on interface elements as they appear in Windows 7. To print the document from applications, install the printer driver on your computer from the supplied Product Library disc. Note Refer to Installing Software on page 2-7. Follow the steps below to print documents from applications. 1 Create a document using an application. 2 Click File and select Print in the application. The Print dialog box appears. 3 Click the next to the Name field and select this machine from the list. 4 Enter the desired print quantity in the Number of copies box. Enter any number up to 999. When there is more than one page, select Collate to print out one by one in the sequence of the page numbers. 5 Click Properties. The Properties dialog box appears. 6 Select the Basic tab and click Print Size to select the print size. To print on the special paper such as thick paper or transparency, click Media type menu and select the media type. 7 Click Source and select the paper source. Note If you choose Auto source selection, paper is supplied automatically from the paper source loaded with paper of optimum size and type. To print on special paper such as envelopes or thick paper, place it on the multi purpose tray and select MP Tray. 8 Select paper orientation, either Portrait or Landscape, to match the orientation of the document. Selecting Rotated will print the document rotated 180°. 9 Click OK to return to the Print dialog box. 10 Click OK to start printing. Canceling a Printing Job 1 While the printer displays Processing., press [Cancel]. The Job Cancel List appears, showing the list of current print jobs. 2 Press or to display the desired job and then press [OK]. When the Job will be canceled. Are you sure? message appears, press [Yes] ([Left Select]) to cancel the job or [No] ([Right Select]) to cancel this operation and continue printing. When you cancel a job, Canceling... appears on the message display and printing stops after the page currently printing has been fed output. 3-2
-
 1
1 -
2
-
3
-
4
-
5
-
6
-
7
-
8
-
9
-
10
-
11
-
12
-
13
-
14
-
15
-
16
-
17
-
18
-
19
-
20
-
21
-
22
-
23
-
24
-
25
-
26
-
27
-
28
-
29
-
30
-
31
-
32
-
33
-
34
-
35
-
36
-
37
-
38
-
39
-
40
-
41
-
42
-
43
-
44
-
45
-
46
-
47
-
48
-
49
-
50
-
 51
51 -
 52
52 -
 53
53 -
 54
54 -
 55
55 -
 56
56 -
 57
57 -
 58
58 -
 59
59 -
 60
60 -
 61
61 -
62
-
63
-
64
-
65
-
66
-
67
-
68
-
69
-
70
-
71
-
72
-
73
-
74
-
75
-
76
-
77
-
78
-
79
-
80
-
81
-
82
-
83
-
84
-
85
-
86
-
87
-
88
-
89
-
90
-
91
-
92
-
93
-
94
-
95
-
96
-
97
-
98
-
99
-
100
-
101
-
102
-
103
-
104
-
105
-
106
-
107
-
108
-
109
-
110
-
111
-
112
-
113
-
114
-
115
-
116
-
117
-
118
-
119
-
120
-
121
-
122
-
123
-
124
-
125
-
126
-
127
-
128
-
129
-
130
-
131
-
132
-
133
-
134
-
135
-
136
-
137
-
138
-
139
-
140
-
141
-
142
-
143
-
144
-
145
-
146
-
147
-
148
-
149
-
150
-
151
-
152
-
153
-
154
-
155
-
156
-
157
-
158
-
159
-
160
-
161
-
162
-
163
-
164
-
165
-
166
-
167
-
168
-
169
-
170
-
171
-
172
-
173
-
174
-
175
-
176
-
177
-
178
-
179
-
180
-
181
-
182
-
183
-
184
-
185
-
186
-
187
-
188
-
189
-
190
-
191
-
192
-
193
-
194
-
195
-
196
-
197
-
198
-
199
-
200
-
201
-
202
-
203
-
204
-
205
-
206
-
207
-
208
-
209
-
210
-
211
-
212
-
213
-
214
-
215
-
216
-
217
-
218
-
219
-
220
-
221
-
222
-
223
-
224
-
225
-
226
-
227
-
228
-
229
-
230
-
231
-
232
-
233
-
234
-
235
-
236
-
237
-
238
-
239
-
240
-
241
-
242
-
243
-
244
-
245
-
246
-
247
-
248
-
249
-
250
-
251
-
252
-
253
-
254
-
255
-
256
-
257
-
258
-
259
-
260
-
261
-
262
-
263
-
264
-
265
-
266
-
267
-
268
-
269
-
270
-
271
-
272
-
273
-
274
-
275
-
276
-
277
-
278
-
279
-
280
-
281
-
282
-
283
-
284
-
285
-
286
-
287
-
288
-
289
-
290
-
291
-
292
-
293
-
294
-
295
-
296
-
297
-
298
-
299
-
300
-
301
-
302
-
303
-
304
-
305
-
306
-
307
-
308
-
309
-
310
-
311
-
312
-
313
-
314
-
315
-
316
 |
 |