Kyocera KM-3035 Network Fax Online Manual (Revision) - Page 16
Install a service mode, Select, Components, KM-Network, Receive, Handler, Add/Remove Programs - fax setup
 |
View all Kyocera KM-3035 manuals
Add to My Manuals
Save this manual to your list of manuals |
Page 16 highlights
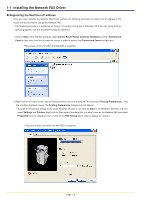
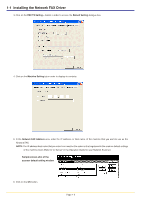
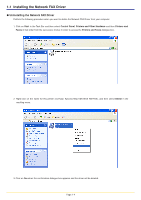
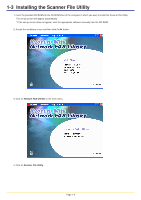
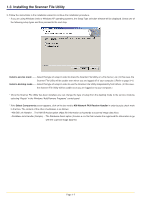
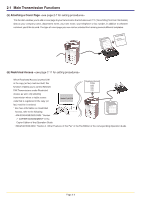
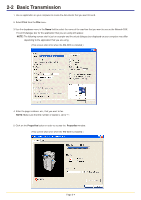
1-3 Installing the Scanner File Utility 5. Follow the instructions in the installation wizard to continue the installation procedure. * If you are using Windows 2000 or Windows XP operating systems, the Setup Type selection window will be displayed. Select one of the following setup types and then proceed to the next step. Install a service mode ....... Select this type of setup in order to share the Scanner File Utility on a File Server, etc. (In this case, the Scanner File Utility will be usable even when you are logged off of your computer.) (Refer to page 3-4.) Install a desktop mode ...... Select this type of setup in order to use the Scanner File Utility independently from others. (In this case, the Scanner File Utility will be usable once you are logged on to your computer.) * Once the Scanner File Utility has been installed, you can change the type of setup from the desktop mode to the service mode by selecting "Repair" in the Windows "Add/Remove Programs" control panel. * If the Select Components screen appears, click on the box next to KM-Network FAX Receive Handler in order to put a check mark in that box. The content of the other checkboxes is as follows: • KM-DB Link Handler ... The KM-DB Assist option (Adds file information as keywords to scanned image data files) • DataBase Link Handler (Sample) ... The Database Assist option (Creates a csv file that includes the registered file information to go with the scanned image data file) Page 1-7
-
 1
1 -
2
-
3
-
4
-
5
-
6
-
7
-
8
-
9
-
10
-
 11
11 -
 12
12 -
 13
13 -
 14
14 -
 15
15 -
 16
16 -
 17
17 -
 18
18 -
 19
19 -
 20
20 -
 21
21 -
22
-
23
-
24
-
25
-
26
-
27
-
28
-
29
-
30
-
31
-
32
-
33
-
34
-
35
-
36
-
37
-
38
-
39
-
40
-
41
-
42
-
43
-
44
-
45
-
46
-
47
-
48
-
49
-
50
-
51
-
52
-
53
-
54
-
55
-
56
-
57
-
58
-
59
-
60
-
61
-
62
-
63
-
64
-
65
-
66
-
67
-
68
-
69
-
70
-
71
-
72
-
73
-
74
-
75
-
76
-
77
-
78
-
79
-
80
-
81
-
82
-
83
-
84
-
85
-
86
-
87
-
88
-
89
-
90
-
91
-
92
-
93
-
94
-
95
-
96
-
97
-
98
-
99
-
100
-
101
-
102
-
103
-
104
-
105
-
106
-
107
-
108
 |
 |
