LG 34UC79G-B Owners Manual - Page 15
Using The Monitor
 |
View all LG 34UC79G-B manuals
Add to My Manuals
Save this manual to your list of manuals |
Page 15 highlights
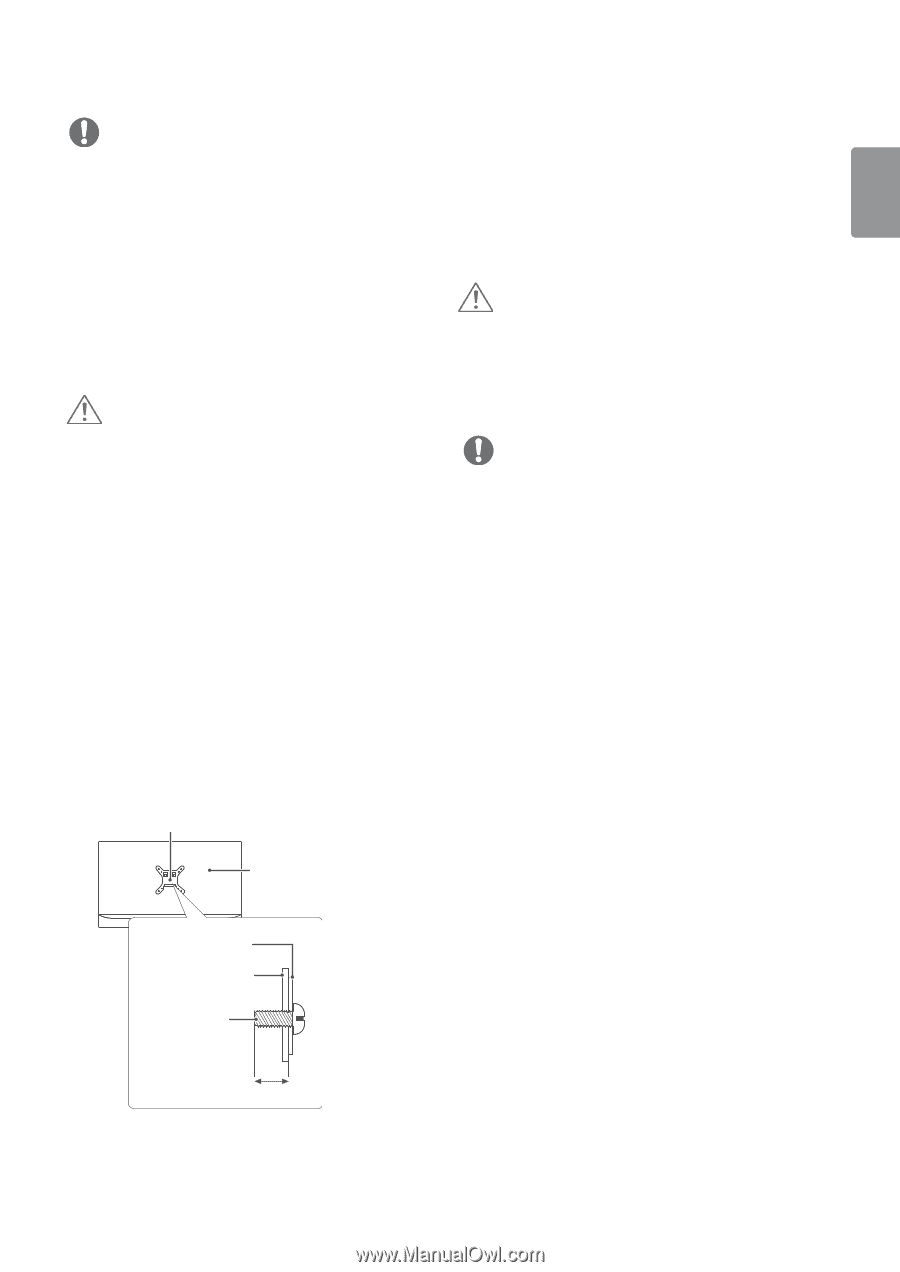
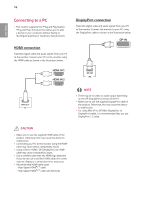
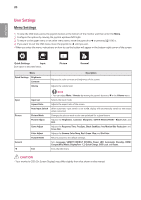
15 ENGLISH NOTE yyUse the screws specified by VESA standards. yyThe wall mount kit includes the installation guide and all necessary parts. yyThe wall mounting bracket is optional. You can obtain optional accessories from your local dealer. yyThe length of the screw may differ for each wall mounting bracket. Be sure to use the proper length. yyFor more information, please refer to the user manual for the wall mounting bracket. CAUTION yyUnplug the power cord before moving or installing the monitor to avoid electric shock. yyInstalling the monitor on the ceiling or on a slanted wall may result in the monitor falling off, which could lead to injury. Use an authorized LG wall mount and contact the local dealer or qualified personnel. yyApplying excessive force when tightening screws may cause damage to the monitor. Damage caused in this way will not be covered by the product warranty. yyUse the wall mounting bracket and screws that conform to VESA standards. Damage caused by the use or misuse of inappropriate components will not be covered by the product warranty. yyWhen measured from the back of the monitor, the length of each installed screw must be 8 mm or less. Wall Mount Plate Back of the Monitor USING THE MONITOR yyThe following instructions are based on the 34UC79G model. Illustrations in this manual may differ from the actual product. Press the joystick button, go to Menu → Input, and then select the input option. CAUTION yyDo not press the screen for a prolonged time. This may cause image distortion. yyDo not display a still image on the screen for a prolonged time. This may cause image retention. Use a screensaver if possible. NOTE yyWhen connecting the power cord to the outlet, use a grounded (3-hole) power strip or a grounded power outlet. yyThe monitor may flicker when turned on in an area where the temperature is low. This is normal. yySometimes red, green, or blue spots may appear on the screen. This is normal. Wall Mount Plate Back of the Monitor Screw Dimensions : M4 x L10 Max 8 mm
-
 1
1 -
2
-
3
-
4
-
5
-
6
-
7
-
8
-
9
-
 10
10 -
 11
11 -
 12
12 -
 13
13 -
 14
14 -
 15
15 -
 16
16 -
 17
17 -
 18
18 -
 19
19 -
 20
20 -
21
-
22
-
23
-
24
-
25
-
26
-
27
-
28
-
29
-
30
-
31
-
32
-
33
 |
 |